Table of Contents
Advertisement
Quick Links
Advertisement
Table of Contents

Subscribe to Our Youtube Channel
Related Manuals for BCP SKY5969


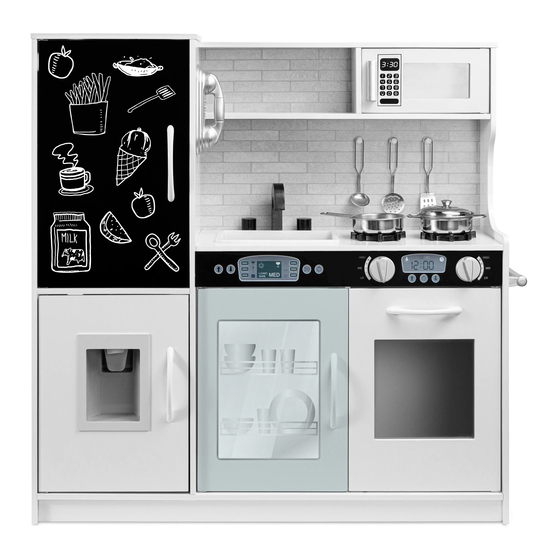
Summary of Contents for BCP SKY5969
- Page 1 INSTRUCTION MANUAL Kitchen Playset SKY5969 + SKY6009 + SKY6346 Ver. 3...
-
Page 2: Tools Required
NOTICE Please retain these instructions for future reference. • This product requires adult assembly and supervision when in use. • This product is intended for indoor use only. • Do not stand on or use any part of this item as a step ladder. •... - Page 3 HARDWARE SCREW SCREW MICROWAVE LEFT HINGE HANDLE 3 PCS 22 PCS 1 PC 5 PCS HANDLE DOOR CATCH DOOR INSERT FAUCET 4 PCS 5 PCS 5 PCS 1 PC TAPS RIGHT HINGE SINK WALL NAIL 2 PCS 5 PCS 1 PC 1 PC WALL WALL...
- Page 4 PARTS PANTRY LEFT PANTRY PANTRY RIGHT PANTRY BACK DIVIDER 1 PC 1 PC 1 PC 1 PC UPPER SHELF SHELF DIVIDER LOWER SHELF COUNTERTOP 1 PC 1 PC 1 PC 1 PC COUNTER UPPER SHELF MIDDLE SHELF BASE PANEL BACK BACK 1 PC 1 PC...
- Page 5 PARTS REFRIGERATOR OVEN SIDE PANTRY TOP ICE DISPENSER DOOR PANEL 1 PC 1 PC 1 PC 1 PC SAUCE PAN DUTCH OVEN UTENSILS ICE CUBE 1 PC 1 PC 1 SET 4 PCS...
-
Page 6: Before Assembly
BEFORE ASSEMBLY Insert two part B dowels into the part 5 Insert four part B dowels into the part 6 upper shelf. shelf divider. Attach one part I handle to the part 16 Insert four part B dowels into the part sink cupboard door with two part 8 countertop. - Page 7 BEFORE ASSEMBLY Insert four part B dowels into the Attach three part X supports to the part part 12 base. 11 middle shelf back with three part C screws. Attach one part I handle to the part 17 Insert four part B dowels into the part 7 oven door with two part F screws.
- Page 8 BEFORE ASSEMBLY Insert two part B dowels into the part 9 Insert two part B dowels into the part 13 skirt. counter panel. Attach one part Z2 left holding peg and one part Z1 right holding peg with four part D screws, two screws each. Insert four part B dowels into the part 2 Insert two part B dowels into the part 22 pantry divider.
- Page 9 BEFORE ASSEMBLY Attach one part G microwave handle to Insert four part B dowels into the part 3 the part 14 microwave door with two pantry right. part F screws. Attach the part V phone receiver with Attach one part K door insert and one two part F screws.
-
Page 10: Product Assembly
BEFORE ASSEMBLY Attach one part I handle to the part 20 Attach one part I handle to the part 21 pantry door with two part F screws. refrigerator door with two part F screws. Attach one part K door insert and one Attach one part K door insert and one part H hinge peg with four part D part H hinge peg with four part D... - Page 11 PRODUCT ASSEMBLY Locate the part 2 pantry divider and Attach the part 15 sink/oven divider to insert it into the part 3 pantry right. the base with one part A screws. Attach the part 1 part pantry left with two part A screws and secure the divider with four part A screws.
- Page 12 PRODUCT ASSEMBLY Insert the part 4 pantry back between the pantry sides. Attach the shelf assembly to the part 3 pantry right and secure with two part A screws. Attach the part 23 pantry top to the pantry sides with four part A screws. Attach the part 22 oven side and secure with six part A screws.
- Page 13 PRODUCT ASSEMBLY Secure the part 10, 11, 18, and 19 back panels with eighteen part C screws and seven part S disk washers. Attach two part J door catches to the part 3 pantry right with four part D screws. Attach two part J door catches to the part 15 divider with four part D screws.
- Page 14 PRODUCT ASSEMBLY Insert the hinge peg on the part 20 pantry door into the opening on the part 23 pantry top. Insert one part N hinge peg into the opening on the part 2 pantry divider, and secure to the pantry door with two part D screws.
- Page 15 PRODUCT ASSEMBLY Insert the hinge peg on the part 21 refrigerator door into the opening on the part 2 pantry divider. Insert one part N hinge peg into the opening on the base and secure to the pantry door with two part D screws.
- Page 16 PRODUCT ASSEMBLY Insert the hinge peg on the part 16 sink cupboard door into the opening on the part 9 counter panel. Insert one part N hinge peg into the opening on the part 12 base, and secure to the part 16 cupboard door with two part D screws.
- Page 17 PRODUCT ASSEMBLY Insert the hinge peg on the part 17 oven door into the opening on the part 9 counter panel. Insert one part H hinge peg into the opening on the part 12 base, and secure to the part 17 oven door with two part D screws.
- Page 18 PRODUCT ASSEMBLY Insert the hinge peg on the part 14 microwave door into the opening on the part 5 upper shelf. Insert one part H hinge peg into the opening on the part 7 lower shelf, and secure to the part 14 oven door with two part D screws.
- Page 19 PRODUCT ASSEMBLY (OPTIONAL) Combine the part P wall nail, part R wall washer, and part Q wall anchor and use a hammer to drive the nail into the wall through the opening on the part 4 pantry back. Insert part O sink and part W phone.
-
Page 20: Help Center
HELP CENTER Question about your product? We're here to help. Visit us at: help.bestchoiceproducts.com CHAT Chat Support Product Inquiry Orders FAQ Product Assembly Returns & Refunds PRODUCT WARRANTY INFORMATION All items can be returned for any reason within 60 days of the receipt and will receive a full refund as long as the item is returned in its original product packaging and all accessories from its original shipment are included.
Need help?
Do you have a question about the SKY5969 and is the answer not in the manual?
Questions and answers