Table of Contents
Troubleshooting

Related Manuals for Miller Ag-Bag G6170


Summary of Contents for Miller Ag-Bag G6170
- Page 1 OPERATOR'S MANUAL MODEL: G6170 DO NOT OPERATE THIS EQUIPMENT UNTIL THIS MANUAL HAS BEEN READ AND UNDERSTOOD. Part Number: 42.0901734C February 2013 MILLER-ST.NAZIANZ,INC. P.O. BOX 127 ST. NAZIANZ, WI 54232 920/773-2121 FAX:920/773-1200...
- Page 2 INTRODUCTION This Operator's Manual is provided to acquaint the operator with the safety and operation of the Miller Ag-Bag 6170 bagger. Complete Assembly, Operation, Lubrication and Maintenance procedures are pro- vided. Following the recommended procedures will help you achieve many years of dependable service.
-
Page 3: Table Of Contents
Table Of Contents AG-BAGGER CHECK LISTS ......................4 SAFETY PRECAUTIONS ........................5 Power Source Shutdown Procedure ..................... 5 SAFETY DECALS ..........................8 Reflective Decals ..........................13 AG-BAGGER COMPONENT LOCATIONS ..................14 SET-UP AND ASSEMBLY ........................ 15 Assemble Bag Boom ........................15 Assemble Tunnel Extension ...................... - Page 4 Table of Contents - continued LUBRICATION AND MAINTENANCE ....................60 Tire Air Pressure ......................... 60 Wheel Lug Nut Torque ........................ 60 Rotor Bearings ..........................60 Rotor Drive Jackshaft Bearings ....................61 Cable Drum Shaft Bearings ......................62 Upper Conveyor Apron Shaft Bearings..................62 Center Conveyor Apron Shaft Bearings..................
- Page 5 This Page Intentionally Left Blank...
- Page 6 Ag-Bagger Check Lists Pre-Delivery and Delivery Check Lists (customer and dealer copies) follow this page. Customer copies can remain with this manual. Dealer copies can be removed along perforation and remain with dealer.
- Page 7 G6170 Ag-Baggers Dealer Pre-Delivery Check List After the Bagger has been completely set-up, the following inspections Must be made before delivery to the customer. Check off each item after prescribed action is taken. No parts of the unit have been damaged in Wheels are properly attached and tires are shipment.
- Page 8 G6170 Ag-Baggers Delivery Check List The following check list is an important reminder of valuable information that MUST be passed on to the customer at the time the unit is delivered. Check off each item as you explain it to the customer.
- Page 9 G6170 Ag-Baggers Dealer Pre-Delivery Check List After the Bagger has been completely set-up, the following inspections Must be made before delivery to the customer. Check off each item after prescribed action is taken. No parts of the unit have been damaged in Wheels are properly attached and tires are shipment.
-
Page 10: Ag-Bagger Check Lists
G6170 Ag-Baggers Delivery Check List The following check list is an important reminder of valuable information that MUST be passed on to the customer at the time the unit is delivered. Check off each item as you explain it to the customer. -
Page 11: Safety Precautions
In addition, MAKE SURE that every individual who operates or works with this equip- ment, whether family member or employee, is familiar with these safety precautions. Miller- St. Nazianz provides guards for exposed moving parts for the operator’s protection; however, some areas cannot be guarded or shielded in order to assure proper operation. - Page 12 Safety Precautions - continued Know how to stop bagger operation BEFORE starting it. BE ALERT for people and/or animals in front of or around machine, before you start operat- ing the machine. DO NOT enter the conveyor or hopper when machine is operating. KEEP hands, feet and clothing away from conveyor when operating.
- Page 13 BE SURE the tractor is in NEUTRAL and the parking brake released before beginning any bagging operation. BE SURE tractor wheels are pointed in a straight ahead position while bagging. BE SURE the hitch jack locking pin is completely engaged and that the machine is properly blocked and prevented from rolling BEFORE disconnecting the bagger from the tractor.
-
Page 14: Safety Decals
Safety Decals The decals are for your protection. If your safety decals are not readable or are missing, con- tact your dealer for replacements. 16.20181 Warning (Located on side of upper conveyor deflector) 16.20179 Warning (Located on side of conveyor under drive chain guard) 340248B1 Caution (Located on top side of hitch... - Page 15 Safety Decals - continued 16.20178 Warning (Located on control side of hopper) 21.09024 Warning (Located on frame above 01.77800 Warning hand pump) (Located on top of PTO shield) WARNING NO STEP 16.20177 Danger (Located on each side of PTO shield)
- Page 16 Safety Decals - continued DANGER MOVING CONVEYOR KEEP AWAY DURING OPERATION DISCONNECT POWER BEFORE SERVICING FAILURE TO HEED WILL RESULT IN DEATH OR PERSONAL INJURY 42-0900821 42.0900821 Danger (Located on each side of conveyor) 42.0900820 Danger (Lo- cated on front and side of hopper) WARNING NO STEP...
- Page 17 Safety Decals - continued Underside of PTO Shield On Top Of Hydraulic Oil Reservoir 16.20179 Warning Under Rotor Drive Chain Shield 42.0900837 Important (Located next to each rotor bearing grease fitting) 42.0900823 Important (Located on frame next to each wheel)
- Page 18 Safety Decals - continued 42.0901739 Important (Located on frame tube below each cable drum) 42.0900822 Warning (Located on frame tube below each cable drum)
-
Page 19: Reflective Decals
Reflective Decals Yellow Reflectors 907220 Yellow Reflector 907220 Yellow Reflector Red Reflectors and SMV Sign 907225 SMV 907219 Red Sign 907219 Red Reflector Reflector... -
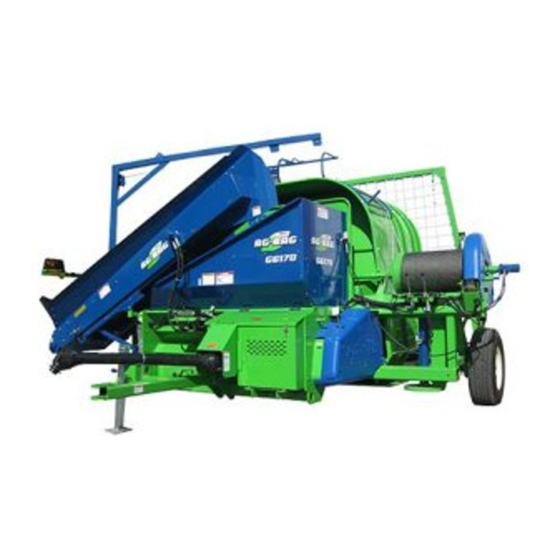
Page 20: Ag-Bagger Component Locations
Ag-Bagger Component Locations Tunnel Tail Lights Tunnel Extension Right Side Cable Drum Conveyor Lift Jack Tow Hitch Left Side Hopper Rotor Drive Cover PTO Shield PTO Driveline Bagger Shown In Bagging Configuration Without Bag Boom, Back Stop & Bag Cradle... -
Page 21: Set-Up And Assembly
Set-Up And Assembly Assemble Bag Boom 1. Lift the bag boom up into position above the pivot tube. Place the brass spacer onto the pivot end of the bag boom and lower the pivot shaft into the pivot tube on the bagger. Grease both grease fittings after assembly and rotate bag boom back and forth to distribute the grease evenly. -
Page 22: Assemble Bag Pan
Assemble Bag Pan 1. Place the bag pan under the tunnel. Line up the holes in the bag pan mounts with the mounting holes in the bag pan tabs under and to the backside of the tunnel. Be sure the bag pan mounts are to the outside of each mounting tab under and to the backside of the tunnel. -
Page 23: Prepare The Backstop
Prepare the Backstop For ease of lacing the backstop, stand the backstop up and support with the backstop feet supplied with the bagger. Lace the backstop 1. Use the rope supplied with the bagger. 2. Start in the upper corner of the frame. Make sure you find the middle of the rope, Do Not cut the rope. - Page 24 Fasten the backstop slings. Fasten the backstop slings to the sides of the backstop. Make sure you connect both sides of each sling. Attach the sling to the backstop bracket using the 5/8 x 5" hardware (nuts and bolts). Backstop Sling (Lower Shown) Connect the slings on the backstop to the cables.
-
Page 25: Operation
Operation Pre-Operation Checklist The pre-operation check list is provided for both personal safety and maintaining the mechanical condition of the bagger. Make sure each item on the list is checked prior to operating the bagger each time. The tractor is properly sized to operate the bagger. Refer to the “Machine Specifications” section. -
Page 26: Set The Backstop In Position
Set The Backstop In Position WARNING Backstop is heavy. Use care when handling backstop. Place the bagger where the bag will begin. Release the cable drum brake pressure by opening the needle valve and the hand pump valve. Needle Valve Hand Pump Pump Valve Unhook the backstop slings from the cables. - Page 27 Reassemble the bolt and nut into the support feet tabs. Remove the support feet from the pockets in the tunnel. Insert the support feet into the pockets on the backstop with the tabs to the rear of the backstop. The feet will help hold the backstop in the upright position. NOTE: After two loads are placed in the bag, remove the feet from the backstop and continue bag- ging.
-
Page 28: Changing Wheels And Hitch To Bagging Position
Changing Wheels and Hitch To Bagging Position NOTE: Backstop must be placed at the starting location of the bag, but bagger must be on a level site to move wheels and hitch. Remove the backstop from the transport position. Remove the support feet from the lower part of the tunnel. - Page 29 3. Remove the second lift jack from the storage mount at the rear of the frame (under the convey- or). Pull the retainer pin and save. 4. Assemble the second lift jack to the lower outward facing mount at the rear of the frame (control side).
- Page 30 Moving The Second Wheel 1. Remove the lift jack from the tow hitch. Pull the retaining pin and remove the lift jack. Lift Jack Tow Hitch 2. Insert the lift jack into the socket located on the wheel strut at the right side of the bagger. Jack the bagger up until the wheel (inside the tunnel) is off the ground.
- Page 31 Moving Tow Hitch To Bagging Position 1. Remove the lift jack from the tow hitch before removing the tow hitch from the hitch tube. 2. Remove the hair pin and retaining pin holding the tow hitch in the transport position. 3.
-
Page 32: Hook Tractor To Tow Hitch
Hook Tractor To Tow Hitch 1. Crank the lift jack up or down to make the tow hitch match up with the tractor drawbar. 2. Back the tractor up to the tow hitch, be sure the tractor is in a straight line with the bagger. Line up the hitch pin holes in the tractor drawbar and bagger hitch and insert the hitch pin and hair pin. - Page 33 2. Lift the gearbox shaft guard up out of the way. 3. Attach the PTO shaft to the splined shaft of the gearbox. Be sure the PTO shaft is completely locked into place. Push the locking ring toward the gear box to release the locks and push all the way on.
-
Page 34: Connect The Inoculant Applicator (Units So Equipped)
Connect The Inoculant Applicator (Units so equipped) Connect the inoculant applicator electrical supply to a 12 volt source on the tractor. Consult your local Ag-Bag dealer and your tractor operators manual for specific installation instructions. Bag Identification Remember to use only genuine Ag-Bag ®... -
Page 35: Bag Installation
Bag Installation NOTE: Remember to use only bags that are the proper size for your model. Retaining Pin Retaining Pin To gain room at the right side of the tunnel when working with the bag and bag pan, the light mounting arm on the tunnel side can be unpinned and raised up out of the way. - Page 36 CAUTION Caution should be used when moving bags. Weight of bags can be over 400 pounds depending on size of bag. 5. Unfold the bag, lift the top half of the bag and place it on the bag cradle. Using the winch on the bag boom, raise the bag up.
- Page 37 8. Install the bungee cords. Bungee cords are supplied with bagger. a. Lay the tunnel bungee cord over the tunnel. b. Connect the ends of the tunnel bungee cord to the bag pan hooks on each side of the tun- nel.
-
Page 38: Seal The Beginning End Of The Bag
Seal The Beginning End Of The Bag 1. Pull enough bag to apply the seal. Pull from the inside folds, not the outside folds (white on the outside, black on the inside). Make sure you pull the bag under the bag bungee cord. 2. -
Page 39: Attaching The Backstop
Attaching The Backstop 1. Make sure the backstop is where you intend to start your bag. Back the bagger up next to the backstop. The backstop should be aligned with the tunnel opening and 1 to 2 feet behind the tunnel. -
Page 40: Lower Conveyor To Operating Position
Lower Conveyor to Operating Position. Conveyor Lowering/Raising (Manual) 1. Using the hand winch on the side of the conveyor, slightly raise the conveyor to remove pressure on the transport lock. Pull and rotate the transport lock to release the conveyor. 2. - Page 41 Conveyor Lowering/Raising (Hydraulic) 1. The tractor PTO must be engaged before operating the hydraulic conveyor raising/lowering con- trol. 2. Lower the conveyor down to the operating position by pushing the hydraulic control lever away from you. The control lever will return to the centered (neutral) position when released. Pulling the control lever toward you will raise the conveyor.
-
Page 42: Bagging Operation
Bagging Operation Begin Bagging DANGER To avoid serious injury, DO NOT climb on or in bagger or conveyor while in operation. Falling into machine will result in serious injury or death. 1. Instruct all unloading personnel how to communicate with the bagger operator. 2. - Page 43 6. Start unloading product onto the conveyor. The person operating the unloading equipment should watch that the conveyor or hopper does not get over loaded. Unloading equipment should be run accordingly. IMPORTANT: Remove the support feet from the backstop after the first two loads. If support feet are left in the backstop pockets, damage to the support feet and/or pockets may result.
-
Page 44: Remove Bagger From Bag
Remove Bagger From Bag Tunnel Clean Out 1. Using the release valve or valves on the hydraulic hand pump, slightly release the cable brake pressure and move the bagger forward about five feet. Set the tractor brakes. 2. Send more product through the hopper to help loosen the packed product inside the tunnel. Al- low as much product as possible to fall out of the tunnel and into the bag before bag is removed from the tunnel. -
Page 45: Venting The Bag
Venting The Bag Immediately after the bag is sealed a vent must be installed to remove the gases produced by the product. A reusable vent valve and vent tool are available from your Ag-Bag dealer. Reusable Vent Valve Part Number 42.1500893 Vent Installation Tool Part Number 42.1500568 Insert the vent valve as follows: 1. -
Page 46: Changing Bagger To Transport Position
Changing Bagger To Transport Position Raise Conveyor Up For Transport (Manual) Using the hand winch on the side of the conveyor, raise the conveyor all the way up. Rotate the transport lock and allow it to seat itself in the locking hole of the conveyor. IMPORTANT: When raising the conveyor, rotate the transport lock to the lock position. - Page 47 Clean Out The Tunnel WARNING DO NOT lubricate, adjust and/or service this machine unless the POWER SOURCE SHUT DOWN PROCEDURE (page 5) has been exercised. 1. Disengage the tractor PTO. 2. Remove excess product from the tunnel. If this has been your last bag, prepare the bagger for storage.
- Page 48 5. Place the pto shaft in the storage position between the front of the hopper and the pto shaft transport rest mounted to the cable drum mount. 6. Lock the tractor end of the pto shaft to the shaft on the hopper. Place the other end of the pto shaft into the transport rest and under the rubber flap.
- Page 49 Change Wheels and Hitch To The Transport Position IMPORTANT: Site for unhitching and moving wheels must be level to prevent bagger from rolling when unhitched from the tractor. Ground conditions must be firm to prevent lift jacks from settling during wheel removal. Move The First Wheel 1.
- Page 50 4. Relocate the lift jack from the tow hitch to the lift jack socket located next to the wheel assembly on the right side of the bagger. Securely pin the lift jack in this location. 5. Use the lift jack to raise this end of the bagger up until the wheel assembly is off the ground. Wheel Socket (Wheel Not Shown) 6.
- Page 51 Moving the tow hitch IMPORTANT: Site for moving wheels must be level to prevent bagger from rolling when un- hitched from the tractor. Ground conditions must be firm to prevent lift jacks from settling during wheel removal. 1. Leave the lift jack off the tow hitch before removing the tow hitch from the hitch socket. 2.
- Page 52 7. Assemble the lift jack to the tow hitch in the down position. Securely pin the lift jack in this posi- tion. Tow Hitch Lift Jack In Down Position 8. Crank the lift jack on the tow hitch down until the wheel assembly can be removed from the socket at the left side of the bagger near the tow hitch.
- Page 53 11. Remove the lift jack and place on the storage mount under the conveyor. Second Lift Jack Stored 12. Use the lift jack to line the tow hitch up with the tow vehicle. Securely hitch the bagger to the tow vehicle. Pin in place and retain hitch pin with a clip pin. Bagger Hitched To Tow Vehicle 13.
- Page 54 Secure Backstop To Tunnel 1. Place the backstop support feet into the sockets inside the tunnel. Secure the support feet in place. 2. Connect the slings to the backstop and the cables. Using the bag boom, lift the backstop up and place in the ears of the support feet.
-
Page 55: Ag-Bagging Instructions
Ag-Bagging Instructions Read and follow these procedures for proper bagging of product as well as feed out rates and bag placement. The Crop a. Maturity (pre-bloom) b. Moisture Level (60 to 65 percent target) c. Crop Management (length of cut) Bag Location - pick an area using the following recommendations a. - Page 56 Bagging Pressure (Cable Drum Brakes) When filling the bag, it should not be stretched more than 2” above the tunnel nor should the bag push against the cables. 1. Less brake pressure is required when: a. Bagging uphill b. Bagging with a large tractor c.
- Page 57 Sealing and Venting - Very Important As soon as the bag is filled seal the finished end of the bag as outlined with the Master Seal instruc- tions. The sooner oxygen is sealed out, the sooner the fermentation process can begin. It is very important to vent the bag after sealing.
-
Page 58: Bag Information
Bag Information Approx Tons/Bag Tons/Bag Tons/Bag Bushels Per 28-30% Bag (Based Bag Size Alfalfa Earlage Shelled Corn On 56# Bushel) 9’ x 135’ 140-160 4,411 9’ x 150’ 160-180 6,125 9’ x 200’ 200-225 6,765 9’ x 300’ 320-360 12,250 10’... - Page 59 Bagging Surface WARNING Do not bag on a hillside. Tip-over or bag roll could result. Bag up hill rather than down hill. Avoid bagging on a hillside. The bagger can drift and the bag may roll. Surface conditions may affect bagging quality and ability. Soft ground conditions will act as a brake and may cause the bagger to sink.
- Page 60 Product Moisture Refer to the “3M’s of Silage” supplement available from your Ag-Bag dealer for more detailed infor- mation on product moisture levels. Moisture levels play an important part of product quality. Dry Product Dry product makes a lumpy bag. Long dry chop is hard on the bagger. Remember when trying to make good haylage, dry feeds have more resistance.
-
Page 61: Adjustments
Adjustments Conveyor Chain Tension Check WARNING DO NOT lubricate, adjust and/or service this machine unless the POWER SOURCE SHUT DOWN PROCEDURE (page 5) has been exercised. At the midway point of the conveyor lift the two middle strands of the chains up. Chains should be able to be lifted 2 inches. - Page 62 WARNING DO NOT operate the bagger unless all guards are secured in place. Moving parts inside could cause serious injury or death. If the long conveyor chain is still loose, adjust the upper drive shaft as follows: Open the conveyor drive chain guard at the top of the conveyor. Loosen the idler on the conveyor drive chain.
-
Page 63: Conveyor Drive Chain
Conveyor Drive Chain Tension Check and Adjustment WARNING DO NOT lubricate, adjust and/or service this machine unless the POWER SOURCE SHUT DOWN PROCEDURE (page 5) has been exercised. 1. Open the conveyor drive chain guard at the top of the conveyor. Measure the chain deflection at a mid point between the sprockets on the lower part of the chain. -
Page 64: Hydraulic Pump Drive Chain
Hydraulic Pump Drive Chain Tension Check and Adjustment WARNING DO NOT lubricate, adjust and/or service this machine unless the POWER SOURCE SHUT DOWN PROCEDURE (page 5) has been exercised. The hydraulic pump drive chain is located between the hydraulic oil reservoir opposite the gearbox. The hydrulic oil reservoir guard must be tipped up to gain access to the chain. -
Page 65: Rotor Drive Chain
Rotor Drive Chain Tension Check and Adjustment WARNING DO NOT lubricate, adjust and/or service this machine unless the POWER SOURCE SHUT DOWN PROCEDURE (page 5) has been exercised. The tensioner for the rotor chain is spring loaded. Check to be sure the tensioner is maintaining proper tension on the chain. -
Page 66: Lubrication And Maintenance
Lubrication And Maintenance Tire Air Pressure Interval: Daily Check and maintain the proper air pressure. Check the air pressure daily. Maintain the following pressure: LT 265/75R x 16 ........... Pressure Cold 80 psi Wheel Lug Nut Torque Torque each wheel lug nut per the specifications below. Check the lug nut torque and retorque after each 10 miles of highway use until the torque stabilizes. -
Page 67: Rotor Drive Jackshaft Bearings
Rotor Drive Jackshaft Bearings Interval: Daily Each jackshaft bearing is greased by using a remote mounted grease fitting. The grease fittings are located side by side at the front of the rotor drive chain cover. The right side fitting is used to grease the right side bearing and the left side fitting is used to grease the left side bearing. -
Page 68: Cable Drum Shaft Bearings
Cable Drum Shaft Bearings Interval: Daily WARNING DO NOT lubricate, adjust and/or service this machine unless the POWER SOURCE SHUT DOWN PROCEDURE (page 5) has been exercised. Wipe off each fitting before attaching the grease gun. Grease each bearing. Wipe off excess grease when finished. -
Page 69: Center Conveyor Apron Shaft Bearings
Center Conveyor Apron Shaft Bearings Interval: Daily WARNING DO NOT lubricate, adjust and/or service this machine unless the POWER SOURCE SHUT DOWN PROCEDURE (page 5) has been exercised. Wipe off the fitting before attaching the grease gun. Grease each bearing. Wipe off excess grease when finished. -
Page 70: Lower Conveyor Apron Shaft Bearings
Lower Conveyor Apron Shaft Bearings Interval: Daily WARNING DO NOT lubricate, adjust and/or service this machine unless the POWER SOURCE SHUT DOWN PROCEDURE (page 5) has been exercised. Wipe off the fitting before attaching the grease gun. Grease each bearing. Wipe off excess grease when finished. -
Page 71: Pto Shaft
PTO Shaft Interval: Daily Wipe off the fittings before attaching the grease gun. Grease each u-joint and the shear plates. Wipe off excess grease when finished. Apply a coating of grease to the slide tube inside the PTO shaft at a monthly interval. U-Joint &... -
Page 72: Wheel Bearings
Wheel Bearings Interval: Annually For Non Highway Use For Highway Use Check Wheel Bearings Monthly Type of Grease: Use a good grade of Lithium Base Wheel Bearing Grease. Carefully raise and support each wheel as repacking is performed. Remove the hub from the spindle and wipe old grease from all components. Inspect the inner and outer cups in the hub for signs of wear. -
Page 73: Rotor Drive Chain
Rotor Drive Chain Interval: Once Per Bag With the bagger idling, oil the rotor drive chain through the two round holes located in the top of the rotor drive chain guard. Oil both drive chains completely. Oil Rotor Drive Chains Here Hydraulic Pump Drive Chain Interval: Once Per Bag With the bagger idling, oil the hydraulic pump drive chain. -
Page 74: Gearbox Output Shaft Coupler Chain
Gearbox Output Shaft Coupler Chain Interval: Once Per Bag With the bagger idling, oil the output shaft coupler chain. Unlatch and open the cover for the hy- draulic oil reservoir. Oil the coupler chain completely. WARNING DO NOT operate the bagger unless all guards or covers are secured in place. Moving parts inside could cause serious injury or death. -
Page 75: Conveyor Drive Chain
Conveyor Drive Chain Interval: Once Per Bag WARNING DO NOT lubricate, adjust and/or service this machine unless the POWER SOURCE SHUT DOWN PROCEDURE (page 5) has been exercised. With the conveyor shut off, open the guard at the top of the conveyor. Oil as much chain as pos- sible. -
Page 76: Conveyor Drive Coupler Chain
Conveyor Drive Coupler Chain Interval: Once Per Bag WARNING DO NOT lubricate, adjust and/or service this machine unless the POWER SOURCE SHUT DOWN PROCEDURE (page 5) has been exercised. With the conveyor shut off, open the guard at the top of the conveyor. Oil as much coupler chain as possible. -
Page 77: Hydraulic Oil
Hydraulic Oil Level Check Interval: Daily Maintain the oil level in the main hydraulic oil reservoir at a point approximately 2 - 3 inches be- low the top of the reservoir. Lift up the cover over the hydraulic oil reservoir to gain access to the breather cap. - Page 78 3. Drain the hydraulic oil from the main reservoir. Place a suitable container below the plug on the side of the reservoir opposite the drive chain. Remove the plug. Oil will come out of this drain with quite a bit of force. Be prepared to move the container as needed. Drain the reservoir completely.
- Page 79 Fill reservoirs with oil Refill with ISO Grade 68 Hydraulic Oil. The total hydraulic oil reservoir capacity is 19 gallons which includes the lower reservoirs. 1. Lift up the cover over the hydraulic oil reservoir to gain access to the breather/fill cap. 2.
-
Page 80: Hydraulic Oil Filter
Hydraulic Oil Filter Interval: Annually or Whenever Hydraulic Oil Is Changed Thoroughly clean the area around the hydraulic oil filter head. Unlatch and open the cover over the hydraulic oil reservoir. Remove the oil filter from the filter head. Clean the sealing surface of the filter head. Lightly oil the gasket on the new filter. Fill the filter with new hydraulic oil and spin on to the filter head. - Page 81 Change Gearbox Oil 1. Lift up the cover over the top of the hydraulic oil reservoir to expose the extended tube with the fill/breather on the top. 2. Place a suitable container under the drain plug located on the side of the gearbox opposite the output shaft.
-
Page 82: Cable Drum Brake Pads
Cable Drum Brake Pads Replace as needed If the cable drum brakes begin to lose the ability to hold the cable drums at the pressure required, the brake pads may need to be replaced. Replace both pads on the cable drum. 1. -
Page 83: Rotor Tooth Tine Caps
Rotor Tooth Tine Caps Replace as needed WARNING DO NOT lubricate, adjust and/or service this machine unless the POWER SOURCE SHUT DOWN PROCEDURE (page 5) has been exercised. Shut off the tractor, remove the ignition key and remove the PTO shaft from the tractor. Periodically check the wear of the rotor tooth tine caps. -
Page 84: Cables
Cables Interval: Once Per Bag IMPORTANT: Always wear gloves when handling or working with cables. Check the cables at the end of each bag before the tension is released. 1. Check each cable for frayed spots, kinks, broken strands or thin spots. 2. -
Page 85: Hydraulic Hand Pump
Hydraulic Hand Pump Interval: As Required If the hand pump is low on oil and does not maintain the ability to pump correct pressure, the reser- voir on the pump needs to be refilled. IMPORTANT: Use only hydraulic oil in the hand pump. DO NOT use brake fluid in this sys- tem. -
Page 86: Troubleshooting
Troubleshooting Problem Cause Solution Rotor stops rotating, PTO Shear bolt on PTO shaft bro- Replace shear bolt. shaft continues to turn. ken. Check for and remove ob- struction from hopper. Check for further damage. Conveyor apron slows Build up of product around Open clean out door and down or stops. -
Page 87: Troubleshooting (Continued)
Troubleshooting (continued) Problem Cause Solution Multiple folds of bag are Bag pan does not have proper Tie knots in the bungee sliding off tunnel. tension. cords until proper spacing is obtained (about 3/4 inch) between bag pan and tunnel floor. Tunnel bungee cord not prop- Check bungee installation. -
Page 88: Storage
Storage Before placing the bagger into storage. 1. Remove any product or acidic juices which will cause corrosion. 2. Open the clean out door at the lower end of the conveyor and thoroughly clean out any product. Close the clean out door when complete. 3. -
Page 89: Torque Specifications
Torque Specifications NOTE: Use these torque values when tightening hardware (excluding: locknuts and self tapping, thread forming and sheet metal screws) unless specified otherwise. All torque values are in lb-ft except those marked with an (*) which are lb-in (for metric torque value Nm, multiply lb-ft value by 1.355 or for lb-in multiply by 0.113). -
Page 90: Tightening Hydraulic Fittings
Tightening Hydraulic Fittings WARNING Escaping fluid under pressure can penetrate the skin causing serious injury. Relieve pressure before disconnecting hydraulic or other lines. Tighten all connections before applying pressure. Keep hands and body away from pin holes and nozzles which eject fluids under high pressure. Use a piece of card- board or paper to search for leaks. -
Page 91: Machine Specifications
Machine Specifications Width - Towing Model G6170 without tunnel extension installed ............8 ft. - 6 in Model G6170 with tunnel extension installed ............10 ft. - 6 in Width - Bagging Model G6170 ........................21 ft. Length - Towing Model G6170 ......................20 ft. - 10 in Length - Bagging Model G6170 without tunnel extension installed ...............12 ft. -
Page 92: Lubrication Specifications
Lubrication Specifications Gearbox Type of Oil ....................75w90 Synthetic Oil Capacity ....................2-1/2 Gal. (9.5 liter) Hydraulic System Type Of Oil ..................ISO Grade 68 Hydraulic Oil Capacity ....................... 19 Gal. (72 liter) Hand Pump Type Of Oil ....................Hydraulic Jack Oil Grease Type Of Grease ............. - Page 93 This Page Intentionally Left Blank...
- Page 94 This Page Intentionally Left Blank...
-
Page 95: Warranty
Warranty Miller will replace, F.O.B. St. Nazianz, Wisconsin, or repair, as Miller elects, any part of a new G6000 series Ag-Bagger which is defective in material or workmanship: Without charge for either parts or labor during the first year following delivery to the original retail customer. - Page 96 © 2013 by Miller-St. Nazianz, Inc.
Need help?
Do you have a question about the Ag-Bag G6170 and is the answer not in the manual?
Questions and answers