Advertisement
Quick Links
Advertisement

Related Manuals for Becker CC41


Summary of Contents for Becker CC41
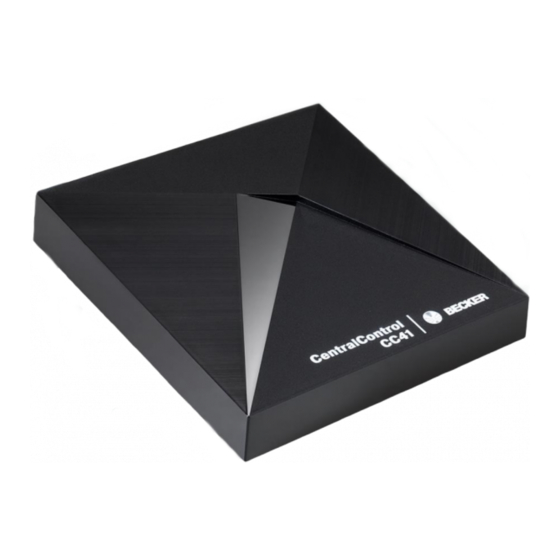
- Page 1 CC41 Stand 07/2021...
-
Page 2: First Steps
First steps Short instruction... - Page 3 Aufbau und Anschlüsse First steps • Plug in the mains cable and wait approx. 5 s • The red LED on the front flashes red and blue alternately several times (change of network configuration) • After that, the blue LED lights up continuously and the red LED flashes cyclically, indicating that the access point is activated - the unit is now in setup mode...
- Page 4 Aufbau und Anschlüsse First steps • Install the Becker CentralControl app (iOS/Android) using the following QR code • (also included in the operating instructions), or enter "Becker CentralControl" in the search field of the AppStore or PlayStore. • Start the app...
- Page 5 Aufbau und Anschlüsse First steps • Select the CentralControl CC41...
- Page 6 Aufbau und Anschlüsse First steps • You will be advised that the CC41 must be in set-up mode • If the CentralControl is already in your network, for example when connected with a cable, it will appear under "CentralControls in your network".
- Page 7 Aufbau und Anschlüsse First steps • Allow your mobile phone to connect to the Access Point of the CC41 and press "Connect". • If you are asked for location permissions, please allow them - the app needs them to find your CentralControl in the network later.
- Page 8 Aufbau und Anschlüsse First steps • Select your WLAN from the list of networks foundTragen Sie den Netzwerkschlüssel ein • Tap on „Connect“ • Attention! Please do not use guest networks to operate your CentralControl. These usually prohibit communication between your smartphone and other network participants such as the CentralControl.
- Page 9 First steps • The CC41 now connects to your home network • The LED in the CC41 lights up blue to indicate that the connection was successful. • Make sure that your smartphone and the CentralControl are then in the same...
- Page 10 • If the connection was successful, your CentralControl will now be found automatically • Now tap on the upper menu item or alternatively set up remote access directly via the Becker Gateway server • Done! You can now control your CentralControl with your smartphone...
- Page 11 Aufbau und Anschlüsse Reset / Activate Access Point • If the connection fails and the LED on the front of your CentralControl lights permanently red, an error has probably occurred when entering the network data. • In that case put the CentralControl back into teach-in mode •...
- Page 12 Rooms, receivers and timers...
- Page 13 Aufbau und Anschlüsse Add rooms • Swipe left and right to navigate through the app's menu items • Alternatively, the current menu item can also be dragged downwards to show a quick navigation • Select the item "Rooms"...
- Page 14 Aufbau und Anschlüsse Add rooms • Tap the "+" symbol to create a new room • By tapping the cogwheel symbol in the upper right corner, rooms can be deleted or created later.
- Page 15 Aufbau und Anschlüsse Add rooms • Enter the name of the new room and tap on "Add room".
- Page 16 Aufbau und Anschlüsse Add rooms • With this you can create all the rooms for your house • By moving the icons, you can change the arrangement of your rooms as you desire • Open the room you want to place the receivers in(tubular drives, external radio receivers, etc.) by tapping on it.
- Page 17 Aufbau und Anschlüsse Add receivers • For better recognition, you can optionally assign an image to the room (your own photo or standard image). • To teach in a receiver, tap on "+".
- Page 18 Aufbau und Anschlüsse Add receivers • Select the corresponding radio system and follow the instructions in the app and the operating instructions of the device to be taught in Für das Herstellen der Lernbereitschaft an den Empfängern beachten Sie bitte: Centronic: Via master handheld transmitter B-Tronic: Via a taught-in transmitter or by switching on the power supply...
- Page 19 Aufbau und Anschlüsse Add receivers • In our example, we use the CentronicPLUS radio system. Here, after a short time, all the devices that have previously been put into teach-in readiness are automatically listed • Select the desired receiver (the selected CentronicPLUS receiver clicks or waves for identification) •...
- Page 20 Aufbau und Anschlüsse Add receivers • Name the receiver according to your wishes • For better recognition, you can optionally assign a picture to the recipient (your own photo or standard picture).
- Page 21 Aufbau und Anschlüsse Add receivers • In our example, we have assigned our own photo for our CentronicPLUS device and chosen the name accordingly • Note: All stored images are only stored locally on your smartphone. If you want to use another device, the standard images will be displayed there again.
-
Page 22: Operation
Aufbau und Anschlüsse Operation • The slider in the centre of the image can be used to move directly to a desired position - optionally, it is possible to switch to the up- stop-down button operation • The buttons 1 and 2 can also be used to move to predefined intermediate positions. - Page 23 Timers...
- Page 24 Aufbau und Anschlüsse Timers • The alarm clock icon at the bottom of the screen can be used to assign timers to each receiver • You can switch the timer function on or off for each unit with the green symbol above the receiver name.
- Page 25 Aufbau und Anschlüsse Timers • Several timers can be created for one receiver • In addition to freely selectable switching times, astrofunctions for mornings and evenings with individual astroshift and blocking times are also available • By pressing "Create now" the timer is saved...
- Page 26 Aufbau und Anschlüsse Timers • In the lower area of the screen you can now see the timers that have been created • Here, for example, you can see when the respective timer will be triggered the next time • Done!
- Page 27 Scenarios...
- Page 28 Aufbau und Anschlüsse Scenarios • Select the item "Scenarios" by swiping or from the quick navigation...
- Page 29 Aufbau und Anschlüsse Scenarios • After tapping the "+" symbol, you can enter a name for the scenario to be created • Tap on „create scenario“...
- Page 30 Aufbau und Anschlüsse Scenarios • Select the receivers you want to control in your scenario • Tap on „Close“...
- Page 31 Aufbau und Anschlüsse Scenarios • The "Settings" page opens • Use the drop-down menu to determine the behaviour of the receivers when the scenario is triggered • With B-Tronic or CentronicPLUS receivers, additional %-positions can be approached. • Leave the settings by tapping „Done“...
- Page 32 Aufbau und Anschlüsse Scenarios • To activate your scenarios, simply tap them in the overview • To edit, press the cogwheel symbol at the top right and then press the desired scenario • Done!
- Page 33 Groups...
- Page 34 Aufbau und Anschlüsse Groups • Select the item "Groups" by swiping or from the quick navigation...
- Page 35 Aufbau und Anschlüsse Groups • Tap the "+" symbol to create a new group • Groups can be deleted or created at any time by tapping the cogwheel symbol in the top right corner...
- Page 36 Aufbau und Anschlüsse Groups • Enter the name of the group and select the appropriate receiver type from the drop- down menu • After that, create the group by tapping on "Create". • In the settings screen, tap on "Add recipient"...
- Page 37 Aufbau und Anschlüsse Groups • All available devices of the selected type are displayed and can be selected • Tap on "Done" to apply the selection • Return to operating mode by tapping on the „X“-symbol...
- Page 38 Favourites...
- Page 39 Aufbau und Anschlüsse Favourites • You can save receivers, rooms, scenarios or groups as favourites on the Home page of your CentralControl App. • To do this, press the cogwheel symbol in the control panel.
- Page 40 Aufbau und Anschlüsse Favourites • Now select the option "Add to favourites" from the menu.
- Page 41 Aufbau und Anschlüsse Favourites • From the drop-down menu, select the desired action when tapping on the favourite, e.g. "Position" for the percentage approach for CentronicPLUS devices.
- Page 42 Aufbau und Anschlüsse Favourites • In our example, we want to move the patio door to an opening height of 50%. • Then tap on "Create favourite".
- Page 43 Aufbau und Anschlüsse Favourites • You are automatically taken to the Home page and the newly created favourite appears • Simply tap the icon to trigger the stored action • Done!
-
Page 44: Remote Access
Remote access... - Page 45 Aufbau und Anschlüsse Remote access • Select the item "Settings" by swiping or from the quick navigation...
- Page 46 Aufbau und Anschlüsse Remote access • In the menu item "System", select the option "Set up remote access". • Now enter the required information in the corresponding fields and confirm the process by clicking "Register” • Please check your email inbox - you will receive an activation link •...
- Page 47 Aufbau und Anschlüsse Remote access • You will now be prompted to enter the access data you have just created • After entering the correct data, tap on "Log in". • After the configuration is complete, the device appears in the list below the assigned user name.
- Page 48 Thank you for your interest! You can also get more information about this product at www.becker-antriebe.com Please also visit the YouTube channel of our Becker Academy at https://www.youtube.com/c/BeckerAcademy - we would be very happy about a subscription and a "Like"!
Need help?
Do you have a question about the CC41 and is the answer not in the manual?
Questions and answers