Becker R8-17 Assembly And Operating Instructions Manual
Turbular drives for roller shutters
Hide thumbs
Also See for R8-17:
- Assembly and operating instructions manual (36 pages) ,
- Assembly and operating instructions manual (28 pages) ,
- Assembly and operating instructions manual (16 pages)
Table of Contents
Advertisement
Quick Links
R8-17...R30-17
Model: E02
Assembly and Operating Instructions
en
Tubular drives for roller shutters
Important information for:
• Fitters / • Electricians / • Users
Please forward accordingly!
These instructions must be kept safe for future reference.
2010 300 990 0a 20/05/2022
Becker-Antriebe GmbH
Friedrich-Ebert-Straße 2-4
35764 Sinn/Germany
www.becker-antriebe.com
Advertisement
Table of Contents

Related Manuals for Becker R8-17


Summary of Contents for Becker R8-17
- Page 1 R8-17...R30-17 Model: E02 Assembly and Operating Instructions Tubular drives for roller shutters Important information for: • Fitters / • Electricians / • Users Please forward accordingly! These instructions must be kept safe for future reference. 2010 300 990 0a 20/05/2022 Becker-Antriebe GmbH Friedrich-Ebert-Straße 2-4...
-
Page 2: Table Of Contents
Table of contents General .................................... 3 Warranty ..................................... 3 Safety instructions ................................ 4 Instructions for the user.............................. 4 Instructions for installation and commissioning........................ 4 Intended use .................................. 5 Drive version with angled plug ............................... 6 Assembly .................................... 6 Setting the limit positions using the programming unit...................... 9 Deleting the limit positions using the programming unit ...................... -
Page 3: General
General These tubular drives are high-quality products with the following features: • Optimised for roller shutter operation • Automatic detection of limit positions thanks to intelligent electronic system with stop systems ∙ Secure anti-lifting device ∙ Slight pressure applied to the roller shutter curtain makes it difficult to raise or reach under it ∙... -
Page 4: Safety Instructions
Safety instructions The following safety instructions and warnings are intended to avert hazards and to prevent property damage and personal injury. Instructions for the user General information • The drive must be disconnected from its power source during cleaning and maintenance and when re- placing parts. -
Page 5: Intended Use
• If the drive is used for shading solutions in a specially marked area (e.g., escape routes, hazard zones, safety areas), compliance with all applicable regulations and standards must be ensured. • Once the drive has been installed, the fitter must mark the used tubular drive in the “Technical data” chapter and make a note of the installation position. -
Page 6: Drive Version With Angled Plug
Drive version with angled plug Caution The power supply to the connecting cable must be disconnected prior to assembly/disas- sembly. Assembling the plug-in connecting cable for tubular drives with angled plug Ø35/Ø45/Ø58 Plug the dead connecting cable into the angled plug until the locating lug clicks into place in the angled plug. - Page 7 Then mount the wall bracket and idler. Ensure that the barrel is aligned at right angles to the wall and that sufficient axial play is al- lowed for the mounted system. Attention When using rigid shaft connectors, closed brackets must be fitted. The tubular drive presses the closed curtain down to make it difficult for people to reach under it or raise it.
- Page 8 To ensure secure torque transmission for round shafts, we recommend screwing the drive adapter to the shaft (see the table below). Attention! When drilling into the barrel, never drill near the tubular drive! -10 mm Size of drive Drive adapter Torque Fastening screws [mm] max.
-
Page 9: Setting The Limit Positions Using The Programming Unit
Setting the limit positions using the programming unit Programming unit for drives with electronic limit switching. Programming button Travel button Attention The programming unit is only designed for the commissioning, not for continuous opera- tion. Intelligent installation management Completion of installation following automatic setting of limit position "Stop" Next time the “stop”... -
Page 10: Deleting The Limit Positions Using The Programming Unit
Deleting the limit positions using the programming unit Connect the wires of the tubular drive to those of the same colour in the programming unit and switch on the power supply. Please pause for 1 sec after the last drive command before beginning the deletion se- quence. -
Page 11: Obstruction Detection / Blockage Detection
Obstruction detection / Blockage detection Caution Use of the drive’s obstacle detection system as personal protection is not permitted. It has been designed exclusively to protect the roller shutters or sun protection system from be- ing damaged. If the drive is correctly installed, it switches off when it detects obstructions or shutter faults. The following are detected both when using attachment springs and when using anti-lifting devices: In the DOWN direction (Obstruction detection) A curtain jam when closing due to objects on the window sill or sticking of the lateral guide tracks. -
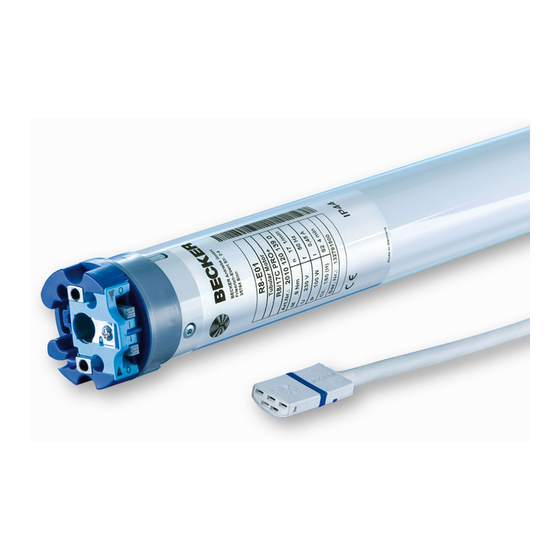
Page 12: Technical Data Dia. 45
Technical data dia. 45 Tubular drive R8-17 R12-17 R20-17 R30-17 Model Type Rated torque [Nm] Output speed [rpm] Limit switch range 64 revolutions Supply voltage 230 V AC / 50 Hz Connected load [W] Rated current consumption [A] 0.45 0.50 0.75 0.90 Operating mode... -
Page 13: Sample Wiring Diagrams
Sample wiring diagrams The assignment of the black and brown wires according to the direction of travel is de- pendant on how the drive is installed (mounted to the right or to the left). Controlling one/several drive(s) via a single switch/button Central, group and individual control using Centronic UnitControl UC42 Central Control unit... -
Page 14: Declaration Of Conformity
Declaration of conformity 14 - en...
Need help?
Do you have a question about the R8-17 and is the answer not in the manual?
Questions and answers