Advertisement
Quick Links
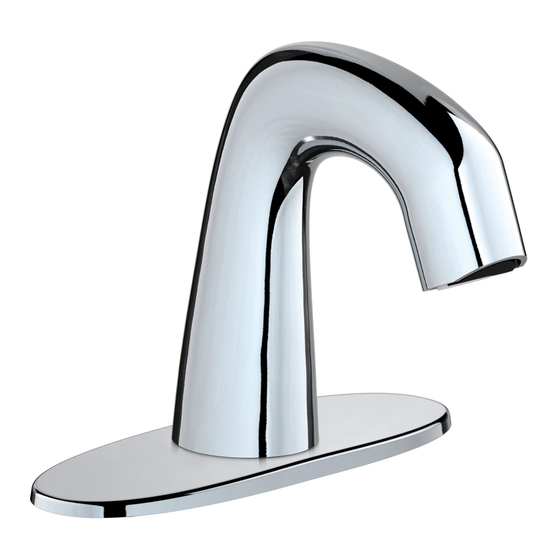
EQ Series User Guide Installation Instructions
For single supply and dual supply EQ Series faucets
Overview
Chicago Faucets EQ Series faucets feature two designs in two finishes with heavy-duty cast brass spouts and high-quality electronic components. The faucet is up and running in minutes
without the need for programming. Superior user detection means EQ turns on when user approaches and shuts off when user leaves. It also adjusts for optimal performance, saving water.
Faucets equipped with EQ Connect allow additional adjustments to meet specific
needs with a smart phone or tablet using the EQ Connect app for Android or iOS.
Safety Information
Read this entire user guide to ensure proper installation. Compliance and conformity to local codes and ordinances is the
responsibility of the installer. The following safety notes must always be complied with during handling of this product:
• Make sure there is enough space and lighting available during installation and service.
• Do not modify or convert this Chicago Faucets product yourself. All warranties will be voided.
Notice to the Installer
• Read this entire instruction sheet before installing to ensure proper installation.
• Installation must comply with local codes and ordinances.
• Do not use pipe dope.
• Care shall be exercised when installing the device to prevent marring the exposed, decorative surfaces.
The supply piping to these devices shall be securely anchored to the building structure to prevent installed device from unnecessary movement when operated by the user.
NOTE: The information in this manual is subject to change without notice.
Installation may be performed at different times of construction by different individuals.
For this reason, these instructions should be left on-site with the facility or maintenance manager.
NOTE: Before installation, turn off water supplies to existing faucet and remove faucet if replacing. Clean faucet basin and clear away debris. Flush all supply lines before connecting to faucet.
Failure to do so can result in debris clogging the inlets and/or internal control and mixing valves.
In order to complete the installation, you will need the following tools and supplies:
• Phillips Screwdriver, #1, #2, #3
• Adjustable Wrench
Mounting of Faucet and Optional Cover Plate
1
2
1. Install gasket flat side
2. Attach the threaded
down. If installing a
rods to bottom of the
cover plate, align holes
cover plate. Apply
in spout base with pins
sealant to underside of
on plate. Feed the power
the cover plate where
cable and braided hose
shown.
through plate. Secure
plate to spout.
Mount Control Box
17-21˝
(43-53 cm)
24˝
(61 cm)
1. Determine position of the control box, hold it against
the wall and mark the locations of the two mounting
holes.
FOR EQ CONNECT UNITS
Confirm mounting position allows attachment of power
wires from faucet to connectors at bottom of box.
Insert Wires From Spout Into Control Box
1. B ring wire into box. Snap wire into holder on side of box.
FOR EQ CONNECT UNITS
Attach wires to bottom of control box cover, gray to gray and black to black.
Snap wire into holder on side of box.
Connect Power: Plug-in or Hardwire (AC)
1. Choose a location and mount
2. Attach wiring connectors
the transformer. Run the
cable from the transformer
through opening in control
box.
For additional technical assistance, call 800/TEC-TRUE (800-832-8783) or visit our website at chicagofaucets.com.
1
• Drill, with 3/16˝ Bit
• Tape Measure
• Mallet
• Silicone-based Lubricant
1
2
2
1
3. Position faucet on sink. Hand-
tighten spout to deck with the large
black spacer and long mounting
nut. For cover plate installation,
attach the large cup washers, flat
washers, and wing nuts to the
threaded rods.
Tighten mounting nut with flat
head screwdriver or wrench.
1
2
2. D rill 3/16˝ holes, install
anchors and mounting
screws. Be sure to leave
at least 1/2˝ (12mm)
of the screw head
exposed. Secure the
control box to wall.
FOR EQ CONNECT UNITS
(gray to gray, black to
1. Use 2-sided tape to secure
black). Snap the completed
transformer to the top of
connections into the wiring
the control box or on the
harness as shown.
wall. Run the cable from the
transformer through opening
in control box.
• Sealant
• 1/2˝ Deep Socket or #3 Flat Head Screwdriver
Attach Braided Hose to Control Box
1
Remo ve
screw
acces s
for box
2
Flat head
#2 Phillips
1. Remove the control box
cover by using a #2 Phillips
screwdriver to loosen the
cover screw.
Connect Water Supply (dual supply unit shown)
1. Check to see that the
screen filters are
present.
Connect Power: Battery (DC)
1
2
#1 Phillips
1. Open yellow battery
2. Attach wiring connectors (gray to gray, black to black). Snap the
housing and insert
completed connections into wiring harness.
batteries according to
diagram inside housing.
FOR EQ CONNECT UNITS
The wiring connectors are located on the inside of the control box cover.
2. Attach wiring connectors
located on the inside of the
control box cover (gray to
gray, black to black). Snap
the completed connections
into the wiring harness.
Operating static pressure: 20-125 PSI (138-862 kPa)
Minimum static pressure for mixing: 30 PSI (207 kPa)
COLD water inlet temperature range: 40-80°F (4-27°C)
HOT water inlet temperature range: 100-180°F (38-82°C)
Maximum hot water range outlet from thermostatic
mixing valve: 80-120°F (27-49°C)
Maximum hot water range outlet from mechanical mixing
valve: 40-140°F (4-60°C)
Maximum pressure differential between Hot & Cold water
supplies: 20%;
Minimum inlet water supply temperature differential:
20°F (9°C)
3
2
1
3. B e sure to seat hose
2. Pivot yellow locking tab
firmly before reinstalling
and remove metal key
metal key and securing it
at top of box. Apply
with yellow locking tab.
silicone-based lubri-
cant to the end of the
spout hose and insert it
through the hole.
H
C
2. A ttach 3/8˝ compression
3. Open supply stops and
supply hoses from con-
check for leaks. Water
trol box to the supply
may run through spout.
stops. Wrench tighten.
IMPORTANT: Remove any debris or hardware from the
sink before opening the supplies and testing the faucet.
OR
3. Plug the
4. Wire up the
transformer into
transformer to the
the wall.
main line.
1
Advertisement

Related Manuals for Chicago Faucets EQ Series


Summary of Contents for Chicago Faucets EQ Series
- Page 1 Overview Chicago Faucets EQ Series faucets feature two designs in two finishes with heavy-duty cast brass spouts and high-quality electronic components. The faucet is up and running in minutes without the need for programming. Superior user detection means EQ turns on when user approaches and shuts off when user leaves. It also adjusts for optimal performance, saving water.
- Page 2 OTHER WARRANTIES — All other Products not covered above are warranted against material manufacturing defects for a period of one (1) year from the date of Product purchase. Technical: 800/832-8783 www.chicagofaucets.com Other restrictions and limitations apply. For complete warranty details, call Chicago Faucets Customer Service at 847-803-5000 or visit chicagofaucets.com. © 2020 Chicago Faucet Company 957.109.00.0...
Need help?
Do you have a question about the EQ Series and is the answer not in the manual?
Questions and answers