
Subscribe to Our Youtube Channel
Related Manuals for Motorola solutions MIC-WRL-TRN-500


Summary of Contents for Motorola solutions MIC-WRL-TRN-500
- Page 1 HiFi Microphone User Guide October 2021 WGD00181 ©2021 Motorola Solutions, Inc. All rights reserved. Revision A...
- Page 2 Accordingly, any copyrighted Motorola Solutions computer programs contained in the Motorola Solutions products described in this document may not be copied or reproduced in any manner without the express written permission of Motorola Solutions. Furthermore, the purchase of...
- Page 3 This equipment complies with Part 15 of the FCC rules and Industry Canada licence-exempt RSS standard(s). This equipment should only be used with the antenna supplied by Motorola Solutions, Inc. Any changes or modifications not expressly approved by the manufacturer could void the user's authority to operate the equipment.
- Page 4 Address: 415 East Exchange Parkway Allen TX 75013 Phone Number: 1-800-605-6734 Hereby declares that the product: Model Name: MIC-WRL-CHG-500 and MIC-WRL-TRN-500 conforms to the following regulations: FCC Part 15, subpart B, section 15.109 and section 15.109(g) Class B Digital Device As a personal computer peripheral, this device complies with Part 15 of the FCC Rules.
- Page 5 NOTICE: This equipment has been tested and found to comply with the limits for a Class B digital device, pursuant to part 15 of the FCC Rules. These limits are designed to provide reasonable protection against harmful interference in a residential installation.
-
Page 6: Table Of Contents
Contents Contents Introduction Welcome About this Document Related documents and information About the HiFi Microphone Technical specifications Warranty Information HiFi Microphone Overview Using the HiFi Microphone Beginning a shift During a shift Ending a shift Base Status LEDs Connections and contacts DVR cable connection Antenna connection Charge and sync contacts... - Page 7 Contents External microphone jack Display Icons Status icons Battery level Connection Signal strength Mode icons Record Mute Covert mode Notification Synchronizing the Transmitter and the Base Charging the Transmitter Charging in a vehicle with the ignition off Using Two HiFi Microphones Best Practices and Troubleshooting Best Practices Installation best practices...
-
Page 8: Introduction
Introduction Introduction In this section... Welcome (page About this document (page Related documents and information (page About the HiFi Microphone (HiFi Mic) (page Technical specifications (page 1) Warranty information (page HiFi Microphone HiFi Microphone User Guide WGD00181, Revision A... -
Page 9: Welcome
Motorola Solutions representative. Related documents and information For subjects related to the Motorola Solutions 4RE DVR system that are not covered by the HiFi Microphone User Guide, see the following documents: 4RE In-Car DVR Quick Start Guide... -
Page 10: About The Hifi Microphone
About the HiFi Microphone About the HiFi Microphone The HiFi Microphone (HiFi Mic) is one of the Motorola Solutions components for transmitting audio to the 4RE DVR (digital video recorder) during the video recording process. The HiFi Mic consists of two parts: Base: The base is the part of the HiFi Mic that is mounted in the vehicle and physically connects to the DVR and the antenna. -
Page 11: Warranty Information
Motorola Solutions, Inc. will not be responsible for any removal or re-installation cost of the unit or for damages caused by improper installation. - Page 12 Shipping During the first ninety (90) days of the initial warranty period, Motorola Solutions, Inc. will provide a prepaid shipping label to return any defective unit for end users in the continental United States provided serial numbers are submitted with the request.
-
Page 13: Hifi Microphone
HiFi Microphone HiFi Microphone In this section... HiFi Microphone (HiFi Mic) overview (page Using the HiFi Mic (page Base features (page Transmitter features (page Display icons (page Synchronizing the base and the transmitter (page Charging the transmitter (page Using two HiFi Mics in the same vehicle (page HiFi Microphone HiFi Microphone User Guide... -
Page 14: Overview
HiFi Microphone Overview The Motorola Solutions HiFi Microphone (HiFi Mic) consists of a transmitter and a base: The base, commonly mounted inside the vehicle on the headliner or center console, holds the transmitter when you are not using it. You must synchronize the transmitter and base to record audio using the 4RE DVR (see page 30). -
Page 15: Using The Hifi Microphone
2. Place the transmitter in the base to charge (see page 31). Note: Motorola Solutions recommends that you power off the transmitter before you put it in the base to charge, but this step is not required. HiFi Microphone HiFi Microphone User Guide... -
Page 16: Base
Note: A version of the base exists that only serves as a charger for the HiFi Mic. This version of the base is not used in the vehicle. For information about the charge- only base, contact your Motorola Solutions representative. Status LEDs The HiFi Mic has status LEDs on both the base and the transmitter. -
Page 17: Connections And Contacts
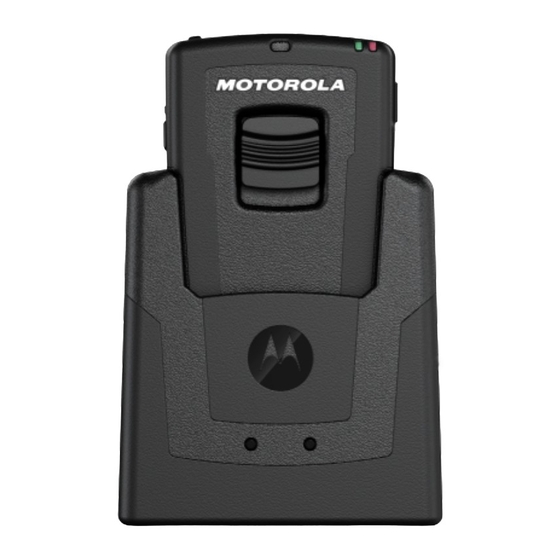
Connections and contacts On the base, the status LEDs are on the front of the unit under the Motorola Solutions logo: The LEDs on the base can help to indicate the status of certain HiFi Mic functions: Synchronizing: As the base syncs with the transmitter, both the red and green LEDs flash. After... -
Page 18: Dvr Cable Connection
The DVR cable connection is located on the back of the base: Connect the DVR system interface cable to the DVR cable connection point. Note: Motorola Solutions recommends that you use a short cable (3-foot) to connect the HiFi Mic base to the DVR. Keeping the cable short helps maintain audio quality. -
Page 19: Charge And Sync Contacts
Tip: Finger-tighten the SMA connector when you connect the antenna to the base. Using hand tools can damage the connector. Note: You should only use the antenna that you received from Motorola Solutions with the HiFi Mic. Using a different antenna can compromise wireless performance and audio quality. -
Page 20: Transmitter
HiFi Microphone Transmitter The transmitter is the part of the HiFi Microphone (HiFi Mic) that you attach to your apparel or duty belt. The transmitter includes the following features: Display backlight button (see page Display (see page Status LEDs (see page Microphone External microphone jack (see page... -
Page 21: Talk/Mute Slide Button
Talk/Mute slide button For information about the icons on the display, see page 27. For information on the status LEDs, see page Talk/Mute slide button The Talk/Mute slide button is on the front of the transmitter. After turning on the transmitter and synchronizing it with the base, you can use the Talk/Mute button to trigger a recording event or to mute audio being transmitted to the DVR. -
Page 22: Display
HiFi Microphone Display The display is on the top of the transmitter: Status LEDs Display Display backlight button The display shows icons that indicate the current transmitter status (battery, connection, signal) and mode (recording/muted, Covert, vibrate/beep/silent). For more information about the display and its icons, see page Display backlight button... -
Page 23: Mode Button
Mode button Mode button The Mode button is on the left side of the transmitter as you look at the front of the transmitter: The Mode button changes the notification mode and activates Covert mode. Changing the notification mode The notification mode is one of the ways the transmitter lets you know that its status has changed. For example, the transmitter will display status indicators when the battery is low or when your HiFi Mic has moved out of the base's range. -
Page 24: Activating Covert Mode
HiFi Microphone Activating Covert mode Covert mode disables the status LEDs and audio notifications on the transmitter so no light or sound comes from it without your action. To activate (or deactivate) Covert mode, press and hold the Mode button for two seconds. The transmitter indicates when it is in Covert mode by displaying the Covert Mode icon (see page 27). -
Page 25: Power Switch
Slide this switch to power the transmitter on or off. Note: Motorola Solutions recommends that you power off the transmitter before you put it in the base to charge, but this step is not required. Contacts for charging and synchronizing... -
Page 26: External Microphone Jack
The external microphone jack is on the right-hand side of the transmitter, as you look at the front of the transmitter: If you want to use the optional lapel microphone available from Motorola Solutions, you can connect it to the HiFi Mic using the external microphone jack. -
Page 27: Display Icons
Display Icons Display Icons The display is on the top of the transmitter: Battery level Signal connection indicator Signal strength Covert mode Beep mode Vibrate mode Mute Record The display shows icons that indicate the transmitter's current status and mode. Note: This graphic only shows where the icons can appear on the display. -
Page 28: Connection
HiFi Microphone Warning! If the battery outline begins blinking, the charge level has moved below normal operational limits; you should place the transmitter in the base to charge immediately. While the transmitter is charging, the bars in the Battery Level icon cycle on and off in series. For information on charging the transmitter battery, see page Connection... -
Page 29: Mute
Mute Mute The Mute icon appears in the middle of the display and looks like a circled Record icon with a slash through it . This icon indicates that audio is no longer being recorded by the DVR (see page 21). -
Page 30: Synchronizing The Transmitter And The Base
Note: A charge-only version of the base is available for the HiFi Microphone (HiFi Mic). Charge-only bases are not used in vehicles. For information about charge-only bases, contact your Motorola Solutions representative. The transmitter and the base in the vehicle sync automatically when you place the transmitter in the powered base for a few seconds. -
Page 31: Charging The Transmitter
25). 2. Place the transmitter in a base. Note: Motorola Solutions recommends that you power off the transmitter before you put it in the base to charge, but this step is not required. If the base is in the vehicle, the base syncs with the transmitter before the transmitter begins to charge. - Page 32 HiFi Microphone After ten minutes, the base powers back up and begins to charge the transmitter. The base remains on for four hours to fully charge the transmitter, and then the base shuts down again until the vehicle, DVR, and base are powered on again. HiFi Microphone HiFi Microphone User Guide WGD00181, Revision A...
-
Page 33: Using Two Hifi Microphones
Using Two HiFi Microphones Using Two HiFi Microphones For the most part, using two HiFi Microphones (HiFi Mics) in a vehicle is just like using one transmitter. When using two HiFi Mics in the same vehicle, do the following to minimize the potential for interference between the transmitters when both mics are in use: When you install the HiFi Mic antennas, install them horizontally in the upper-right and upper-left corners of the windshield to keep them as far apart as possible. -
Page 34: Best Practices And Troubleshooting
Best Practices and Troubleshooting Best Practices and Troubleshooting In this section... Best practices for Installing the HiFi Microphone (HiFi Mic) (page Using the HiFi Mic (page Troubleshooting HiFi Mic issues (page HiFi Microphone HiFi Microphone User Guide WGD00181, Revision A... -
Page 35: Best Practices
Use a short cable (3-foot) when you connect the HiFi Mic base to the 4RE DVR; keeping the cable short helps maintain audio quality. Use the antenna that you received from Motorola Solutions with the HiFi Mic. Using a different antenna can compromise wireless performance and audio quality. -
Page 36: Troubleshooting
Motorola Solutions Customer Service for assistance. If the transmitter does not respond to or synchronize with the base... Check that the base and transmitter have the Motorola Solutions branding to verify base and transmitter compatibility. Check that the transmitter battery is charged (see page 27). - Page 37 Best Practices and Troubleshooting Tip: If your transmitter still does not respond to or synchronize with the base after trying all of the above steps, contact Motorola Solutions Customer Service for assistance. HiFi Microphone HiFi Microphone User Guide WGD00181, Revision A...
-
Page 38: Index
Index DVR, connecting, 17, 35 Index external mic jack, 26 icons Beep, 29 antenna display, 27-29 best practices, 35 mode, 28 connecting, 19 status, 27 Vibrate, 29 backlight, 22 ignition off, charging with, 31 base overview, 16 jack, external mic, 26 status LEDs, 16-17 synchronizing with transmitter, 30 key the mic, 21... - Page 39 Index normal usage, 15 turned off base LEDs, 17 base LEDs, 17 transmitter LEDs, 24 transmitter LEDs, 24 turning on/off, 25 two microphone configuration, 33 out of range base LEDs, 17 transmitter LEDs, 24 using during shift, 15 pairing, 30 vehicle off, charging with, 31 poor reception, 36 Vibrate icon, 29...
Need help?
Do you have a question about the MIC-WRL-TRN-500 and is the answer not in the manual?
Questions and answers