Nibe F1226 Service Instructions Manual
Hide thumbs
Also See for F1226:
- User manual (68 pages) ,
- Installer manual (68 pages) ,
- Service instructions manual (36 pages)
Advertisement
Available languages
Available languages
Quick Links
SIT SV 1927-4
431300
SERVICEINSTRUKTION
SERVICEINSTRUKTION - Byte av beredare
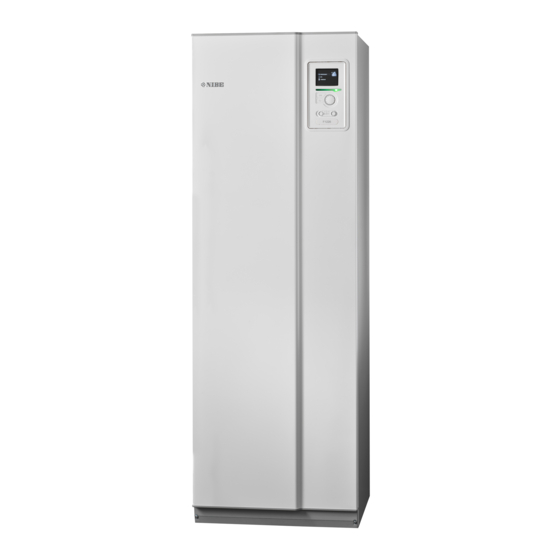
NIBE F1226/F1245/F1255
SERVICE INSTRUCTIONS - Replacing heater on
NIBE F1226/F1245/F1255
SERVICEANLEITUNG - Speicherwechsel für
NIBE F1226/F1245/F1255
SE
GB
DE
Advertisement

Related Manuals for Nibe F1226


Summary of Contents for Nibe F1226
- Page 1 SIT SV 1927-4 SERVICEINSTRUKTION 431300 SERVICEINSTRUKTION - Byte av beredare NIBE F1226/F1245/F1255 SERVICE INSTRUCTIONS - Replacing heater on NIBE F1226/F1245/F1255 SERVICEANLEITUNG - Speicherwechsel für NIBE F1226/F1245/F1255...
- Page 3 Antal Beskrivning 016 940 8 st Buntband till isoleringen för KB-venti- Vid byte av beredare i F1226/F1245/F1255 flyttas kylmo- lerna (QM33, QM34). dul, rörkopplingar, isolering och all elektrisk utrustning över från den befintliga värmepumpen till den nya bere- 028 028 4 st Låsbleck till ventiler (QM31, 32, 33,...
- Page 4 Skållningsrisk kan föreligga. FÖRBEREDELSER, ISÄRTAGNING Gör värmepumpen spänningslös. Ta bort frontluckan. Koppla loss värmepumpen från installationen. Lossa skruvarna i frontplåtens nederkant. Lyft plåten utåt i nederkant och upp. Ta bort kylmodulens servicelucka. Kapitel 2 | Byte av beredare på NIBE F1226/F1245/F1255...
- Page 5 Lossa skruvarna i över- och nederkant. Vrid luckan något utåt. För luckan utåt och bakåt. Montering sker i omvänd ordning. Ta bort skyddslocket för ellådan och plastkåpan mellan vänster och höger ellåda. Kapitel 2 | Byte av beredare på NIBE F1226/F1245/F1255...
- Page 6 Ta bort rörklammern på VB-framledning mellan elpa- tronen och kylmodulen (QM31) och sära på koppling- Lossa/ta bort kontakten från givare (BT2). Lossa/ta bort kontakten från växelventilen (QN10). Lossa/ta bort ellådan från dess fästen. Press Press 4.7? Kapitel 2 | Byte av beredare på NIBE F1226/F1245/F1255...
- Page 7 Flytta över hela paketet (elpatron och ellåda) till den nya enheten. (Vinkla ut elpatronen och håll i ellådan.) För att ansluta elanoden krävs adaptern som bipac- kas. Kapitel 2 | Byte av beredare på NIBE F1226/F1245/F1255...
- Page 8 Ta bort plåtfästet för displayen (två skruvar i stativra- men). Lossa ellådans jordkabel. (Fäst med en skruv i stativ- ramen.) Ta bort kablagekontakt(er) från displayen. Demontera displayen. Tryck in spärren upptill på displayens baksida och lyft displayen något. Kapitel 2 | Byte av beredare på NIBE F1226/F1245/F1255...
- Page 9 Montera två nya fästen (bipackade) för ellådan på den nya enhetens högra stativram. Varje fäste har två fästtappar som sticks in i ramen och sedan vrids fästet för fastlåsning. Kapitel 2 | Byte av beredare på NIBE F1226/F1245/F1255...
- Page 10 Montera köldbärarrören med nya O-ringar (bipacka- de) i den nya enheten. Stick in dem bakifrån och anslut kopplingarna (QM33) och (QM34) med lås- bleck. Sätt dit kopplingarnas isolering och spännfast med bipackade buntband. QM33 QM34 QM32 Kapitel 2 | Byte av beredare på NIBE F1226/F1245/F1255...
- Page 11 (AA1) och grundkort (AA2). Montera givaren i dykröret och se till att benen på clipset riktas mot beredaren. Det görs enklast genom att hålla i fliken på clipset som pekas ut på bilden. Kapitel 2 | Byte av beredare på NIBE F1226/F1245/F1255...
- Page 12 Montera toppisoleringen över beredaren och framför beredaren, topplock och kylmodulens servicelucka. Flytta över etiketter med serienummer/teknisk data från den gamla till den nya enheten. Montera frontluckan. Kapitel 2 | Byte av beredare på NIBE F1226/F1245/F1255...
-
Page 13: Supplied Components
SUPPLIED COMPONENTS General Part No. Quant- Description When replacing the heater in F1226/F1245/F1255 the 016 940 Cable tie for insulation for the Brine cooling module, pipe connections, insulation and all valves (QM33, QM34). electrical equipment are transferred from the existing heat pump to the heater with stand. - Page 14 Disconnect the heat pump from the installation. Remove the screws from the lower edge of the front panel. Lift the panel out at the bottom edge and up. Remove the cooling module's service cover. Kapitel 2 | Replacement of heater on NIBE F1226/F1245/F1255...
- Page 15 Move the hatch outwards and backwards. Assembly takes place in the reverse order. Remove the protective cover of the distribution box and the plastic cover between the right and left junction boxes. Kapitel 2 | Replacement of heater on NIBE F1226/F1245/F1255...
- Page 16 (QM31) and separate the connector. Disconnect/remove the connector from the reversing valve (QN10). Disconnect/remove the distribution box from its mounting. Press Press 4.7? Kapitel 2 | Replacement of heater on NIBE F1226/F1245/F1255...
- Page 17 Transfer the whole package (immersion heater and distribution box) to the new unit. (Angle out the im- mersion heater and hold the distribution box.) To connect the electrical anode, the enclosed ad- apter is required. Kapitel 2 | Replacement of heater on NIBE F1226/F1245/F1255...
- Page 18 (Secured with a screw in the stand frame.) Remove wiring connector(s) from the display. Remove the display. Press the top catch on the re- verse side of the display and lift the display slightly. Kapitel 2 | Replacement of heater on NIBE F1226/F1245/F1255...
- Page 19 Install two new mountings (enclosed) for the distri- bution box on the new unit's right stand frame. Each mounting has two mounting pins that are inserted in the frame and then twisted to secure it. Kapitel 2 | Replacement of heater on NIBE F1226/F1245/F1255...
- Page 20 Insert them from behind and con- nect connections (QM33) and (QM34) with securing plate. Install the insulation for the connectors and secure using the cable ties enclosed. QM33 QM34 QM32 Kapitel 2 | Replacement of heater on NIBE F1226/F1245/F1255...
- Page 21 Install the sensor in the submerged tube and made sure that the legs on the clip are facing the heater. This is done most easily by holding the tab on the clip as indicated in the picture. Kapitel 2 | Replacement of heater on NIBE F1226/F1245/F1255...
-
Page 22: Assembly, Commissioning
Install the top insulation across the heater and in front of the heater, top cover and the cooling module service hatch. Transfer labels with serial numbers/technical data from the old unit to the new unit. Install the front cover. Kapitel 2 | Replacement of heater on NIBE F1226/F1245/F1255... - Page 23 059 392 1 St. Dichtungssatz mit 8 O-Ringen für Bei einem Komponentenwechsel an QM31, 32, 33, 34. F1226/F1245/F1255 dürfen nur Ersatzteile von NIBE verwendet werden. 425 728 1 St. Isolierband 300x50x3, zur Isolierung der WQM-Ventile (QM32, 33). 524 210 2 St.
- Page 24 Lösen Sie die Wärmepumpe von der Installation. Lösen Sie die Schrauben an der Unterseite der Frontabdeckung. Heben Sie die Abdeckung an ihrer Unterkante zur Seite und nach oben ab. Entfernen Sie die Serviceabdeckung des Kältemo- duls. Kapitel 2 | Speicherwechsel für NIBE F1226/F1245/F1255...
- Page 25 Drehen Sie die Abdeckung leicht nach außen. Bewegen Sie die Abdeckung nach außen und hinten. Der Einbau erfolgt in umgekehrter Reihenfolge. Entfernen Sie die Schutzabdeckung für den Schalt- schrank sowie die Kunststoffabdeckung zwischen linkem und rechtem Schaltschrank. Kapitel 2 | Speicherwechsel für NIBE F1226/F1245/F1255...
- Page 26 Elektroheizpatrone sowie Kältemodul (QM31) Lösen/entfernen Sie den Kontakt vom Fühler (BT2). und trennen Sie die Kupplung. Lösen/entfernen Sie den Kontakt vom Umschaltven- Lösen/entfernen Sie den Schaltschrank von seinen til QN10. Halterungen. Press Press 4.7? Kapitel 2 | Speicherwechsel für NIBE F1226/F1245/F1255...
- Page 27 über zwei Befestigungszapfen, die in den Schaltschrank fest.) Rahmen eingeführt und danach durch Drehen arre- tiert werden. Montieren Sie den Conex-Winkel (im Lieferumfang enthalten) am Vorlauf zum Glattrohrwärmetauscher an der neuen Einheit. Kapitel 2 | Speicherwechsel für NIBE F1226/F1245/F1255...
- Page 28 Demontieren Sie das Display. Drücken Sie die Sperre oben an der Rückseite des Displays hinein und heben Sie das Display leicht an. Die Fremdstromanode muss über den im Lieferum- fang enthaltenen Adapter angeschlossen werden. Kapitel 2 | Speicherwechsel für NIBE F1226/F1245/F1255...
- Page 29 Montieren Sie zwei neue Halterungen (im Lieferum- fang enthalten) für den Schaltschrank am rechten Ständerrahmen der neuen Einheit. Jede Halterung verfügt über zwei Befestigungszapfen, die in den Rahmen eingeführt und danach durch Drehen arre- tiert werden. Kapitel 2 | Speicherwechsel für NIBE F1226/F1245/F1255...
- Page 30 Montieren Sie das Display und verbinden Sie die Verkabelungskontakte mit dem Display. KÄLTEMODUL UND ROHRE FÜR HEIZUNGS-/WÄRMEQUELLENMEDIUM, UMSETZUNG Entfernen Sie das obere Sperrblech von den Absperr- ventilen (QM32, QM33, QM34) und trennen Sie die Kupplungen. Kapitel 2 | Speicherwechsel für NIBE F1226/F1245/F1255...
- Page 31 O-Ringen (im Lieferumfang enthal- ten) in der neuen Einheit. Führen Sie sie von hinten ein und schließen Sie die Kupplungen (QM33) sowie Verbinden Sie die Verkabelungskontakte vom Kälte- modul mit Elektroheizpatronenplatine (AA1) und Basisplatine (AA2). Kapitel 2 | Speicherwechsel für NIBE F1226/F1245/F1255...
- Page 32 Montieren Sie den Fühler im Tauchrohr und achten Sie darauf, dass die Beine der Klemme zum Speicher zeigen. Hierzu am besten die Klemme an der Lasche festhalten, auf die im Bild gezeigt wird. Kapitel 2 | Speicherwechsel für NIBE F1226/F1245/F1255...
-
Page 33: Montage, Inbetriebnahme
Montieren Sie die obere Isolierung über und vor dem Speicher, obere Abdeckung und Serviceabdeckung des Kältemoduls. Setzen Sie die Etiketten mit der Seriennummer/tech- nischen Daten von der alten zur neuen Einheit um. Montieren Sie die Frontabdeckung. Kapitel 2 | Speicherwechsel für NIBE F1226/F1245/F1255... - Page 36 Denna handbok är en publikation från NIBE Energy Systems. Alla produktillustrationer, fakta och data bygger på aktuell information vid tidpunkten för publikationens godkännande. NIBE Energy Systems reserverar sig för eventuella fakta- eller tryckfel i denna handbok. ©2019 NIBE ENERGY SYSTEMS...
Need help?
Do you have a question about the F1226 and is the answer not in the manual?
Questions and answers