Table of Contents
Advertisement
Quick Links
Advertisement
Table of Contents

Subscribe to Our Youtube Channel
Related Manuals for Electrolux LRB3DE18C


Summary of Contents for Electrolux LRB3DE18C
- Page 1 LRB3DE18C Refrigerator User Manual...
-
Page 2: Table Of Contents
11. INFORMATION FOR TEST INSTITUTES............20 WE’RE THINKING OF YOU Thank you for purchasing an Electrolux appliance. You’ve chosen a product that brings with it decades of professional experience and innovation. Ingenious and stylish, it has been designed with you in mind. So whenever you use it, you can be safe in the knowledge that you’ll get great results every time. - Page 3 ENGLISH of incorrect installation or usage. Always keep the instructions in a safe and accessible location for future reference. 1.1 Children and vulnerable people safety This appliance can be used by children aged from 8 • years and above and persons with reduced physical, sensory or mental capabilities or lack of experience and knowledge if they have been given supervision or instruction concerning the use of the appliance in a...
-
Page 4: Safety Instructions
– refrigerator, so that it is not in contact with or drip onto other food. WARNING: Keep ventilation openings, in the • appliance enclosure or in the built-in structure, clear of obstruction. - Page 5 ENGLISH • Before carrying out any operations on access to the mains plug after the the appliance (e.g. reversing the installation. door), remove the plug from the • Do not pull the mains cable to power socket. disconnect the appliance. Always pull •...
-
Page 6: Installation
• Before maintenance, deactivate the professional repairers, and that not all appliance and disconnect the mains spare parts are relevant for all plug from the mains socket. models. • This appliance contains hydrocarbons • Door gaskets will be available for 10 in the cooling unit. - Page 7 ENGLISH 3.1 Dimensions Overall dimensions ¹ Space required in use ² 1769 1780 ² the height, width and depth of the appliance including the handle, plus the ¹ the height, width and depth of the space necessary for free circulation of appliance without the handle and feet the cooling air Space required in use ²...
- Page 8 Overall space required in use ³ • The appliance must be earthed. The 1085 power supply cable plug is provided with a contact for this purpose. If the ³ the height, width and depth of the...
-
Page 9: Control Panel
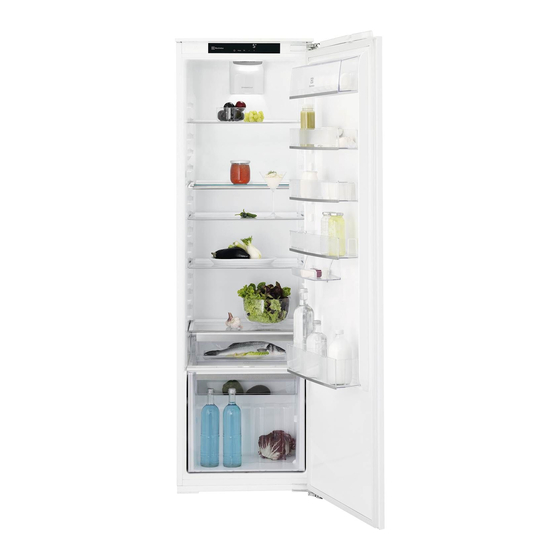
ENGLISH 4. CONTROL PANEL Display Mode Temperature warmer button ON/OFF Temperature colder button It is possible to change predefined sound and temperature colder button for a few of buttons by pressing together Mode seconds. Change is reversible. 4.1 Display A. Timer indicator B. - Page 10 To switch off the function repeat the FastCool function to chill the products procedure until the DYNAMICAIR more rapidly and to avoid warming the indicator icon goes off. other food which is already in the If the function is activated refrigerator.
-
Page 11: Daily Use
ENGLISH To switch off the function repeat the The alarm stops after closing the door. procedure until the DrinksChill goes off. During the alarm, the sound can be muted by pressing any button. It is possible to change the time at any time during the If you do not press any countdown and at the end by button, the sound switches... - Page 12 2. Tilt the module downwards to remove it from the refrigerator. To reassemble: 1. Pull out the rails. 5.4 Vegetable drawer The drawer is suitable for storing fruit and vegetables. To remove the drawer (e.g. for cleaning): 2. Place the rear part of the drawer (1) 1.
-
Page 13: Hints And Tips
ENGLISH cooling of foods and keeps more uniform Pull out the drawer again temperature in the compartment. and check if it is placed This device activates automatically when correctly on both rear and needed. front hooks. 5.5 Humidity control The glass shelf incorporates a device with slits (adjustable by means of a sliding lever), which makes it possible to regulate the humidity in the vegetable... -
Page 14: Care And Cleaning
6.3 Hints for food refrigeration toward higher temperature to allow automatic defrosting and to save • Meat (all types): wrap in a suitable energy this way. packaging and place it on the glass • Ensure a good ventilation. Do not shelf above the vegetable drawer. -
Page 15: Troubleshooting
ENGLISH 7.3 Defrosting of the 1. Open the drawer. 2. Pull out the exhausted air filter. refrigerator Frost is automatically eliminated from the evaporator of the refrigerator compartment during normal use. The defrost water drains out through a trough into a special container at the back of the appliance, over the motor compressor, where it evaporates. - Page 16 8.1 What to do if... Problem Possible cause Solution The appliance does not The appliance is switched Switch on the appliance. operate. off. The mains plug is not con‐ Connect the mains plug to nected to the mains socket the mains socket correctly.
- Page 17 ENGLISH Problem Possible cause Solution Door does not open easily. You attempted to re-open Wait a few seconds be‐ the door immediately after tween closing and re-open‐ closing. ing of the door. The lamp does not work. The lamp is in stand-by Close and open the door.
- Page 18 Problem Possible cause Solution Temperature cannot be The "FastCool function" is Switch off "FastCool func‐ set. switched on. tion" manually, or wait until the function deactivates automatically to set the temperature. Refer to "FastCool function" sec‐ tion. The temperature in the ap‐...
-
Page 19: Noises
ENGLISH 8.3 Closing the door 3. If necessary, replace the defective door gaskets. Contact the Authorised 1. Clean the door gaskets. Service Centre. 2. If necessary, adjust the door. Refer to installation instructions. 9. NOISES SSSRRR! BRRR! CLICK! HISSS! BLUBB! 10. -
Page 20: Information For Test Institutes
11. INFORMATION FOR TEST INSTITUTES Installation and preparation of the clearances shall be as stated in this User appliance for any EcoDesign verification Manual at Chapter 3. Please contact the shall be compliant with EN 62552. manufacturer for any other further Ventilation requirements, recess information, including loading plans. - Page 24 www.electrolux.com/shop...
Need help?
Do you have a question about the LRB3DE18C and is the answer not in the manual?
Questions and answers