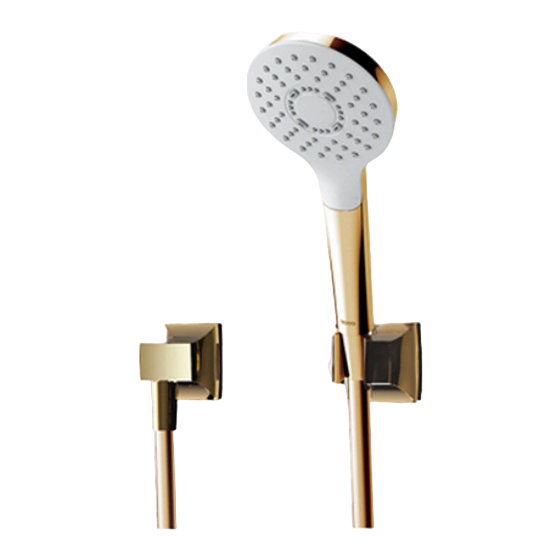
Summary of Contents for Toto TBW01008B2
- Page 1 Before product installation, read these instructions for construction carefully and retain it for future reference. 0G4771Y[A] 2018.06...
-
Page 2: Table Of Contents
目录 明细单 目 录 明细单 淋浴器 1套 目录 淋浴软管 1根 明细单 施工说明书 1本 使用条件与施工上的注意 使用说明书 1本 施工上的注意与保养 安装完成图 8-10 水嘴的安装 使用本明细单的产品包括: TBW01008B2 手持花洒(圆形单功能) 生产厂家与销售商 TBW01008B2 #PG 手持花洒(圆形单功能) TBW01010B2 手持花洒(圆形多功能) TBW01010B2#PG 手持花洒(圆形多功能))... -
Page 3: 明细单
使用条件与施工上的注意 明细单 明细单 使 用 条 件 1.供冷水*热水压力: 最低压力………………0.05MPa(流动压) 最高压力………………0.75MPa(静压) 推荐使用压力…………单功能0.12MPa(流动压)-0.5MPa(流动压) 淋浴支架 1套 多功能0.15MPa(流动压)-0.5MPa(流动压) 2.供水温度在4℃~60℃,建议使用热水温度60℃以下,供热水请勿使用蒸汽。 3.使用环境温度1~40℃。如果低于0℃,水嘴会出现变形、冻裂等现象。 主体部 1套 4.为防止花洒内部损坏,花洒侧吐水温度不得超过60℃,建议使用温度45℃ 以下。 1本 5.长时间不使用时,可能导致水嘴内部及外部锈蚀不能使用等现象。 施工说明书 6.如果您需要废弃本产品,请勿将其作为一般生活垃圾处理,请依照法规经 由独立的回收体系进行合适的处理、恢复和回收。 使用说明书 1本 7.本说明书中的产品具有清洗功能。 施 工 上 的 注 意 ! 警告 表示如果无视此标志而误操作时,有可能造成人员重伤或死亡。 ! 注意 表示如果无视此标志而误操作时,有可能造成人身伤害或财产损失。 !... -
Page 4: 施工上的注意与保养
安装完成图 施工上的注意与保养 注意 TBW01008B2 手持花洒(圆形单功能) TBW01010B2 手持花洒(圆形多功能) 1.请勿撞击本产品,否则可能会造成故障、漏水。 2.必须使用中性洗涤剂清洗,中性以外的洗涤剂会破坏镀层或使表面 变色。 3.不得使用酸性洗涤剂和去污粉、抛光粉等含粗颗粒的洗涤剂和尼龙 刷,否则可能会破坏镀层等。 4.可使用软布擦拭,间或用机油或车用蜡浸布擦拭,但请勿接触树脂 部件,否则可能失去光泽和产生锈蚀。 5.建议不要长时间不使用,否则可能导致水嘴内部以及外部锈蚀不能 使用等现象。 6.随着产品式样的不断更新,实物存在与图示不符的情况,但基本安 装、使用原理相同。 保养 为长期保持产品的美观,请用户按以下方法维护保养。 1.经常用软布擦拭,间或用软布蘸水擦拭。 G1/2 2.当有污垢且比较明显时,请用中性洗涤剂擦拭后充分进行水洗。 3.散水板的保养与维护: 轻度脏的场合,将软布用温水浸 湿后拧干擦拭。 重度脏的场合,用软布蘸取适量 中性洗调剂擦拭后用清水充分清洗, L=1600 喷嘴 再用软布擦干。 当喷嘴有堵塞、流线混乱时,将软 布用温水浸湿后拧干擦拭,注意 不要将喷嘴划破,如果太用力擦拭, 喷嘴容易被划破、变形,从而造成 注:上记尺寸单位为mm( )内尺寸为参考尺寸 流线变形。... -
Page 5: 水嘴的安装
安装完成图 水嘴的安装 事前准备工具 TBW01031B 淋浴支架 密封带 螺丝刀 六角棒扳手 扳手 TBW01008B2安装 安装前确认 确认供水管已经关闭,确认安装前水路进行清洗了。 仔细阅读施工说明书并按照说明书的安装要领来进行安装。 确认您所看到的包装盒内的部件同下图相同。 淋浴器 38.4 墙面 内含垫片 O型圈 G1/2 淋浴软管 4.2×35螺钉 注:上记尺寸单位为mm( )内尺寸为参考尺寸 1.将淋浴软管两端分别与本体部螺纹、淋浴器相连接。... - Page 6 水嘴的安装 水嘴的安装 TBW01031B安装 2.淋浴主体的安装 ① 将进水接手螺纹处缠上密封胶带,然后旋入供水接头中。 安装前确认 ② 将淋浴主体安装在进水接手上,然后用螺钉固定。 确认供水管已经关闭,确认安装前水路进行清洗了。 仔细阅读施工说明书并按照说明书的安装要领来进行安装。 确认您所看到的包装盒内的部件同下图相同。 固定螺丝 膨胀管 进水接手 淋浴支架 O-型圈 胶塞 淋浴主体 固定螺丝 1.淋浴支架的安装 ① 对照淋浴支架上的安装孔尺寸在墙面上沿竖直方向开两个孔。 ② 在孔内打入膨胀管。将淋浴支架开口腔内胶塞拆卸下来,装 入固定螺丝。 ③ 将淋浴支架放在预先打好孔的墙面上然后用固定螺丝将其紧固。 (注意要保证其方向正确)。 ④ 将胶塞装入淋浴支架内。 注:安装前务必确认墙内配管的位置,切勿钻孔时损伤配管造成漏水。 ! 固定螺丝 膨胀管 淋浴支架 胶塞 3 10...
- Page 7 Contents 生产厂家与销售商 Contents GB T23447-2009、GB 28378-2012 QB/T 1334-2013(适用于TBW01031B) Contents Detailed list Use condition and attentions in construction (0411) 87624383 Attentions in use and maintenances Installstion completion figure 800-820-9787 Faucet installation 8-10 400-820-9787 1915...
- Page 8 1 copy The products using this detailed list include: TBW01008B2 "G Shower" 1mode Hand Shower Set The products using this detailed list include: (Standard Type) TBW01008B2 #PG "G Shower" 1mode Hand Shower Set TBW01031B Shower holder (Standard Type) TBW01010B2 "G Shower" 3mode Hand Shower Set...
- Page 9 Use condition and attentions in construction Attentions Use condition Minimum pressure………………0.05MPa(flow pressure) 1. Do not impact the product. Otherwise, failure, water leakage may occur. Maximum pressure………………0.75MPa(static pressure) 2. It is imperative to use a neutral detergent in cleaning. Other detergents than a Recommended Operating pressure…………...
- Page 10 Installstion completion figure Installstion completion figure TBW01008B2 "G Shower" 1mode Hand Shower Set TBW01031B Shower holder (Standard Type) TBW01010B2 "G Shower" 3mode Hand Shower Set (Standard Type) 38.4 Wall surface G1/2 4.2×35 Screw G1/2 L=1600 Note:The unit of the above dimensions is mm;the dimensions in ( ) are Note:The unit of the above dimensions is mm;the dimensions in ( ) are...
- Page 11 Screwdriver Wrensh Hex bar wrench beforeinstallation TBW01008B2 Installation Read carefully the instructions for construction and conduct installation Confirmation before installation according tothe main points for installation therein. Confirm that the water supply pipe is closed and the water circuit is cleaned...
- Page 12 Faucet installation Fastening screw Expansion tubes Shower support Plug cover 2. Main shower body installation ①Wind seal tape on the water inlet joint threads and then screw in the water supply connector. ②Install the main shower body onto the water inlet joint and then use screws to secure.


Need help?
Do you have a question about the TBW01008B2 and is the answer not in the manual?
Questions and answers