MidNite Solar Classic 250 Owner's Manual
Hide thumbs
Also See for Classic 250:
- Owner's manual (102 pages) ,
- Owner's manual (79 pages) ,
- Owner's manual (54 pages)
Table of Contents
Advertisement
Quick Links
For help with the Classic, Classic Lite or Classic-SL please see
our how to videos and extended documentation. Please visit
this website: www.midnitesolar.com/classic
Before calling tech support, we recommend visiting this
website for some of the most common issues.
Warning: Arc Fault protection is not turned
on by default.
(Note neither the Classic Lite
or Classic-SL haveArcFault built in)
The National Electrical Code article 690.11 requires Arc Fault Protection. The Classic has
this built in as standard equipment. This will need to be enabled if so desired.
Please Note: The Arc Fault Protection has adjustable sensitivity and may require some
tuning for your particular system to avoid nuisance tripping. Some house loads like
Table saws and well pumps and other motor loads can actually be seen on the PV circuit
in the Classic appearing similar to DC arcs. We have started with a general average we
have found to work reliably but in some cases this sensitivity level is too high causing
false Arc Fault Alarms. When the Classic goes into Arc Fault, it goes to Resting and will
not charge the batteries. Please consult the manual that came with your Classic for
enabling and or fine tuning of the Arc Fault system.
DANGER OF DEATH TO YOUR CLASSIC
Advertisement
Table of Contents

Subscribe to Our Youtube Channel
Related Manuals for MidNite Solar Classic 250


Summary of Contents for MidNite Solar Classic 250
- Page 1 For help with the Classic, Classic Lite or Classic-SL please see our how to videos and extended documentation. Please visit this website: www.midnitesolar.com/classic Before calling tech support, we recommend visiting this website for some of the most common issues. Warning: Arc Fault protection is not turned on by default.
- Page 2 Classic owner’s manual Rev I 2193 A brief explanation of all the Classic Voice menus To start: Press the MAIN MENU button repeatedly until ―CHARGE‖ is highlighted. This is the start of the Menu tree. Adjusting the volume: From the MAIN MENU, press the right arrow key 3 times to highlight MISC, then press ENTER. Press the right arrow key once to highlight MNGP and press ENTER.
- Page 3 Classic owner’s manual Rev I 2193 When the Classic is used with Wind or Hydro a Clipper type device will most likely be needed to protect against over voltage. A battery based diversion load WILL NOT keep the Classic safe from over voltage. High input voltage is recorded and over voltage is not covered under warranty.
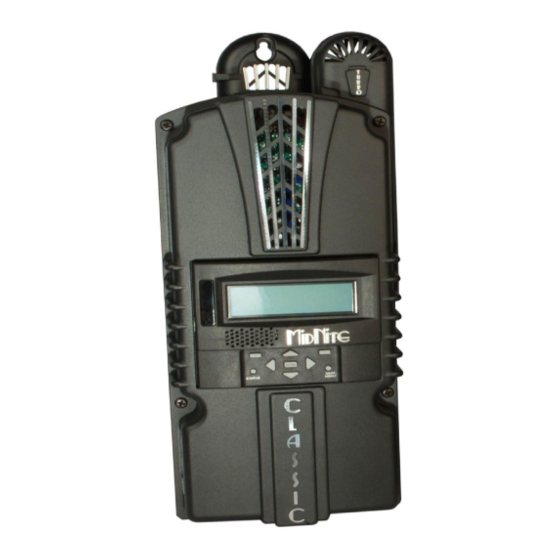
- Page 4 Classic owner’s manual Rev I 2193 Standard Classic This Manual covers models Classic 150, 200 & 250 Este manuel tambiénestádisponibleenEspañol. La versiónenEspañolpuedeencontrarseennuestrapagina web en la fichaDocumentos y hagaclicenManuales. P a g e 1 0 - 0 0 1 - 1 R E V : I...
- Page 5 Copyright ⓒ 2010 all rights reserved. MidNite Solar Inc. reserves the right to revise this document and to periodically make changes to the content hereof without obligation or organization of such revisions or changes unless required to do so by prior arrangement.
-
Page 6: Table Of Contents
Classic owner’s manual Rev I 2193 Contents Scope ..................................... 8 Introduction ................................. 8 How to KILL Your Batteries ........................... 10 Classic Power Curves ..............................11 Unpacking the Classic ............................... 13 Removing and installing the front cover on the Classic ..................14 Mounting the Classic .............................. - Page 7 Classic owner’s manual Rev I 2193 LED Modes and the ―Blinking Red LED‖ ......................32 Calibrating Battery and PV Voltage ........................33 Configuring DC Input Source ..........................33 Configuring the Classic for Wind Input Source ...................... 35 Setting the Date and Time ............................35 Configuring Auxiliary Input/Output ........................
-
Page 8: Scope
Classic is designed to regulate DC input from PV, and Approved Hydro and Wind turbines for other DC sources please contact MidNite Solar tech support. The Classic 150, 200 and 250 are designed to work with 12, 24, 36, 48, 60 and 72 volt battery banks. - Page 9 Classic owner’s manual Rev I 2193 •To use the Classic’s built in DC GFP the System's DC Negative conductor must not be bonded to earth ground. The Classic does this with its internal Ground Fault Protection circuitry. The battery negative and ground are not bonded together directly but are connected together by the Classic’s internal GFP device.
-
Page 10: How To Kill Your Batteries
Classic owner’s manual Rev I 2193 Keep plenty of fresh water and soap nearby in case battery acid contacts skin, clothing, or eyes. Wear complete eye protection. Avoid touching eyes while working near batteries. Wash your hands with soap and warm water when done. -
Page 11: Classic Power Curves
Classic owner’s manual Rev I 2193 *Trusting a State Of Charge meter, They can all get off over time and give you false readings, You need to verify specific gravity and or verify the charge voltage is being met. Never fully rely on the SOC % it is just a good quick reference Classic Power Curves Table 1... - Page 12 Classic owner’s manual Rev I 2193 Table 2 Table 3 The graphs above represent the max power output for a given input for each Classic. Using and understanding these power graphs will help maximize Classic’s output power and aid in selecting wire and breaker/disconnects.
-
Page 13: Unpacking The Classic
Classic owner’s manual Rev I 2193 For example: if you are using a Classic 250 and 48v battery bank, the maximum continuous output power based on 25 degree C ambient is 55 amps when using a PV array that yields a Maximum Power Voltage of 180 volts. -
Page 14: Removing And Installing The Front Cover On The Classic
Classic owner’s manual Rev I 2193 Removing and installing the front cover on the Classic Removing the front art deco cover is required to gain access to the wiring compartment. Be aware if this is not the first removal of this cover there is a cable connecting the cover to the electronics. -
Page 15: Mounting The Classic
The Classic is designed to be directly mounted onto the MidNite Solar E-Panel. The Classic can accommodate other installation methods as well. Mount in an upright position out of direct sunlight when possible. For your convenience the Classic has four one inch knock outs that are pre cast. -
Page 16: Alternative Mounting
Classic owner’s manual Rev I 2193 Figure 6 Install locknut here to act as a spacer. Alternative Mounting To mount the Classic to a plywood surface, use 1 1/2‖ wood screws in the top key hole slot hole and the holes in the wiring compartment. -
Page 17: Sealed Or Vented
Classic owner’s manual Rev I 2193 Sealed or Vented The Classic has the ability to be sealed for protection from salt air or dust. It comes from the factory Vented. If you live in a dusty or salt air environment you may wish to seal the Classic. Sealing the Classic does not make the unit water resistant. - Page 18 Classic owner’s manual Rev I 2193 WARNING: ALL FIRMWARE SHOULD MATCH ACROSS ALL CLASSICS WARNING: REVERSED FOLLOW ME CABLES CAN DAMAGE THE CLASSIC IF LEFT IN PLACE FOR EXTENDED PERIODS OF TIME AND WILL NOT BE CONSIDERED UNDER WARRANTY. PLEASE VERIFY THE PROPER OPERATION OF FOLLOW ME ON THE INITIAL SET UP.
- Page 19 Classic owner’s manual Rev I 2193 Addressing the Classics You can assign unique addresses to each networked Classic. This is not necessary for Follow Me to work but it is necessary if you want to view multiple Classics from a single MNGP. To address a Classic simply use the MNGP that is plugged into that Classic, or plug the MNGP into that classic and hold the Left arrow button down and tap the up or down button.
-
Page 20: Battery Temperature Sensor Installation
Classic owner’s manual Rev I 2193 Cable Clamp for network cables Battery Temp Sensor (included) USB connector Ethernet connector Figure 11 Battery Temperature Sensor Installation CAUTION - To reduce risk of injury, charge only deep-cycle lead acid, lead antimony, lead calcium, gel cell or absorbed glass mat type rechargeable batteries. - Page 21 Classic owner’s manual Rev I 2193 Figure 12 Insert BTS to the jack labeled BATTERY TEMP on the control board. Figure 13 21 | P a g e 1 0 - 0 0 1 - 1 R E V : I...
-
Page 22: Chassis Grounding
Classic owner’s manual Rev I 2193 Chassis Grounding In all installations the Classic chassis should be connected to ground. For systems with a battery breaker sized 60 amps and smaller, 10 AWG (6 mm ) copper is generally sufficient. For systems with a battery breaker sized 100 amps and smaller, 8 AWG (10 mm ) copper is required. -
Page 23: Dc Gfp (Ground Fault Protection)
Classic owner’s manual Rev I 2193 DC GFP (Ground Fault Protection) The Classic has internal ground fault protection (GFP) built in. Since 2008, the NEC requires a DC-GFP on all PV systems in the USA. The built in DC-GFP eliminates the need to purchase and install an external DC-GFP. -
Page 24: Disabling Gfp
Classic owner’s manual Rev I 2193 Disabling GFP The GFP feature should only be disabled to operate the Classic in an ungrounded power system or in systems where GFP is not required. Press Main Menu Scroll to the right or left until TWEAKS is highlighted and press ENTER ... - Page 25 Classic owner’s manual Rev I 2193 Diagram 1 Explanations 10 = Solar Modules (PV) 11 = DC Combiner (Like our MNPV6 or MNPV12 for example) 12 = MNSPD300-DC (Surge protection) 13 = MNSPD300-AC (Surge protection) 14 = MNSPD300-DC (Surge protection) 15 = DC breaker for the Inverter (Also serves as a disconnect for the Inverter) 16 = DC breaker for the PV into the Classic (Also serves as a disconnect for the Classic) 17 = DC breaker for the Battery into the Classic (Also serves as a disconnect for the Classic)
- Page 26 Classic owner’s manual Rev I 2193 Diagram 1 26 | P a g e 1 0 - 0 0 1 - 1 R E V : I...
-
Page 27: Dc Terminal Connector
The Classic limits the output current based on the model you have. The Classic current ratings are: Classic 150 - 96amps maximum Classic 200 - 79 amps maximum Classic 250 - 62 amps maximum 27 | P a g e 1 0 - 0 0 1 - 1... -
Page 28: Over Current Protection
Classic. PV runs up to 100 feet, use the Classic 150, runs up to 180 feet, use the Classic 200, or above 180 feet use the Classic 250. -
Page 29: Maximum And Minimum Wire Size
Classic owner’s manual Rev I 2193 Diagram 1 Maximum and Minimum Wire Size The Classic’s Blue DC terminal connector will accept wire from #14-#4 AWG The Classic’s Aux 1 and 2 terminal connector will accept wire up to #18 AWG 29 | P a g e 1 0 - 0 0 1 - 1... -
Page 30: Equalization Manual And Auto
Classic owner’s manual Rev I 2193 Equalization Manual and Auto Manual EQ To do a manual Equalization charge, go into the Charge menu and highlight ―EQ‖ and press ―Enter‖. Now ―EQ Stopped‖ will be highlighted. Scroll up to select ―EQ Started‖. Press the ―Status‖ button to return to the home screen. -
Page 31: Standard Classic Programming
Classic owner’s manual Rev I 2193 Standard Classic programming Commissioning the Classic (Quick Start) The Classic will enter into the Quick Set screens upon initial power up. If the Classic does not enter into the quick set or you want to restore to Factory Default follow these steps to initiate a Quick Set. ... -
Page 32: Adjusting Absorb, Equalize And Float Voltages
Classic owner’s manual Rev I 2193 will not charge the battery. If you see ―Mode is Off‖ in the bottom right corner of the display then the Mode may have been turned off. To turn the mode back ―ON‖ push the Main Menu button several times until ―Charge‖... -
Page 33: Calibrating Battery And Pv Voltage
Classic owner’s manual Rev I 2193 Blinky = basically cycles all the LEDs in a Disco fashion (Useful for Parties) LED 1 = LED activity for Warnings and Errors as well as info. A green LED on the display indicates the Classic is in Float. - Page 34 Classic owner’s manual Rev I 2193 Micro Hydro This mode is intended for use with hydro systems, but can be used with other sources as well. When the Classic first turns on after the input voltage goes above battery voltage, it will sweep from that open circuit voltage down to battery voltage, finding the maximum power point voltage (MPP Voltage).
-
Page 35: Configuring The Classic For Wind Input Source
Classic owner’s manual Rev I 2193 Dynamic This is typically used for PV (solar) input sources and tries to follow, on a slow dynamic basis, the changing conditions of the input source. This mode has one user adjustment which is a forced sweep perturb trigger interval for times when the input condition changes do not trigger a dynamic sweep. -
Page 36: Configuring Auxiliary Input/Output
Classic owner’s manual Rev I 2193 Note: If you plan to use the Local App to set the time and not the Classics Display ―Time Sync‖ in the ―Tweaks‖ menu must be disabled to prevent the MNGP (display) from over writing what the Local App does. - Page 37 Classic owner’s manual Rev I 2193 SOC % High This modewill set AUX1 to +12V according to the LOW % and HIGH % settings. HOLD (LOW) and DELAY (HIGH) activation TIMES can be set in seconds. SOC %=HIGH=12V SOC %=LOW=0.0V If the classic is set to do an auto-restart at 23:59 (midnight), the state of the AUX1 will be remembered so it will return to the last state (+12V or OFF) after it resets and comes alive again.
- Page 38 Classic owner’s manual Rev I 2193 Pv V on Low This Mode will turn Aux 1 off above a user set voltage based on the input voltage to the Classic ( V High) and turn Aux 1 on when it hits a low voltage set point (V Low). It also allows you to set a delay time in seconds the Classic will wait before turning Aux 1 off after reaching the V High set point.
- Page 39 Classic owner’s manual Rev I 2193 This mode will turn Aux 1 on when it reaches a set point based on battery voltage (V High) and turn it off at another set point based on battery voltage (V Low). It also allows you to set a delay time in seconds the Classic will wait before turning Aux 1 on after reaching the V High set point.
-
Page 40: Aux 1 Function
Classic owner’s manual Rev I 2193 This mode will cycle Aux 2 for 1 second off and 1 second on repeatedly. This mode is mostly for testing purposes. Waste Not Lo This mode is PWM based and is just reverse logic of Waste Not Hi. It would be comparable to using the NC contacts of the relay used in Waste Not Hi. -
Page 41: Aux 2 Function. Output/Input
Classic owner’s manual Rev I 2193 SOC % LOW Battery State of Charge Active LOW SOC % HIGH Battery State of Charge Active HIGH GFP TRIP HIGH Ground Fault sets AUX1 HIGH for 0.1 seconds repeatedly VENT FAN LOW Aux1 on below setpoint VENT FAN HIGH Aux1 on above setpoint FLOAT LOW... -
Page 42: Aux 1 And Aux 2 Graphs/Jumpers
Classic owner’s manual Rev I 2193 Figure 3.0 Aux 1 and Aux 2 Graphs/Jumpers Figure 3.0 shows the two Aux port terminals, with their respective Polarities. These terminals are located at the bottom of the Aux 2 Aux 1 Power board below the battery temperature jack. Use a mini RELAY/OUT IN/OUT flat head screw driver to tighten the screws. -
Page 43: Aux 1 Voltage-Time Relation (Relay/12V)
Classic owner’s manual Rev I 2193 operate at either normally open, (Active High) or normally closed (Active Low) when the Aux 1 function condition is true. For more information seeConfiguring Auxiliary Input/Output on page 36. Aux 1 Voltage-Time Relation (Relay/12v) Aux 1 Function Graph shows the relationship between voltage and time of AUX 1. - Page 44 Classic owner’s manual Rev I 2193 Setting the MNGP features Diagram 5 The Classic comes with an integrated ―MidNite Graphics Panel‖ (MNGP), which is the primary interface to the Classic. Setting up contrast, backlight and volume is simple; just follow the steps below. ...
-
Page 45: Navigating The Menu
MNGP. Since the Classic transmits power and data signals through the phone cable to the MNGP the length of the cable is limited to 100ft. MidNite Solar only offers a 3ft as an optional accessory. If you are making your own cable be sure be sure to insert cable end all the way into the phone terminal to get a good contact. -
Page 46: Arc Fault
The arc fault module has three adjustable parameters consisting of: MODE, TIME &SENSITIVITY MODE: Is assigned as a 1 from factory default and it should stay that way unless instructed by MidNite Solar. TIME: This sets the length of the arc the Classic has to monitor before tripping the Arc fault detection. -
Page 47: View Faults And Warnings
Classic owner’s manual Rev I 2193 To change the parameters of the Arc Fault, follow the steps below: Press Main Menu Scroll to the right or left until TWEAKS is highlighted and press ENTER In TWEAKS press the right soft key to get to the BITS menu ... - Page 48 Classic owner’s manual Rev I 2193 Screenshot 3 When entering the "LOGS" menu, you will see two items displayed there. The top line is lifetime kW-Hours for the Classic and below that is time spent in float today. (Note: Float, Absorb, Bulk and EQ time is also viewable in the "TIMER VU"...
- Page 49 Classic owner’s manual Rev I 2193 that the time stamp above the word TIME is the time, shown in 24 hour format, that the data was captured that day. The category of data captured is of course more suited for minute by minute capture rather than the maximum data statistics captured on a day by day basis in the DAILY log screen.
-
Page 50: Graphical Logging Display Modes
Classic owner’s manual Rev I 2193 Graphical Logging Display modes Both DAILY and HOURLY logging can also be viewed in a graphical manner. While in the text viewing log screen, pressing the Soft Right key labeled "GRAPH" will bring up this view screen. The HOURLY view is also available in the main status cycle of screens, changed by repeatedly pressing the STATUS key, just after STATUS TWO screen. - Page 51 Classic owner’s manual Rev I 2193 Screenshot 6 The Date of the particular selected cursor positioned data point is shown on the bottom middle of the graphic screen. Moving the cursor left or right using the Left and Right arrow keys, selects the next data points to the left or to the right of the present cursor position.
-
Page 52: Uploading New Firmware To The Classic
Classic owner’s manual Rev I 2193 Uploading New Firmware to the Classic The Classic has the ability to have its firmware updated with a standard USB cable and a Windows based PC. The USB cable is Standard to Mini B. Please see www.midnitesolar.com and click on the Software tab for the firmware and instructions. - Page 53 Classic owner’s manual Rev I 2193 Figure 24 2. Remove the four screws holding the front cover of the Classic charge controller. Do not let the front cover hang by the cable. Figure 25 3. Holding the front cover with one hand, place a screw in the top left hole of the front cover and screw it into the top right hole of the back casting.
- Page 54 Classic owner’s manual Rev I 2193 Figure 26 4. Use any Standard to Mini B USB cable to connect the Classic to the PC. The smaller terminal connects to the USB port on the Classic. The USB port is located on the right side of the Ethernet Jack in the lower part of the Classic.
-
Page 55: Connecting The Classic To The Internet
Classic owner’s manual Rev I 2193 Connecting the Classic to the Internet Networking The Classic supports standard 10/100-base T Ethernet networks. For Gigabit networks you will need a common network switch that is capable of mixed mode operation. The Classic may also be placed on a, b, g, or n wireless networks by using a wireless network bridge device. -
Page 56: Network Setup Through The Mngp
Access MAC Address The hardware or Ethernet address of the Classic Device ID The unique MidNite Solar address of the Classic Table 5 DHCP The Classic supports Dynamic Host Configuration Protocol (DHCP) in which all networking settings are derived from a DHCP-enabled router. This is the simplest configuration method and recommended unless you explicitly need a statically allocated IP address for your Classic. -
Page 57: Web Access
DNS server addresses of 11.22.33.44 and 11.22.33.55, respectively. Set the D1 address to 11.22.33.44 Web Access MidNite Solar will be offering a free web service with which you can access your Classic from a web page from anywhere in the world simply by pointing your favorite web browser to https://www.mymidnite2.com... -
Page 58: Local Network
Classic owner’s manual Rev I 2193 Instructions on setting up your My MidNite account can be found on the above webpage. All communications between the Classic and MidNiteSolar’s server are encrypted using a strong session- based algorithm. To respect your privacy, however, it is required that you manually enable this feature if you’d like to use it. -
Page 59: Troubleshooting / Faqs
Classic owner’s manual Rev I 2193 HyperVOC ™ HyperVOC is a unique feature the Classic has built in. HyperVOC refers to when the DC Input Voltage raises above the maximum operating voltage (150V, 200V, 250V, depending on the Classic model). HyperVOC gives you the flexibility to go up to the maximum operating voltage PLUS the nominal battery voltage. - Page 60 Classic owner’s manual Rev I 2193 WARNING: You must get the battery charging voltages from the battery manufacturer and it is VERY important you do this and do not just leave it as default settings as it is likely this will undercharge and slowly destroy your batteries WARNING: The Clock is a 24 hr clock.
- Page 61 Classic owner’s manual Rev I 2193 *Verify the charging mode is correct for the source as well as the ―Mode‖ is on Classic switches *This can be normal under low light conditions. between Resting and *Watch the input voltage, if it drops down close to battery voltage and then the Bulk MPPT repeatedly Classic goes to Resting this is usually a sign of a bad connection.
- Page 62 Classic owner’s manual Rev I 2193 Updating the firmware *Make sure the MNGP (Display) is actually plugged in using the blue display and the Classic went cable in the top jack of the main circuit board well but the MNGP will *Verify you have an MNGP and not an MNLP.
- Page 63 Classic owner’s manual Rev I 2193 display happening pretty regularly you may want to look at the size of the battery cables, Age of the battery bank or the size of the battery. Call customer service for assistance My Classic has an *This indicates the Classic is current limiting.
- Page 64 Classic owner’s manual Rev I 2193 have WBjrs for about 15 minutes longer on the absorb time this will ensure the Classic with the WBjr goes to float first. *If you are using End Amps make sure you use the Classic with the WBjr to do the sensing of End Amps.
- Page 65 Classic owner’s manual Rev I 2193 I cannot find an *Go to the C directory and find the folder labeled midnitesolar and open it. In uninstaller for the here you will find an uninstaller, simply double left click it to run it. After it is Midnite firmware complete you can delete the midnitesolar folder to completely remove any files updater?
- Page 66 Classic owner’s manual Rev I 2193 mixed up my covers on the left side of the circuit board how do I know what *You can press the status button several times and the Classic will say model Classic I have? ―Connected to Classic xxx‖...
-
Page 67: Electrical Specifications
Classic owner’s manual Rev I 2193 Electrical Specifications Model Classic150 Classic200 Classic250 Operating Volts in 150VDC 200VDC 250VDC Max Hyper VOC 150+battery 200+battery 250+battery *Battery Charge Volts 12-93 volts 12-93 volts 12-93 volts 96a at 12v battery 74a at 12v battery 60a at 12v battery **Absolute Current 94a at 24v battery... -
Page 68: Specifications Mechanical
Classic owner’s manual Rev I 2193 Specifications Mechanical Figure 28 68 | P a g e 1 0 - 0 0 1 - 1 R E V : I... -
Page 69: Default Battery Charge Set Points
MidNite network cable 3ft in Length. Regulatory Approval The MidNite Solar Classic charge controller conforms to UL 1741, Safety for Inverters, Converters, Controllers and Interconnection System Equipment for Use With Distributed Energy Resources, Second Edition, May 7, 1999 with revisions through January 28, 2010 and CAN/CSA C22.2 No. -
Page 70: Warranty
Classic owner’s manual Rev I 2193 Warranty MidNiteSolar's Classic comes with a standard 5 year warranty. We will repair or replace the Classic at no charge to the consumer during this 5 year period AppendixClassic Breaker sizing 70 | P a g e 1 0 - 0 0 1 - 1 R E V : I Table 8... - Page 71 Classic owner’s manual Rev I 2193 71 | P a g e 1 0 - 0 0 1 - 1 R E V : I...
- Page 72 Classic owner’s manual Rev I 2193 72 | P a g e 1 0 - 0 0 1 - 1 R E V : I...
- Page 73 Classic owner’s manual Rev I 2193 73 | P a g e 1 0 - 0 0 1 - 1 R E V : I...
- Page 74 Classic owner’s manual Rev I 2193 Table 9 74 | P a g e 1 0 - 0 0 1 - 1 R E V : I...
-
Page 75: Label Set From Classic
Classic owner’s manual Rev I 2193 Label Set from Classic 75 | P a g e 1 0 - 0 0 1 - 1 R E V : I... -
Page 76: Rs232 Jack Pin Out
Classic owner’s manual Rev I 2193 RS232 Jack Pin Out Figure 1. Classic RS-232 MODBUS RJ-11 PHONE JACK PINOUTS Glossary of Terms 76 | P a g e 1 0 - 0 0 1 - 1 R E V : I... - Page 77 Classic owner’s manual Rev I 2193 Absorb – Constant voltage charge stage to fill the batteries. The controller is regulating so maximum power will not be seen at this time. The Absorb timer is also counting down to the switch to Float. A-EQ-R –...
- Page 78 Classic owner’s manual Rev I 2193 Local App – Monitoring software included with the Classic for monitoring over the Local Network or Internet. MNGP – Midnite Graphical interface Panel. This is the graphical display included with the standard Classic controller. Mode –...
Need help?
Do you have a question about the Classic 250 and is the answer not in the manual?
Questions and answers