Table of Contents
Advertisement
Quick Links
Advertisement
Table of Contents

Subscribe to Our Youtube Channel
Related Manuals for MidNite Solar Hawke's Bay


Summary of Contents for MidNite Solar Hawke's Bay
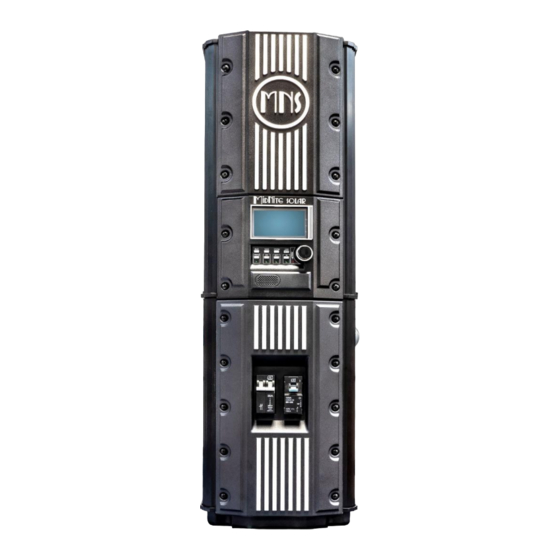
- Page 1 Hawke’s Bay Manual MidNite Solar Hawke’s Bay Owner’s Manual This entire manual is printed without color but is available for download—with many of the diagrams available in color—on our website at midnitesolar.com. 1| P a g e 1 0 - 4 2 5 - 1...
-
Page 2: Table Of Contents
Hawke’s Bay Manual Table of Contents Introduction ..........................3 Safety Instructions ......................... 4 How To KILL Your Batteries ....................7 Wiring Requirements ......................7 Installation .......................... 11 Hawke’s Bay Connections ....................12 Options Board..........................13 Bypass Switch ..........................13 Arc Fault............................. 14 Ground Fault .......................... -
Page 3: Introduction
Hawke’s Bay Manual INTRODUCTION The Hawke’s Bay charge controller regulates a DC input source from solar to properly charge a 48VDC battery bank. The Hawke’s Bay can be installed stand-alone or as a multi-unit, networked installation with any MidNite product using our latest graphical interface, the MNGP2. -
Page 4: Safety Instructions
Hawke’s Bay Manual IMPORTANT SAFETY INSTRUCTIONS SAVE THESE INSTRUCTIONS THIS MANUAL CONTAINS IMPORTANT INSTRUCTIONS FOR THE MIDNITE SOLAR HAWKE’S BAY MPPT CHARGE CONTROLLER THAT SHALL BE FOLLOWED DURING INSTALLATION AND OPERATION. If you do not fully understand any of the concepts, terminology, or hazards outlined in these instructions, please refer installation to a qualified dealer, electrician, or installer. - Page 5 Hawke’s Bay Manual SAFETY PRECAUTIONS • Over-current protection for the DC wiring is not provided as an integral part of this charge controller. Over-current protection of the DC wiring must be provided as part of the system installation. • System grounding is the responsibility of the system installer and must comply with local and national electrical codes and standards.
- Page 6 • Never smoke or allow a spark near batteries. • Never charge a frozen battery. STANDARDS The MidNite Solar Hawke’s Bay charge controller conforms to UL 1741, Safety for Inverters, Converters, Controllers and Interconnection System Equipment for Use with Distributed Energy Resources, UL 1741:2010 Ed.2+R:15Feb2018; CSA C22.2#107.1:2016 Ed.4.
-
Page 7: How To Kill Your Batteries
Hawke’s Bay Manual HOW TO KILL YOUR BATTERIES Batteries are delicate and require proper attention, especially when off-grid. Think of your batteries and solar equipment as a small nuclear power plant, hydro dam, or natural gas-fired power plant. Just like any of those, your system needs DAILY attention to ensure it is performing correctly and safely. - Page 8 Hawke’s Bay Manual (Canadian Electrical Code) for Canada provide standards for safely wiring residential and commercial installations. The NEC/CEC lists the requirements for wire size, over-current protection, and installation methods. • Do not mix AC and DC wiring in the same panel unless specifically approved/designed for both AC and DC wiring.
- Page 9 Hawke’s Bay Manual • The DC cables/wires must be color coded with colored tape or heat shrink tubing: RED for positive (+); WHITE for negative (-) if solidly grounded or BLACK if using a GFP breaker; and GREEN for DC ground. •...
- Page 10 Hawke’s Bay Manual • The DC over-current protection device must be installed on the positive DC cable. It must be correctly sized according to the size of DC cables being used, which means it is required to open before the cable reaches its maximum current carrying capability. •...
-
Page 11: Installation
Hawke’s Bay Manual temperatures on PV string voltages. DO NOT PRESENT MORE THAN 600VDC TO THE CONTROLLER!! The MPPT range of the Hawke’s Bay is 185V – 550VDC. Page 39 shows an ambient temp chart to help size the PV string voltage. EXAMPLE - Assume the coldest weather in your locale is -4F. -
Page 12: Hawke's Bay Connections
Hawke’s Bay Manual • The Hawke’s Bay weighs 23 pounds. The optional Hawke’s Bay Breaker Box weighs 12 pounds. The mounting surface and hardware must be capable of supporting at least twice the weight of these components. • Mount at least 2’ from any flammable or combustible fluid or components (i.e., paper, cloth, plastic, etc.) that may be ignited by heat, sparks, or flames. -
Page 13: Options Board
Hawke’s Bay Manual Terminal Block #4 - AUX 1 and AUX 2 circuits; Battery Voltage Sense circuit; and Whiz Bang Jr, current-sense device. Use #22 AWG wire. Terminal Block #5 - Connect the DC input (PV) wires and the Battery Bank wires here. From left-to-right: PV+ / PV- / Batt - / Batt+. -
Page 14: Arc Fault
Hawke’s Bay Manual AF/GF Sub-board (Figure 6) LEDs on the sub-board indicate: • After boot-up (power on), D2 (green) should flash to indicate device is ready and working. • If D6 (red) is flashing slowly, the device is either defective or coils aren't plugged in. •... -
Page 15: Ground Fault
Hawke’s Bay Manual Activating Arc Fault: 1. Go to MPPT Config, then to External Sensors. 2. Go to AF, then ENABLE. Ground Fault Since 2008 the NEC requires a DC Ground Fault (GF) Figure 9 Protection device on all PV systems to indicate when a GF condition exists. -
Page 16: Battery Temperature Sensor
Hawke’s Bay Manual 2. Align pins of sub-board to Option Board’s receptacle, and 3. Align plastic support rod on Options Board to associated hole in sub-board. 4. Gently seat pins into receptacle and the plastic support through the hole. Connecting the RSS toroid to the Options Board: 1. -
Page 17: Whiz Bang Jr
Hawke’s Bay Manual 2. Pick a battery in the middle of your battery bank. About halfway up the side of the selected battery case, clean that area, remove the protective tape, and affix the BTS sensor to the battery wall. For double-wall battery construction, consult the battery manufacturer for BTS sensor placement. -
Page 18: Battery Sense Circuit
Hawke’s Bay Manual a. Absorb Time – Calculate the normal Absorb time then add one hour. This will ensure that enough time is allowed for Ending Amps to be achieved. – Ending Amps Usually 1 – 3% of batt bank Ah capacity. –... -
Page 19: Energizing The Hawke's Bay
Hawke’s Bay Manual BATTERY (Figure 17) • Connect #2 AWG Batt+ and Batt- cables to the terminal block. • If using fine stranded cable, crimp a ferrule onto the cables ends, then insert into the terminal block and torque. Otherwise, insert bare wire into the terminal block. •... -
Page 20: Operation
Hawke’s Bay Manual • Program per your battery specifications. Step #3 – PV • Connect or turn on the DC input (PV combiner – ON). • Voltmeter – Measure for PV (open-circuit) voltage between PV+ breaker (at the bottom terminal) and PV- terminal (inside the Hawke’s Bay). o PV voltage (Voc, open-circuit voltage) present? ▪... -
Page 21: Battery Charge Stages
Hawke’s Bay Manual • During the naming process, the MNGP2 Back button means “Go Back,” and the User button means “Go forward.” • Device Naming – Setup/MPPT Config/Set Name. • System Naming – User/System Name • To change battery chemistry – perform a factory restore … Setup/MPPT Config/Reset to Defaults. - Page 22 Hawke’s Bay Manual Cycle, and because the Absorb voltage is held at a constant value, the current into the batteries will decrease as the batteries fill up. The Absorb cycle commonly commences on most flooded or sealed batteries when the battery is 75% full (+/-). •...
-
Page 23: Advanced Settings And Concepts
Hawke’s Bay Manual FET (Field Effect Transistor) temperature reaches 75C, the Hawke’s Bay will reduce its current output on a sliding scale relative to the FET temperature. Or when the current-limit setpoint is reached, the controller will reduce its current output. DC Input Modes •... -
Page 24: Hawke's Bay Programming
Hawke’s Bay Manual absence of specifications from your battery manufacturer, use 1 – 3% of the total bank amp-hour capacity for ending amps. • Re-Bulk - Forces Hawke’s Bay back to the Bulk charge cycle. When the battery voltage drops 1/10V below the Re-bulk setpoint for 90 seconds, the Hawke’s Bay then goes back into Bulk Mode. - Page 25 Hawke’s Bay Manual Quiet Time Disable = Talks 24 hours a day. Quiet Time Enable = Has Start Quiet and End Quiet time settings. When activated, Voice will be silenced between the times listed during a 24-hour period. • Saving Alert: OFF/ON •...
- Page 26 Hawke’s Bay Manual • Master Whizbang Jr. – If using multiple CANBUS-connected MidNite devices, this tells the system which one is connected to the WBJr. o Battery – Only one WBJr in system monitoring current to/from the battery bank. o Additive – If more than one WBJr in the system, the SOC% readings are amalgamated.
- Page 27 Hawke’s Bay Manual • External Sensors o WBJr ▪ Disabled ▪ Battery – Device connected to WBJr, shared throughout System. o Arc Fault – Disabled / Enabled o Ground Fault – Disabled / Enabled • Charge Timers – Displays count-down timers for Absorb and EQ; count-up timer for Float (Time in Float).
-
Page 28: Auxiliary Modes
Hawke’s Bay Manual AUXILIARY MODES The Hawke’s Bay offers three Auxiliary terminals to be used as a nominal DC trigger voltage source to activate a relay that in turn connects DC accessories (battery vent fan, diversion loads, lights) to the battery bank or an AC relay to break an inverter’s AC output or some other AC source wire. - Page 29 Hawke’s Bay Manual MODE ON / OFF When ON (OFF)? When OFF (ON)? SOC % Low SOC % SOC % (Timer till OFF) (Timer till ON) SOC % High SOC % SOC % (Timer till ON) (Timer till OFF) GFP Trip High GFP Fault (Until fault cleared)
-
Page 30: Firmware Update
Hawke’s Bay Manual FIRMWARE UPDATE 1. Download to your cell phone the Hawke’s Bay firmware (FW) from the MidNite Solar website using this link … https://www.midnitesolar.com/firmwareIndex.php 2. Install the FW on your phone. 3. Energize the Hawke’s Bay by closing the battery breaker. -
Page 31: Troubleshooting
Hawke’s Bay Manual TROUBLESHOOTING No Power Out - Resting Resting means the Hawke’s Bay is not in Bulk, Absorb, Float, or Equalization charging modes. If the PV input is absent or the PV voltage is too low, the Hawke’s Bay will remain in Resting. Check that the Mode is ON. - Page 32 Hawke’s Bay Manual Low PV Voltage As explained earlier, the Hawke’s Bay needs the PV Voc input to be at least 240V to perform MPPT operations. If the Voc is lower than that, the Hawke’s Bay may rest. How are your panels wired? If all the panels in your array are wired in parallel, the Hawke’s Bay sees the voltage of a single panel.
- Page 33 Hawke’s Bay Manual • Battery voltage needs to be 29V or higher for the Hawke’s Bay to power up. If less than 29V, charge the battery bank using external source of power. Ground Fault Ground Fault means one of the current-carrying conductors (positive or negative) is in contact with earth ground.
-
Page 34: Technical Drawings & Specifications
Hawke’s Bay Manual 34| P a g e 1 0 - 4 2 5 - 1 R E V : - F W : X X X... - Page 35 Hawke’s Bay Manual 35| P a g e 1 0 - 4 2 5 - 1 R E V : - F W : X X X...
- Page 36 Hawke’s Bay Manual 36| P a g e 1 0 - 4 2 5 - 1 R E V : - F W : X X X...
-
Page 37: Warranty
Those components are warranted by the original manufacturer. At its option, MidNite Solar will repair or replace at no charge any MidNite product that proves to be defective within such warranty period. This warranty shall not apply if the MidNite Solar... - Page 38 DISCLAIMER Unless specifically agreed to in writing, MidNite Solar Inc.: (a) Makes no warranty as to the accuracy, sufficiency, or suitability of any technical or other information provided in its manuals or other documentation; (b) Assumes no responsibility or liability for loss or damage whether direct, indirect, consequential, or incidental, which might arise out of use of such information.
-
Page 39: Pv Voltage Correction Factors
Hawke’s Bay Manual PV Voltage Correction Factors Ambient Temp / C Factor Ambient Temp / F 24 to 20 1.02 76 to 68 19 to 15 1.04 67 to 59 14 to 10 1.06 58 to 50 9 to 5 1.08 49 to 41 4 to 0...
Need help?
Do you have a question about the Hawke's Bay and is the answer not in the manual?
Questions and answers