Advertisement
Quick Links
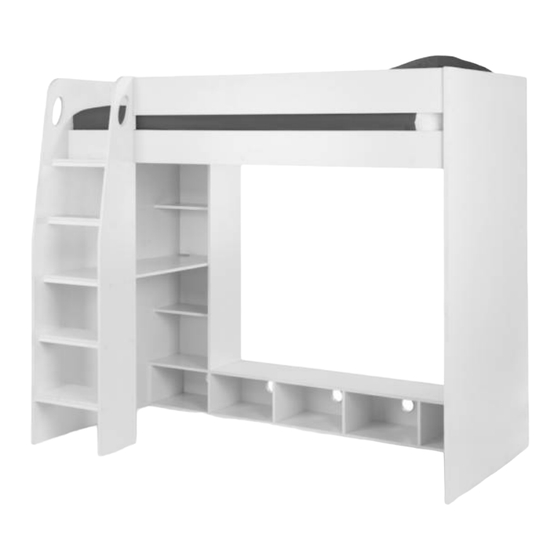
Nebula Gaming Wooden High Sleeper Bed
Important before assembly:
Read these instructions carefully before assembling or using the product.
Please check the contents of the boxes before attempting to assemble this product. The instructions will
have a checklist of parts and fittings.
It would be sensible to lay a rug or a carpet on the floor where you intend to assemble the product, to avoid
scratches and damaging the product or the floor.
Assemble the product as close to its intended final location/room as possible.
Do NOT use any power tools as this may damage the frame.
Health & Safety:
This product or some parts of this product will be heavy. Please use an assistant when lifting.
Please keep small parts out of reach of children.
Always use on a level, even surface.
DO NOT jump on the product or any of its parts.
DO NOT use this product if any parts are missing, damaged or worn.
DO NOT use this product unless all fixings are secured.
Please keep these instructions for future reference.
Assembly Instructions
Title of Product
.
.
www.happybeds.co.uk
Advertisement

Related Manuals for Happybeds Nebula


Summary of Contents for Happybeds Nebula
- Page 1 Assembly Instructions Title of Product Nebula Gaming Wooden High Sleeper Bed Important before assembly: Read these instructions carefully before assembling or using the product. Please check the contents of the boxes before attempting to assemble this product. The instructions will have a checklist of parts and fittings.
- Page 2 Never drag or push the pieces across a hard or stone floor as this will cause damage to the joints. Use a carpet or a rug for extra care. If you have problems assembling or have damaged or missing pieces, please contact us by visiting: https://www.happybeds.co.uk/customer-service...
- Page 3 Please check all hardware matches the list below. Should you notice any are missing please contact your retailer. Cam Stud Contractfix Dowel M8 x 25mm M5 x 40mm 25PCS 37PCS 12PCS 75PCS 8PCS M4 x 45mm M4 x 22mm M6 x 13mm PVC Back Support M6 Round Nut 6PCS...
- Page 4 Please check all hardware matches the list below. Should you notice any are missing please contact your retailer. Felt Pads 7PCS 2PCS 24PCS Sticker Hole Plug 10mm 34PCS 2PCS Circle Stopper PVC Cap 5PCS 1PCS We strongly advise that you do not use Power Tools, such as drills or electric screwdrivers during the assembly as this may cause irreparable damage and will invalidate your warranty.
- Page 5 LVL Slats x15 PARTS Please ensure you carefully check all the pieces, should you have any concerns please contact the retailer before assembly commences. Please have your order number, details of the issue, the product code, and the batch number from the cartons as this will help us to resolve your issue much faster.
- Page 6 IMPORTANT INFORMATION WARNING - High Beds and the upper bed of bunk beds are not suitable for children under six years due to the risk of injury from falls. WARNING - Bunk beds and high beds can present a serious risk of injury from strangulation if not used correctly.
-
Page 7: Safety Advice
Safety Advice Please take the time to carefully read through the whole of these instructions before you commence. Keep these instructions for future reference. Unpack, inspect and check off all of the contents. Please dispose of all packaging safely. Small component parts could choke a child if swallowed. We strongly recommend that you keep children well away from the work area. -
Page 8: Assembly Advice
ASSEMBLY ADVICE Please take the time to carefully read through these instructions before you commence. Keep these instructions for future reference. We advise that the product is assembled in the room it is intended for. We advise that you keep the hardware in a bowl during assembly to avoid losing anything. - Page 9 WHEN FITTING CAMS A x 6 ENSURE STARTING POSITION IS CORRECT BEFORE YOU INSERT CONNECTING BOLT TURN CLOCKWISE UNTIL SECURE B x 6 D x 24 WRONG CORRECT Page : 9 of 31...
- Page 10 F x 6 V x 5 Page : 10 of 31...
- Page 11 E x 8 U x 10 Page : 11 of 31...
- Page 12 WHEN FITTING CAMS A x 10 ENSURE STARTING POSITION IS CORRECT BEFORE YOU INSERT CONNECTING BOLT TURN CLOCKWISE UNTIL SECURE B x 6 C x 6 WRONG CORRECT D x 8 J x 6 Page : 12 of 31...
- Page 13 X x 11 Page : 13 of 31...
- Page 14 WHEN FITTING CAMS A x 8 ENSURE STARTING POSITION IS CORRECT BEFORE YOU INSERT CONNECTING BOLT TURN CLOCKWISE UNTIL SECURE B x 19 D x 35 WRONG CORRECT Page : 14 of 31...
- Page 15 Front Front Front Page : 15 of 31...
- Page 16 with Edging Page : 16 of 31...
- Page 17 Page : 17 of 31...
- Page 18 U x 8 A x 1 Page : 18 of 31...
- Page 19 Q x 1 Page : 19 of 31...
- Page 20 M x 20 W x 1 Page : 20 of 31...
- Page 21 WHEN FITTING CAMS B x 6 ENSURE STARTING POSITION IS CORRECT BEFORE YOU INSERT CONNECTING BOLT TURN CLOCKWISE UNTIL SECURE C x 6 D x 8 WRONG CORRECT J x 6 Page : 21 of 31...
- Page 22 U x 6 X x 11 Page : 22 of 31...
- Page 23 K x 4 L x 4 N x 2 Page : 23 of 31...
- Page 24 N x 3 S x 3 Y x 1 K x 4 L x 4 Page : 24 of 31...
- Page 25 G x 6 H x 6 Q x 1 Page : 25 of 31...
- Page 26 J x 4 L x 4 J x 2 L x 2 Page : 26 of 31...
- Page 27 N x 5 S x 3 Y x 1 P x 30 LVL Slats x15 Page : 27 of 31...
- Page 28 J x 4 L x 4 R x 2 S x 1 Page : 28 of 31...
- Page 29 X x 4 X x 6 Page : 29 of 31...
- Page 30 Page : 30 of 31...
-
Page 31: General Care And Maintenance
If this is not adhered to, it could result in failure to the product that will invalidate the warranty. For more information on cleaning and product care visit: https://www.happybeds.co.uk/help-and-advice Notes We’ve tried to make this product as easy to assemble as possible. In the unlikely event that...
Need help?
Do you have a question about the Nebula and is the answer not in the manual?
Questions and answers