Table of Contents

Subscribe to Our Youtube Channel
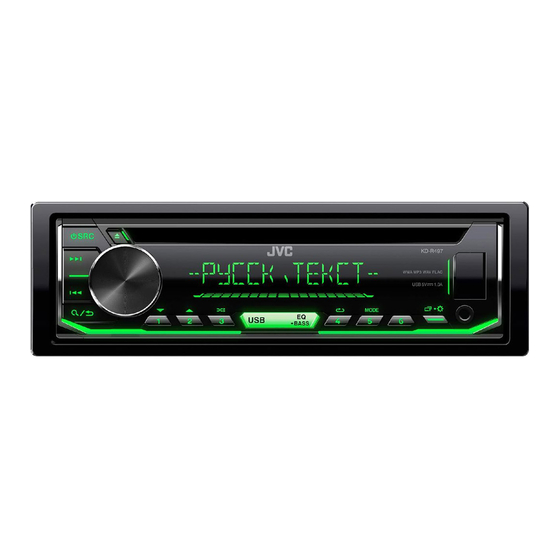
Related Manuals for JVC KENWOOD KD-R497


Summary of Contents for JVC KENWOOD KD-R497
- Page 1 РУCCKИЙ KD-R497 CD-PECИBEP ИHCTPУKЦИЯ ПO ЭKCПЛУATAЦИИ B5A-2122-00 [Q] JS_JVC_KD_R497_Q_C.indd 1 JS_JVC_KD_R497_Q_C.indd 1 7/10/2017 9:39:32 AM 7/10/2017 9:39:32 AM Data Size: B6L (182 mm x 128 mm) Book Size: B6L (182 mm x 128 mm)
- Page 2 Deste modo, a JVCKENWOOD declara que o лазерные лучи класса 1. Это означает, что в устройстве используются лазерные лучи слабой l’équipement radio « KD-R497 » est conforme à la equipamento de rádio “KD-R497” está em интенсивности. Они не представляют опасности и не распространяют опасную радиацию...
- Page 3 Härmed försäkrar JVCKENWOOD att Herved erklærer JVCKENWOOD, at radioudstyret Šiuo JVCKENWOOD pažymi, kad radijo įranga С настоящото JVCKENWOOD декларира, radioutrustningen “KD-R497” är i enlighet med “KD-R497” er i overensstemmelse med Direktiv „KD-R497“ atitinka 2014/53/EB direktyvos че радиооборудването на “KD-R497” е в...
-
Page 4: Table Of Contents
CONTENTS BEFORE USE BEFORE USE IMPORTANT • To ensure proper use, please read through this manual before using this product. It is especially important BASICS that you read and observe Warning and Caution in this manual. • Please keep the manual in a safe and accessible place for future reference. GETTING STARTED 1 Cancel the demonstration WARNING... -
Page 5: Basics
BASICS Faceplate Attach Volume knob Loading slot Detach How to reset Display window Detach button Your preset adjustments will be erased except stored radio stations. On the faceplate Turn on the power Press • Press and hold to turn off the power. Adjust the volume Turn the volume knob. -
Page 6: Getting Started
GETTING STARTED Set the basic settings Press and hold Turn the volume knob to select an item (see the following table), then press the knob. Repeat step until the desired item is selected or activated. Press to exit. Cancel the demonstration To return to the previous setting item, press When you turn on the power (or after you reset the unit), the display Default: XX... -
Page 7: Radio
RADIO GETTING STARTED CLOCK TIME SYNC ON: The clock time is automatically set using the Clock Time (CT) data in FM Radio Data System signal. ; OFF: Cancels. CLOCK DISPLAY ON: The clock time is shown on the display even when the unit is turned off. ; OFF: Cancels. “STEREO”... - Page 8 RADIO IF BAND AUTO: Increases the tuner selectivity to reduce interference noises Other settings from adjacent FM/FM-LO stations. (Stereo effect may be lost.) ; Press and hold WIDE: Subjects to interference noises from adjacent FM/FM-LO stations, Turn the volume knob to select an item (see the following table), but sound quality will not be degraded and the stereo effect will remain.
-
Page 9: Cd/Usb/Android
CD/USB/ANDROID Start playback The source changes automatically and playback starts. Label side Eject disc To directly select USB/ANDROID source, press USB. On the faceplate Reverse/ Press and hold Fast-forward * USB input terminal Select a track/file Press Select a folder * Press Repeat play * Press... - Page 10 CD/USB/ANDROID Select control mode Select a file from a folder/list While in ANDROID source, press repeatedly. For ANDROID, applicable only when [AUTO MODE] is selected. : Control Android device from this unit via JVC MUSIC PLAY AUTO MODE Press application installed in the Android device. Turn the volume knob to select a folder/list, then press the knob.
-
Page 11: Aux
AUDIO SETTINGS Use a portable audio player Connect a portable audio player (commercially available). 3.5 mm stereo mini plug with “L” shaped connector (commercially available) Portable audio player Select a preset equalizer directly Press repeatedly. Auxiliary input jack (or) Press , then turn the volume knob within 5 seconds. Select [ON] for [BUILT-IN AUX] in [SOURCE SELECT]. - Page 12 AUDIO SETTINGS Default: XX AUDIO CONTROL EQ SETTING BASS BOOST LEVEL +01 to LEVEL +05 (LEVEL +01): Selects your preferred bass boost level. ; OFF: Cancels. PRESET EQ Select a preset equalizer suitable to the music genre. • Select [USER] to use the settings made in [EASY EQ] or [PRO EQ]. LOUDNESS LEVEL 01/LEVEL 02: Boosts low or high frequencies to produce a FLAT/DRVN 3/DRVN 2/DRVN 1/HARD ROCK/HIP HOP/JAZZ/POP/R&B/...
- Page 13 AUDIO SETTINGS Connection via speaker leads VOLUME ADJUST LEVEL –15 to LEVEL +06 (LEVEL 00): Preset the initial volume level of each source (compared to the FM volume level). Before adjustment, For connections without using an external amplifier. However, with this select the source you want to adjust. (“VOL ADJ FIX” appears if FM is settings you can also enjoy the subwoofer output.
-
Page 14: Display Settings
DISPLAY SETTINGS BRIGHTNESS Set the brightness for day and night separately. 1 DAY/NIGHT: Select day or night. 2 Select a zone. (See the illustration.) 3 LEVEL 00 to LEVEL 31: Set the brightness level. TEXT SCROLL * SCROLL ONCE: Scrolls the display information once. ; SCROLL AUTO: Repeats scrolling at 5-second intervals. ;... -
Page 15: References
REFERENCES Maintenance Playable files • Playable audio file: Cleaning the unit For disc: MP3 (.mp3), WMA (.wma) Wipe off dirt on the faceplate with a dry silicone or soft cloth. For USB mass storage class device: MP3 (.mp3), WMA (.wma), WAV (.wav), FLAC (.flac) •... -
Page 16: Troubleshooting
TROUBLESHOOTING REFERENCES Change the display information Symptom Remedy Each time you press , the display information changes. Sound cannot be heard. • Adjust the volume to the optimum level. • If the information is unavailable or not recorded, “NO TEXT”, “NO NAME”, or other •... -
Page 17: Installation/Connection
INSTALLATION/CONNECTION TROUBLESHOOTING Warning Symptom Remedy • The unit can only be used with a 12 V DC power supply, negative ground. Correct characters are not • This unit can only display uppercase letters, numbers, and a • Disconnect the battery’s negative terminal before wiring and mounting. displayed. - Page 18 INSTALLATION/CONNECTION Part list for installation Installing the unit (in-dash mounting) (A) Faceplate (B) Trim plate Do the required wiring. ( 17) (C) Mounting sleeve (D) Wiring harness Hook on the top side Orientate the trim Dashboard of plate as illustrated your car before fitting.
- Page 19 INSTALLATION/CONNECTION Wiring connection When connecting to an external amplifier, connect its ground wire to the car’s chassis to avoid damaging the unit. Rear/subwoofer output Fuse (10 A) Antenna terminal Connecting the ISO connectors on some Yellow (Battery wire) Light blue/yellow VW/Audi or Opel (Vauxhall) automobiles To the steering wheel remote control adapter (Steering remote You may need to modify the wiring of the supplied...
-
Page 20: Specifications
SPECIFICATIONS Subject to change without notice. Frequency Range 87.5 MHz — 108.0 MHz (50 kHz step) USB Standard USB 1.1, USB 2.0 (Full speed) FM-LO 65.0 MHz — 74.0 MHz (30 kHz step) Compatible Devices Mass storage class Usable Sensitivity (S/N = 26 dB) 0.71 μV/75 Ω File System FAT12/16/32 Quieting Sensitivity 2.0 μV/75 Ω Maximum Supply Current DC 5 V ... - Page 21 SPECIFICATIONS Operating Voltage 14.4 V (10.5 V — 16 V allowable) Maximum Current Consumption 10 A Operating Temperature Range –10°C — +60°C Installation Size (W × H × D) 182 mm × 53 mm × 158 mm Net Weight (includes Trimplate, 1.2 k Mounting Sleeve) ENGLISH Data Size: B6L (182 mm x 128 mm) JS_JVC_KD_R497_Q_EN_2.indd 19 JS_JVC_KD_R497_Q_EN_2.indd 19 7/17/2017 3:26:29 PM 7/17/2017 3:26:29 PM Book Size:...
- Page 22 HOWEVER CAUSED AND ON ANY THEORY OF LIABILITY, WHETHER IN CONTRACT, STRICT LIABILITY, OR TORT (INCLUDING NEGLIGENCE OR OTHERWISE) ARISING IN ANY WAY OUT OF THE USE OF THIS SOFTWARE, EVEN IF ADVISED OF THE POSSIBILITY OF SUCH DAMAGE. © 2017 JVC KENWOOD Corporation 0817DTSMDTJEIN JS_JVC_KD_R497_Q_C.indd iii JS_JVC_KD_R497_Q_C.indd iii...
Need help?
Do you have a question about the KD-R497 and is the answer not in the manual?
Questions and answers