Table of Contents
Advertisement
Quick Links
Advertisement
Table of Contents

Related Manuals for Perfect Aire 1PDP60


Summary of Contents for Perfect Aire 1PDP60
- Page 1 OWNER’S MANUAL & INSTALLATION MANUAL Dehumidifier Model 1PDP60...
-
Page 2: Table Of Contents
IMPORTANT NOTE: Read this manual carefully before installing or operating your new machine. Make sure to save this manual for future reference. CONTENTS Safety Precautions Safety Precautions ........................Preparation Part Identification ........................Design Notice ..........................Positioning the Unit ........................When Using the Unit ........................Accessories .......................... -
Page 3: Safety Precautions
SAFETY PRECAUTIONS Read the Safety Precautions Before Operation and Installation To prevent death or injury to the user or other people and property damage. The following instructions must be followed. Incorrect operation due to ignoring of instructions may cause death, harm or damage. WARNING CAUTION This symbol indicates the possibility of personal... - Page 4 SAFETY PRECAUTIONS CONTINUED CAUTION • This appliance can be used by children aged from 8 years and above and a person with reduced physical, sensory or mental capabilities. The appliance can also be used by an individual who lacks experience and knowledge if they have been given supervision or instruction concerning use of the appliance in a safe way and understand the hazards involved.
- Page 5 SAFETY PRECAUTIONS CONTINUED • Ensure the unit is properly grounded. To minimize shock and fire hazards, proper grounding is important. The power cord is equipped with a three-pronged grounding plug for protection against shock hazards. • Your unit must be used in a properly grounded wall receptacle. If the wall receptacle you intend to use is not adequately grounded or protected by a time delay fuse or circuit breaker (please refer to the nameplate for the electrical data), and have a qualified electrician install the proper receptacle.
- Page 6 SAFETY PRECAUTIONS CONTINUED WARNING for Using R32/R290 Refrigerant • Do not use means to accelerate the defrosting process or to clean, other than those recommended by the manufacturer. • The appliance should be stored in a room without continuously operating ignition sources (for example: open flames, an operating gas appliance or an operating electric heater).
- Page 7 SAFETY PRECAUTIONS CONTINUED Transport of equipment containing flammable refrigerants. See transport regulations. Marking of equipment using signs. See local regulations. Disposal of equipment using flammable refrigerants. See national regulations. Storage of equipment/appliances. The storage of equipment should be in accordance with the manufacturer’s instructions.
- Page 8 SAFETY PRECAUTIONS CONTINUED Checks to the refrigeration equipment When changing electrical components, please ensure that they suitable for that purpose and to the correct specifi cation. At all times, the manufacturer’s maintenance and service guidelines should be followed. If in doubt, consult the manufacturer’s technical department for assistance. The following checks should be applied to installations using fl ammable refrigerants: •...
- Page 9 SAFETY PRECAUTIONS CONTINUED Repair to intrinsically safe components Do not apply any permanent inductive or capacitance loads to the circuit without ensuring that this will not exceed the permissible voltage and current permitted for the equipment in use. Intrinsically safe components are the only types that can be worked on while live in the presence of a flammable atmosphere.
- Page 10 SAFETY PRECAUTIONS CONTINUED Charging procedures In addition to conventional charging procedures, the following requirements should be followed. Ensure that contamination of different refrigerants does not occur when using charging equipment. Hoses or lines should be as short as possible to minimize the amount of refrigerant contained in them. Cylinders should be kept upright.
- Page 11 SAFETY PRECAUTIONS CONTINUED Recovery When removing refrigerant from a system, either for servicing or decommissioning, it is recommended good practice that all refrigerants are removed safely. When transferring refrigerant into cylinders, ensure that only appropriate refrigerant recovery cylinders are employed. Ensure that the correct number of cylinders for holding the total system charge is available.
-
Page 12: Preparation
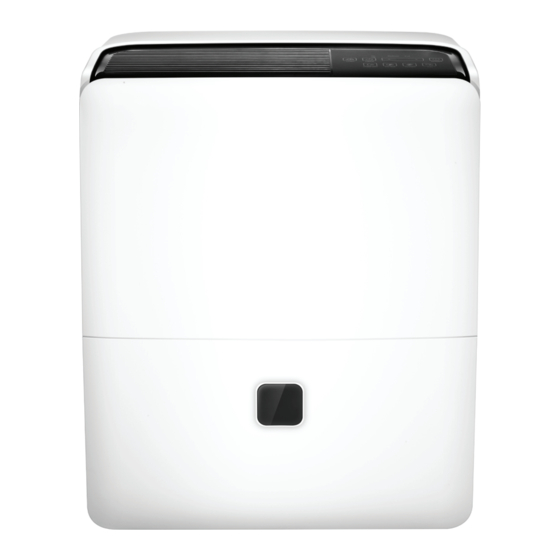
PREPARATION Identifi cation of Parts All the illustrations in the manual are for explanation purpose only. Your machine may be slightly diff erent. Air outlet grille Control panel Air Filter Handle (both sides) Continuous drain hose outlet Panel Power cord buckle (placed in the water bucket, used only when storing the unit) Water level window Pump drain hose outlet (some models... -
Page 13: Positioning The Unit
PREPARATION CONTINUED Positioning the unit 16" or more 8" or more 8" or more 8" or more 16" or more Casters (At four points on the bottom of unit) • Casters can move freely. • Do not force casters to move over carpet, nor move the unit with water in the bucket. (The unit may tip over and spill water.) A dehumidifier operating in a basement will have little or no effect in drying an adjacent enclosed storage area, such as a closet, unless there is adequate circulation of air in and out of the area. -
Page 14: When Using The Unit
PREPARATION CONTINUED When using the unit • When fi rst using the dehumidifi er, operate the unit continuously for 24 hours. Make sure the plastic cover on the continuous drain hose outlet is installed properly, so there are no leaks. •... -
Page 15: Operating Instructions
OPERATING INSTRUCTIONS Control Panel Features Defrost Full Note The following control panel is for explanation purposes only. The control panel of the unit you purchased may be CONTD. TIMER POWER slightly diff erent according to the models. Your machine may not contain some indicators or buttons. The actual shape shall prevail. - Page 16 OPERATING INSTRUCTIONS CONTINUED COMFORT Button (on some models) Press to activate the comfort dehumidifying operation. Note On this operation, the unit cannot be set for humidity level. For some models, under comfort dehumidifying operation, pressing the Up/Down button will cancel this feature. DRYER Button (on some models) Press to activate the dryer operation.
-
Page 17: Other Features
OPERATING INSTRUCTIONS CONTINUED OTHER FEATURES BUCKET FULL LIGHT SETTING THE TIMER Glows when the bucket is ready to be emptied. • When the unit is on, first press the Timer button, the Timer Off indicator light illuminates. It indicates AUTO DEFROST the Auto Stop program is initiated. -
Page 18: Removing The Collected Water
OPERATING INSTRUCTIONS CONTINUED Removing The Collected Water Pull out the bucket a little. There are three ways to remove collected water. 1. Use the Bucket • When the unit is off , if the bucket is full, the Full indicator light will illuminate. •... - Page 19 OPERATING INSTRUCTIONS CONTINUED 2. Continuous Draining Note • Water can be automatically emptied into a fl oor When the continuous draining feature is not drain by attaching a 5/16" water hose with being used, remove the drain hose from the a 1"...
- Page 20 OPERATING INSTRUCTIONS CONTINUED 3. Pump Draining (on some models) Please turn off the unit and disconnect the power cord out. Check the following things: • Water can be automatically emptied into a fl oor • Cleaning the fi lter of the pump. drain or a suitable drainage facility by attaching •...
-
Page 21: Care And Maintenance
CARE AND MAINTENANCE Cleaning the Air Filter Note • Remove the fi lter every two weeks based on normal Turn the dehumidifi er off and remove the plug operating conditions. from the wall outlet before cleaning. • To remove the fi lter, pull fi lter outwards. •... - Page 22 Safety Precautions TROUBLESHOOTING Continued Problem What to Check Unit does not start Make sure the dehumidifier is plugged completely into the outlet. Check the house fuse/circuit breaker box. Dehumidifier has reached its preset level, or the bucket is full. Water bucket is not in the proper position.switched on to protect the compressor. Dehumidifier does not dry the air Did not allow enough time to remove the moisture.
- Page 23 The design and specifications are subject to change without prior notice for product improvement. Consult with the sales agency or manufacturer for details. Any updates to the manual will be uploaded to the service website, please check for the latest version.
- Page 24 Perfect Aire, LLC 5401 Dansher Road Countryside, IL 60625 1020_M516 844-4PA-AIRE | 844-472-2473 www.perfectaire.us Printed in China...
Need help?
Do you have a question about the 1PDP60 and is the answer not in the manual?
Questions and answers