Table of Contents
Advertisement
Quick Links
Advertisement
Table of Contents

Related Manuals for Polyprint PreTreater Pro


Summary of Contents for Polyprint PreTreater Pro
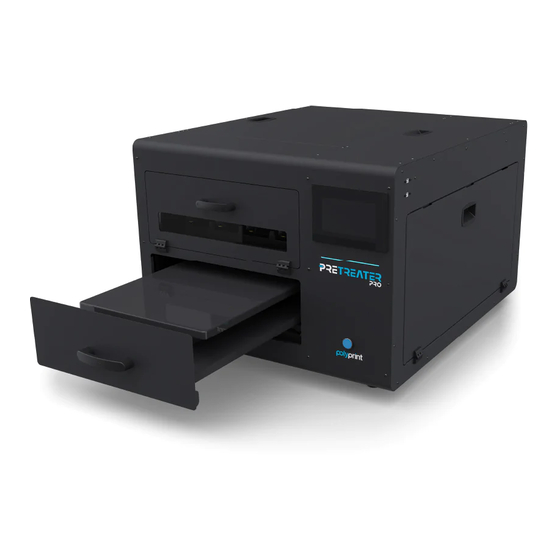
- Page 1 WWW.POLYPRINTDTG.COM...
-
Page 2: Table Of Contents
TABLE TABLE OF CONTENTS OF CONTENTS Before we start p.01 Unboxing p.01 Items contained in the box p.03 Prepare the PRETREATER PRO p.04 Liquid Installation p.05 Tank Filling Procedure p.07 Tank Replacement p.09 Power ON for the first time p.11 Initial Liquid Charge p.13... -
Page 4: Before We Start
PRETREATER PRO Before you start HUMIDITY In case an official Polyprint Stand is not purchased, pre- pare a flat, stable surface with dimensions of at least 670 x 790 mm. The surface should TEMPERATURE be capable of supporting more than 130kg. - Page 5 INSTALLATION GUIDE STEP 2 Then remove the protective styrofoam sheets. Fig.3: Unboxing. STEP 3 Continue with removing the side carton cover. Fig.4: Unboxing. Warning: The product is 104Kg and requires at least 4 people to lift it. • Always carry the device from the bottom. Never lift it utilizing the drawer handle, nor the Nozzle Access Cover.
-
Page 6: Items Contained In The Box
Caution: • Place this product on a flat, stable surface. The surface, if not a Polyprint stand, should be at least 670 x 790 mm and capable of supporting more than 130kg. • This product will not operate properly if it is tilted or in an angle. -
Page 7: Prepare The Pretreater Pro
INSTALLATION GUIDE Fig.5: Items in the box. Prepare the PRETREATER PRO 1. Remove the blue security tapes from the PreTreater Pro covers. 2. Open the Nozzle Access Cover. 3. Remove the yellow safety bar from the Nozzle Carriage. 4. Open the drawer and check that the table is properly placed on it. -
Page 8: Liquid Installation
PRETREATER PRO Liquid Installation STEP 1 Open the Tank Access Cover to gain access to the Tank Storage Compartment. Fig.8: Tank Storage Comparment. STEP 2 There are 4 empty tanks in the slots L1, L2, CL, and MT. You can fill the empty tanks or directly use a new pretreatment tank in its place. - Page 9 INSTALLATION GUIDE STEP 3 Tanks that you need to refill/replace in blue below. Option 1: Using 1 Pretreatment Liquid (L1 or L2) and Distilled water in the (CL) Tank. Option 2: Using 2 of the same type Pretreatment Liquids (L1 +L2) to double your capacity and Distilled water in the (CL) Tank.
-
Page 10: Tank Filling Procedure
PRETREATER PRO Tank Filling Procedure STEP 1 Take the Tank out of the slot. STEP 2 Open the cap of the Tank. Note: You can use the Tank Access Cover as extra workspace. • STEP 3 Take the tubes out of the Tank. - Page 11 INSTALLATION GUIDE STEP 5 Fill the tank with the pretreatment liquid. Ensure that it’s with the same pretreatment liquid type. Fig.12: Filling the tank. STEP 6 Put the tubes inside the tank and close the cap. Ensure they are in place and properly sealed.
-
Page 12: Tank Replacement
PRETREATER PRO Tank Replacement STEP 1 Take the Tank out of the slot. STEP 2 Open the cap of the Tank. Note: You can use the Tank Access Cover for extra workspace. • STEP 3 Take the tubes out of the Tank. - Page 13 INSTALLATION GUIDE STEP 5 Put the tubes inside the new tank and close the cap. Ensure they are in place and properly sealed. Fig.16: Sealing the tank. STEP 6 Put the new tank inside the slot. Fig.17: Placing the tank inside the slot. STEP 7 Close the Tank Access Cover.
-
Page 14: Power On For The First Time
Plug in the power cord. Make certain that the source voltage is the same as the rated voltage, listed on the serial number/rating plate. Power On the machine from the Main switch, that is placed at the backside of PreTreater Pro. Fig.18: Plug the power core. STEP 2... - Page 15 INSTALLATION GUIDE NOZZLE ASSEMBLY STEPS 1. Open the Nozzle Access Cover 2. Insert the nozzle inside the blue nozzle holder. 3. Position the black gasket inside the blue nozzle holder and push it, in place, to tighten. Fig.20: Nozzle assembly. STEP 3 Attach the nozzle assembly to the carriage and turn it 90 degrees counterclockwise to lock it in position.
-
Page 16: Initial Liquid Charge
STEP 1 To initiate the machine, tap the screen. Fig.22:Tap the screen. STEP 2 Follow the link to register the product for full access to Polyprint’s Knowledge Base. Fig.23: Product registration. Note: You can also access the registration page by scanning the QR code... - Page 17 INSTALLATION GUIDE STEP 3 Check that the CL, L1 and/or L2 Tanks are full and that all four (4) nozzles are properly placed into position. 1. Press Confirm to continue with the liquid charge. 2. In case you installed pretreatment liquid in L1 or L2 Tank, select the one you filled.
-
Page 18: Nozzle Check
If you get any error messages, for further information, check the top- ic: Troubleshooting> General Problems in the Operational Manual that you will find in the USB Polyprint key. Nozzle Check You should perform a nozzle check to see if all four nozzles are firing correctly. - Page 19 INSTALLATION GUIDE STEP 2 Press the Nozzle button. Fig.28: Pressing the nozzle button. Note: You can, also, open the Nozzle Access Cover to have a better • view. STEP 3 Enable all the nozzles, one-by-one, (or only the nozzles you want to check).
- Page 20 Exit the Nozzle Check screen, by pressing the back arrow, to return to the Home screen. Note: • If the nozzles are not firing correctly, for further information, check the topic: Troubleshooting> Spraying problems in the Opera- tional Manual that you will find in the USB Polyprint key.
- Page 21 INSTALLATION GUIDE Notes ...................................................................................................................................................................................................................................................................................................................................................................................................................................................................................................................................................................................................................................................................................... WWW.POLYPRINTDTG.COM...
- Page 22 PRETREATER PRO Notes ......................................................................................................................................................................................................................................................................................................................................................................................................................................................................................................................................................................................................................................................................................
- Page 23 INSTALLATION GUIDE Notes ...................................................................................................................................................................................................................................................................................................................................................................................................................................................................................................................................................................................................................................................................................... WWW.POLYPRINTDTG.COM...
- Page 24 POLYPRINT S. A. MONASTIRIOU 301, 54628, THESSALONIKI, GREECE TEL. +30 (2310) 545087, 949366, 246418 EMAIL: INFO@POLYPRINTDTG.COM WEBSITE: WWW.POLYPRINTDTG.COM TECHNICAL SUPPORT TEL. +30 (2310) 246418 EMAIL: SUPPORT@POLYPRINTDTG.COM...
Need help?
Do you have a question about the PreTreater Pro and is the answer not in the manual?
Questions and answers