Polyprint PRETREATER PRO Operation Manual
Direct to garment pretreatment machine
Hide thumbs
Also See for PRETREATER PRO:
- Quick user manual (28 pages) ,
- Installation manual (24 pages)
Table of Contents
Advertisement
Quick Links
Advertisement
Table of Contents

Related Manuals for Polyprint PRETREATER PRO


Summary of Contents for Polyprint PRETREATER PRO
- Page 1 PRETREATER ® Direct to Garment Pretreatment Machine Operation Manual...
- Page 2 No part of this publication may be reproduced mechanically or electronically or in any form without the prior written permission of Polyprint S.A. The information in this manual is for informational use only, is subject to change without notice and should not be taken as a commitment by Polyprint S.A. Polyprint S.A. assumes no responsibility or liability for any errors or inaccuracies that may appear in this document.
-
Page 3: Table Of Contents
Light indications ........................28 Menu Diagram........................29 Basic PreTreater Pro functions ....................... 30 Pretreating procedure with PreTreater Pro ................... 30 Select your preferences for the spray area and liquid amount per ml .......... 30 Grid Edit: ..........................31 Linear Edit: ........................... 32 Garment loading on drawer plate .................... - Page 4 Service Condition ......................... 45 Tube Discharge ..........................46 Guidelines for Pretreatment Storage ....................47 Storage: ..........................47 Shelf Life: ..........................47 Transporting PreTreater Pro ......................48 Troubleshooting ........................... 49 GENERAL PROBLEMS ........................ 49 SPRAYING PROBLEMS ....................... 50 COATING PROBLEMS ........................ 50 Right pretreatment amount needed ..................
-
Page 5: Pretreater Pro Introduction
A pressure regulator provides constant and stable nozzle pressure, ensuring a safe and equal production. PreTreater Pro keeps the pretreatment mist inside the machine, so there is no need for a ventilation system. Ideal for a business with limited space. -
Page 6: Safety Instructions
Never lift it utilizing the drawer handle, nor the nozzle access cover. Caution: • Place this product on a flat, stable surface. The surface, if not a Polyprint stand, should be at least 670 x 790 mm and capable of supporting more than 130 kg. •... -
Page 7: When Setting Up This Product
Operational Manual PreTreater Pro When setting up this product Warning: • Do not use a damaged or frayed power cord. Caution: • Make certain that the source voltage is the same as the rated voltage, listed on the serial number/rating plate. - Page 8 • Do not attempt to service this product yourself. • Do not modify the product without prior consent of POLYPRINT SA. • Contact your local dealer in case you need help. We decline all responsibility of damages resulting by inadequate, neglectful or improper installation of the equipment, as well as, by improper utilization or non-compliance with the operational instructions.
-
Page 9: Before We Start
Operational Manual PreTreater Pro Before we start HUMIDITY In case an official Polyprint Stand is not purchased, prepare a flat, stable surface with dimensions of at least 670 x 790 mm. The surface should TEMPERATURE be capable of supporting more than 130kg. - Page 10 Never lift it utilizing the drawer handle nor the nozzle access cover. Caution: • Place this product on a flat, stable surface. The surface, if it’s not a Polyprint stand, should be at least 670 x 790 mm and capable of supporting more than 130 kg. •...
-
Page 11: Items Contained In The Box
• One (1) Polyprint USB Key • One (1) Registration Page Prepare the Pretreater Pro STEP 1 Remove the blue security tapes from PreTreater Pro covers. STEP 2 Open the Nozzle Access Cover. STEP 3 Remove the tire-up that fixates the Nozzle Carriage with a cutter. -
Page 12: Liquid Installation
Operational Manual PreTreater Pro Liquid Installation STEP 1 Open the Tank access cover to gain access to the Tank compartment. STEP 2 There are 4 empty tanks in the slots L1, L2, CL, and MT. You can fill the empty tanks or directly use a new pretreatment tank in its place. - Page 13 Operational Manual PreTreater Pro STEP 3 Tanks that you need to refill/replace in blue below. Option 1: Using 1 Pretreatment Liquid (L1 or L2) and Distilled water in the (CL) Tank. Option 2: Using 2 of the same type Pretreatment Liquids (L1+L2) to double your capacity and Distilled water in the (CL) Tank.
-
Page 14: Tank Filling Procedure
Operational Manual PreTreater Pro Tank Filling Procedure STEP 1 Take the Tank out of the slot. STEP 2 Open the cap of the Tank. Note: • You can use the Tank Access Cover as extra workspace. STEP 3 Take the tubes out of the Tank. -
Page 15: Tank Replacement
Operational Manual PreTreater Pro STEP 6 Put the tubes inside the tank and close the cap. Ensure they are in place and properly sealed. STEP 7 Put the tank back into the slot. STEP 8 Close the Tank Access Cover. - Page 16 Operational Manual PreTreater Pro STEP 4 Shake the pretreatment bottles well, before replacing the tanks. STEP 5 Put the tubes inside the new tank and close the cap. Ensure they are in place and properly sealed. STEP 6 Put the new tank inside the slot.
-
Page 17: Power On For The First Time
Operational Manual PreTreater Pro Power ON for the first time STEP 1 Plug in the power cord. Make certain that the source voltage is the same as the rated voltage, listed on the serial number/rating plate. Power On the machine from the Main switch, that is placed at the backside of PreTreater Pro. -
Page 18: Initial Liquid Charge
STEP 1 To initiate the machine, tap the screen. STEP 2 Follow the link to register the product for full access to Polyprint’s Knowledge Base. Note: • You can also access the registration page by scanning the QR code on the registration page. -
Page 19: Nozzle Check
Operational Manual PreTreater Pro STEP 4 Press Confirm. STEP 5 After a couple of seconds, the initial liquid charge will finish. STEP 6 The machine is now filled with liquid and ready for operation. Caution: • If there is no liquid flowing, then check that all the tubes are inside the tanks and that the caps are in place and properly sealed. - Page 20 Operational Manual PreTreater Pro STEP 2 Press the Nozzle button. Note: • You can, also, open the Nozzle Access Cover to have a better view. STEP 3 Enable all the nozzles, one-by-one, (or only the nozzles you want to check).
-
Page 21: Name And Location Of The Components
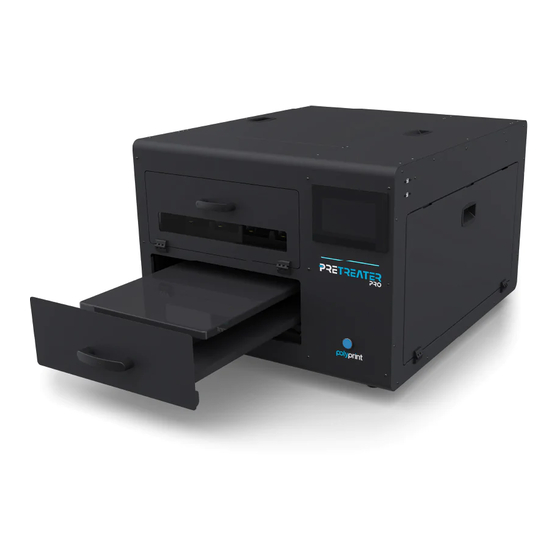
Operational Manual PreTreater Pro Name and location of the components PreTreater Pro Exterior components 1. Nozzle access cover 2. Drawer (T-Shirt Platen) 3. Touch screen display 4. Status LED 5. Start button 6. Connection Interface 7. Tank access cover Page 21... - Page 22 Operational Manual PreTreater Pro 6. Connection Interface 7. Tank access cover Page 22...
- Page 23 Operational Manual PreTreater Pro 8. Power Supply 9. Fuse 10. Main Switch Page 23...
- Page 24 Operational Manual PreTreater Pro 11. Top Main Cover 12. Electrical access cover Page 24...
-
Page 25: Pretreater Pro Interior Components
Operational Manual PreTreater Pro PreTreater Pro Interior components Tank Compartment 13. Tank L1. For pretreatment solution No.1 14. Tank L2. For pretreatment solution No.2 15. Tank CL. For distilled water 16. Tank MT. This Tank will be filled with the waste liquids 17. - Page 26 Operational Manual PreTreater Pro Nozzle Carriage Chamber 21. Nozzle assembly No.1 22. Nozzle assembly No.2 23. Nozzle assembly No.3 24. Nozzle assembly No.4 25. Main Filter for all Nozzles Page 26...
- Page 27 Operational Manual PreTreater Pro Connection Interface 26. Scanner USB connection port for Barcode Reader • The Scanner USB port use is optional. A Barcode Reader Device can be connected, to scan predefined job presets. 27. Service USB connection port at the Mainboard •...
-
Page 28: Main Screen
Operational Manual PreTreater Pro Main Screen EDIT PANEL: Define the Spray Area. SPRAY: Start spraying the selected area. PRODUCION MODE: The function where, once you close the drawer, the spraying starts automatically. MENU: The main Menu of the touch display. -
Page 29: Menu Diagram
Operational Manual PreTreater Pro Menu Diagram To access the menu, press the button (Ξ) on the right top corner. Page 29... -
Page 30: Basic Pretreater Pro Functions
Operational Manual PreTreater Pro Basic PreTreater Pro functions Pretreating procedure with PreTreater Pro 1. Select your preferences for the spray area and the liquid amount per ml. 2. Load the garment on the drawer plate. 3. Start Single step or Production mode spraying procedure. -
Page 31: Grid Edit
Operational Manual PreTreater Pro Grid Edit: Tap on the Grid Edit button. STEP 1 Select the direction you want the garment to have, on the drawer plate. You can rotate it 180 , by pressing the icon. STEP 2 The entire spray area (41x60cm / 16x23.6in) has been divided into 4 columns and 4 rows (4x4=16 boxes). -
Page 32: Linear Edit
Operational Manual PreTreater Pro Linear Edit: Tap on the Linear Edit button. STEP 1 Select the direction you want the garment to have, on the drawer plate. You can rotate it 180 , by pressing the icon. STEP 2 Select the nozzles you want to enable. You are able to choose from 1 up to all 4 nozzles. The nozzles spray, exactly as shown on the screen, in the Nozzle Carriage Chamber. -
Page 33: Garment Loading On Drawer Plate
Operational Manual PreTreater Pro STEP 4 Select the liquid spraying amount per ml, for the max spray area (41x60cm / 16x23.6in), from the slide bar. Tap on the Calculate button, to check the actual liquid amount sprayed on the selected area. -
Page 34: Start Single Step Or Production Mode Spraying
Start single step or production mode spraying Single Step Spraying: To spray the garment, either press the Blue button on the front side of the PreTreater Pro or activate the Spray option on the Home screen. Production Mode: Production Mode allows you to start the spraying procedure, as soon as, the drawer is closed, without pressing a button. -
Page 35: Basic Functions
Operational Manual PreTreater Pro Basic Functions From the Main Screen, press the Menu Button, to enter the Menu. Settings Starting from the Menu, press the Settings button. Screen Brightness: Adjusts the Screen Brightness. LED Brightness: Adjusts the LED Brightness. Screensaver Delay: Puts a Screensaver on the Touch Display after the specified time (in minutes). -
Page 36: Notifications
Operational Manual PreTreater Pro Notifications Starting from the Menu, press the Notifications button. In the Notifications Screen you see all the actual running errors or notifications which are pending. Consumption Counters Starting from the Menu, press the Counters button. In this Consumption Counter Screen you see three counters. Each time you spray, all three counters will count. -
Page 37: Tank Selection
In this Tank Selection Screen, you can check, which Tank you have, currently, selected. If you wish to select a different tank to spray, tap on that tank you want, and press Confirm. PreTreater Pro will automatically switch to your preferred tank. - Page 38 Operational Manual PreTreater Pro Valves: Shows the selection of the actual used Tank (Line). By clicking on any Tank, you can immediately switch to the desired Tank, without prior cleaning of the Nozzle Line. Tube Charge: Fills liquid to the specific line. It requests you to open the specific selected Tank and put the tubes inside the Tank.
-
Page 39: The Preparation Of Garments
A pretreatment machine is recommended, to ensure consistent quality and to keep the environment clear from dust, fumes, gas, mist, vapors, and spray that is present, while using a spray gun. Equipment needed for proper pretreatment solution application: • PreTreater Pro • Heat press • Polyprint Protection Paper... -
Page 40: Pretreatment On Dark-Colored And Black Garments
Operational Manual PreTreater Pro Pretreatment on dark-colored and black garments For dark garments, the application of a pretreatment layer is vital for the colors to adhere to it, be visible and not soak into the fabric. Apart from that, you can choose between different pretreatment solutions, that each suit your needs. -
Page 41: Maintenance Schedule
Pretreatment and Water • Empty the Maintenance Tank • Place the 4 nozzles on the Nozzle Carriage Daily Wake Up • Initiate PreTreater Pro • Liquid Charge • Flush the main tube with distilled water • Remove the 4 nozzles from... -
Page 42: Daily Liquid Check
Operational Manual PreTreater Pro Daily Liquid Check 1. Open the Tank Storage Compartment Cover. 2. Check the liquid level in the L1, L2, CL tanks and if needed, follow the instructions to refill / replace them. 3. Empty the Maintenance Tank... -
Page 43: Daily Shutdown Procedure
Operational Manual PreTreater Pro Daily Shutdown Procedure STEP 1 1. Tap on the Menu button. 2. Tap the Shutdown button. STEP 2 To flush the main tube with distilled water, select YES on the screen that appears. STEP 3 Remove the 4 nozzles from the Nozzle Carriage and disassemble them. -
Page 44: Monthly Maintenance
Operational Manual PreTreater Pro Monthly Maintenance Check and clean the L1, L2 tank filters 1. The two filters are located in the Tank Compartment. 2. Unscrew the filter cap to remove them. 3. Clean them with water. 4. Reposition them. Make sure they are, in their initial place. -
Page 45: Long Inactivity Maintenance
8. Tap on the back icon and select the Shutdown button. 9. Click Yes to flush with distilled water the main line and nozzles. 10. When finished, PreTreater Pro will Shut down. Close the main switch at the back of the machine and remove the power cable. -
Page 46: Tube Discharge
Operational Manual PreTreater Pro Tube Discharge STEP 1 Open the Tank Αccess Cover. Choose the tank that you want to perform the Tube Discharge on and remove the tubes from the tank. Warning: • This step is vital and needs to be performed first. When the process of Tube Discharge begins, the pump will start removing the liquid and discard it from the nozzles. -
Page 47: Guidelines For Pretreatment Storage
Operational Manual PreTreater Pro Guidelines for Pretreatment Storage The Polyprint pre-coating and cleaning solution will provide excellent results, when stored and handled properly. The following storage and handling practices are required to ensure consistent quality and performance. Warning: • Always keep pretreatment/cleaners out of children’s’ reach. -
Page 48: Transporting Pretreater Pro
Before moving the machine to another location/position, ensure that the tank caps are in place and • sealed so liquid cannot spill out. Do not tilt PreTreater Pro while the liquid tanks are full or inside the machine and the waste collector is not properly cleaned. -
Page 49: Troubleshooting
Operational Manual PreTreater Pro Troubleshooting GENERAL PROBLEMS Error message Remedy ERROR ON VALVE OF TANK L1 -Restart the machine and check again. -The valve has not changed condition due to: ERROR ON VALVE OF TANK L2 • Residues in the valve. -
Page 50: Spraying Problems
Operational Manual PreTreater Pro SPRAYING PROBLEMS Problem Remedy Stopped spraying job -Please close the nozzle access cover. -Please close the drawer. Nozzles are not firing correctly -Clean the nozzles in the ultrasonic bath for 1 min. -Clean the nozzles with a toothbrush. -
Page 51: Start Up Problems
Operational Manual PreTreater Pro 3) Correct Pretreatment The image below represents a shirt that has been properly pretreated, printed, heat-pressed and subsequently washed three (3) industrial washes. Note the white under base and color retention. START UP PROBLEMS Problem Remedy... -
Page 52: Machine Specifications
Operational Manual PreTreater Pro Machine Specifications Dimension of the machine (with handle, with feet) 1040 x 850 x 660 mm Dimension with the box for transport 1130 x 980 x 850 mm Machine Weight 104 kg Box Weight for transport:... -
Page 53: Warranty Terms And Conditions
These parts do not extend the warranty of the product. • In case of D.O.A (Dead on Arrival) on a delivered new machine, Polyprint S.A. reserves the right to send replacement part(s) to fix the problem. It covers the replacement of the machine, only after the approval from Polyprint S.A. - Page 54 DR (damage report), when requesting replacement of the Coating Liquids. According to the origin of the problem, Polyprint S.A. will make a decision on the amount of Coating Liquids that the dealer will be compensated for.
-
Page 55: Costs
Costs • The warranty covers the cost of spare parts, the shipping costs from Polyprint to the dealer and labor costs at Polyprint premises. All other generated costs, such as labor of dealer’s technician, travel expenses to dealer’s customer etc. should be covered by the dealer or by the end-user depending on the dealer’s service policy. -
Page 56: Machine Service List
Operational Manual PreTreater Pro Machine Service List Date: Service Operation: Date: Service Operation: Date: Service Operation: Date: Service Operation: Date: Service Operation: Date: Service Operation: Date: Service Operation: Page 56... - Page 57 Operational Manual PreTreater Pro Date: Service Operation: Date: Service Operation: Date: Service Operation: Date: Service Operation: Date: Service Operation: Date: Service Operation: Page 57...
Need help?
Do you have a question about the PRETREATER PRO and is the answer not in the manual?
Questions and answers