
Related Manuals for meilan M3


Summary of Contents for meilan M3
- Page 1 Mini GPS Bike Computer Instruction Manual http://www.meilancycling.com/InstructionSheet/M3.pdf Scan the QR code above to view manuals in other languages (Français/Italiano/Русский язык/ 中文简体/日本語/한국어/ภาษาไทย)
-
Page 3: Table Of Contents
18 • Power indicator: 06 • Computer 19 • Charging notification 06 • Accessories 20 LED Indicator 07 Setting up the M3 21 Specification 07 • Operation of buttons 22 Optional Accessories 08 • Initial settings 23 Safety Statement and Warranty 12 •... -
Page 4: Introduction
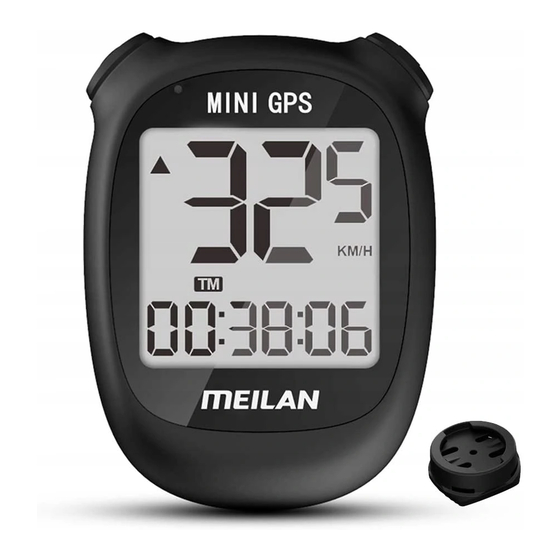
Introduction M3 is a simple bike computer with mini and delicate appearance. Equipped with GPS technology, which can display the basic riding data such as current time, speed, riding time, distance, total mileage, altitude and etc. Screen Display • Display screen... -
Page 5: Icon Description
Time (active time): Moving time Current distance Current altitude ALTI Total time, is the duration from the moment you start on the M3 to the moment you finish the workout (including auto pause feature or pause the timer manually). Total distance... -
Page 6: Gps And Backlight
GPS and Backlight • GPS signal * Please make sure your M3 is used at open space and barrier-free area 1. Turn on M3. 2. GPS positioning: * GPS positioning may take 2 minutes or even a longer time when it is turned on for the first time or after a long period of non-use. - Page 7 • Backlight Manual full screen backlight Short press the left top button and the right top button at the same time to turn on / off the backlight.
-
Page 8: Description Of The Device And Accessories
Description of the Device and Accessories • Computer (POWER) button Turns the power on and off, Switch display of speed data; Change data in settings mode Smart (right top) button Switch display of data menu; Confirm and go to the next in settings mode;... -
Page 9: Setting Up The M3
Setting up the M3 Operation of buttons Setting Button Located above the back of the device, this button accesses the settings menu if pressed when the device is on, then please press again to save if you have completed the setting. -
Page 10: Initial Settings
Perform the following operation when you use the unit for the first time. Press and hold the left top button of M3 for 2 seconds turns on and enter the setting mode. ( If it is not the first time, press the SETTING button to go to setting menu) SETTING Button 2. - Page 11 When the left top button is pressed, the time zone changes. After selecting the appropriate time zone, press the right button to confirm and go to the next step “Setting the sound”. Change the time zone Confirm and Go to the Next Step Blinking * The value of the data will keep blinking when you set it.
- Page 12 3. Setting the sound Change the ON/OFF of device sound by pressing the left top button. Press the right top button to confirm and go to the next step “Setting the units of measurement”. Confirm and Go to the Next Step Blinking 4.
- Page 13 Confirm and Go to the Next Step KM/H Blinking 5. Setting the ODO Change the value of the ODO by pressing the left top button. Press the right top button to confirm. Until the ODO is changed. * When you have set the ODO and completed the setting by pressing the right top button or the setting button,you will enter GPS searching and measurement screen.
-
Page 14: Restore Factory Settings
6. GPS searching Now, setup of the M3 Mini is completed. Go to the open space and wait for the GPS signal. After the GPS signal positioning is successful, you can start to ride. The LED stay on The LED blinking... -
Page 15: Mount Up & Lock It Down
Mount up & Lock it Down ● Installing the bike mount on the stem or handlebar 1. Place the bike mount on the stem or handlebar of your bicycle with the rubber side down. (The triangle symbol in front must point in the direction of travel.) 2. -
Page 16: Perform A Workout
Perform a Workout • Start your workout * Please make sure your device is used at open space and barrier-free area 1. Turn on the M3 by pressing left top button for 2 seconds. The device starts to search GPS signal. - Page 17 C. After the GPS positioning is successful, the time and date are automatically updated according to the GPS. D. After the GPS positioning is successful and the M3 works for a few minutes, the altitude will be automatically calculated by GPS.
- Page 18 • During a workout: 1. Press the left top button to switch current/average/maximum speed display. 2. Press the right button to switch current time, riding time, distance, altitude, total time and ODO. 3. If you need to delete the record of this time riding, you can long press the setting button.
-
Page 19: History
2. Press the right top button quickly to scroll to the record view you want to delete. 3. Then press the SETTING button on the back of M3 to delete. Just delete this record. -
Page 20: Battery And Charge
Battery and Charge Input: Micro USB DC 5V 0.5A • Power indicator: Red: The battery is low and needs to be recharged. Yellow: 31-60% power. Green: Sufficient battery. LED light is breathing on and off: Charging. -
Page 21: Charging Notification
• Please charge the battery after first use or long storage If the battery is not used for a long time, the voltage may decrease according to the standby current. Please fully charge the battery before use. • Charging notification 1. -
Page 22: Led Indicator
LED Indicator: • For power: The battery is low and needs to be recharged. 31-60% power. Yellow Sufficient battery. Green • For charging: LED light is breathing on and off: Charging. • For GPS positioning: Slow blink (about once every two seconds): GPS is searching and positioning. Stay-on brightness: GPS positioning is successful and you can start riding. -
Page 23: Specification
Specification High-precision GPS Display LCD display Screen Size 1.7 inch Battery Lithium battery Battery Capacity 400 mAh Battery Life 8 hours Operation Temperature -20 °C to 60 °C Product Weight Product Size 60*44*24.5 mm / 2.4*1.7*0.97 inch Waterproof Grade IPX5... -
Page 24: Optional Accessories
Optional Accessories • Standard accessories Mini GPS Bike Computer Instruction manual Scan the QR code above to view manuals in other languages (Français/Italiano/Русский язык/ 中文简体/日本語/한국어/ภาษาไทย) Bike mount Rubber bands*4 Charging cable Instruction • Optional accessories C2 Dual-Sided Bike Computer Mount... -
Page 25: Safety Statement And Warranty
6. The product is guaranteed for one year from the date of sale for non-human damage, and the accessories are not covered by the warranty. You can contact the after-sales service through MEILAN global distributors or by writing to MEILAN. -
Page 26: Access To Faq & Videos
For more information about installation and functions, you can check our Youtube/Facebook/Website as below. Facebook YouTube Website MEILAN (HONGKONG) CO., LIMITED 5/F, B16 Building, Hezhou, Hengfeng Industrial City, Xixiang Street, Baoan District, Shenzhen, 518000 China Phone : +86 755 23159119 E-mail : service@meilankj.com...
Need help?
Do you have a question about the M3 and is the answer not in the manual?
Questions and answers