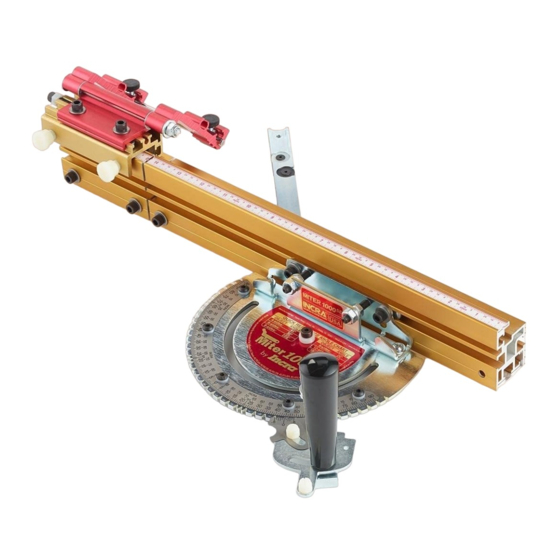
Advertisement
Quick Links
Owner's Manual
SAFETY:
Important safety instructions for using the INCRA Miter1000SE
When using the INCRA Miter1000SE in conjunction with any other tool, first read and follow all instructions and safety
°
information in that tool's owner's manual.
Never let the saw blade come in contact with the aluminum or steel components of the INCRA Miter1000SE.
°
When using the INCRA Miter1000SE, always keep your hands clear of the saw blade and the line of cut.
°
Always turn off the power and make sure that the saw blade comes to a complete stop before changing the setting of any part of
°
the INCRA Miter1000SE.
Always securely tighten the large black clamping knob before starting any cut.
°
Wear safety glasses, hearing protection, and follow all normal shop safety practices.
°
After making any adjustments to the miter angle or fence position of your INCRA Miter1000SE, always verify safe clearance
°
between the blade and fence before turning on the saw.
After making any adjustments to the fence position on the INCRA Miter1000SE, always make sure that the two socket head
°
screws are securely tightened.
When using the INCRA Flip Shop Stop to position a piece for a cut, always hold or otherwise clamp the board between the stop
°
and the blade.
Manufactured by Taylor Design Group, Inc. P.O. BOX 810262 Dallas, TX 75381
w w w . i n c r a . c o m
by
Before using the INCRA
Miter1000SE, read and
follow all of the instructions
and safety information in
this owner's manual.
©2020 by Taylor Design Group, Inc. All rights reserved.
Advertisement

Subscribe to Our Youtube Channel
Summary of Contents for Incra Miter1000SE
- Page 1 After making any adjustments to the fence position on the INCRA Miter1000SE, always make sure that the two socket head ° screws are securely tightened. When using the INCRA Flip Shop Stop to position a piece for a cut, always hold or otherwise clamp the board between the stop ° and the blade.
- Page 2 3. Attach the Fence Fence removed for access Place your Miter1000SE in the preferred miter slot at your table saw. (Note: Left hand miter slot use shown. See step 4 to convert fence for use in right hand miter slot.) Attach the fence to the fence mounting...
- Page 3 Squaring the fence to your table saw top Your INCRA Miter1000SE Fence has been adjusted square to the table at the factory so no further ad- justment should be required. If adding a wooden sub-fence, fine adjustments to the angle can be easily made as described on Page 8.
- Page 4 INCRA MITER1000SE OWNER’S MANUAL Operation – Changing Angle Settings Before using your new INCR A Miter1000SE for Miter1000SE the first time, take a few moments to review these important operational procedures. 1 / 2 1 / 2 1. 5° Indexing (including 22 °...
- Page 5 Fig. 13A Slide Fence to Blade calibrate the extender bar scale. Clamp the INCRA Flip Shop Stop to the 4” fence extender. (Use the scale on the short section of fence as a reference for clamping the stop to the same position each time you use it.) Now loosen the...
- Page 6 INCRA MITER1000SE OWNER’S MANUAL For mitered cutting, a test cut is often the most ac- Fig. 14B Setting Scales for Angled Cuts curate means of setting the fence and extender bar scales since measuring to the tooth of a blade set at an angle to the fence can be difficult.
-
Page 7: Warranty
APPLY TO PARTS WHICH HAVE BEEN SUBJECTED TO IMPROPER USE, ALTERATION, OR ABUSE. LIFETIME WARRANTY ON POSITIONING RACKS IF AN INCRA POSITIONING RACK IN THIS TOOL BECOMES DAMAGED FOR ANY REASON, TAYLOR DESIGN GROUP WILL REPLACE IT FREE OF CHARGE FOR AS LONG AS YOU OWN YOUR TOOL. RETURN THE DAM- AGED RACK, POSTAGE PREPAID, PLEASE ALLOW 1 TO 2 WEEKS FOR DELIVERY. - Page 8 Incra’s fence mounting bracket enables any fence to be quickly and easily adjusted for perfect squareness to the table. We have provided two adjustment points so you can also neutralize twist or thickness variation that is sometimes present in homemade wooden fences or sub-fences.


Need help?
Do you have a question about the Miter1000SE and is the answer not in the manual?
Questions and answers