Advertisement
Quick Links
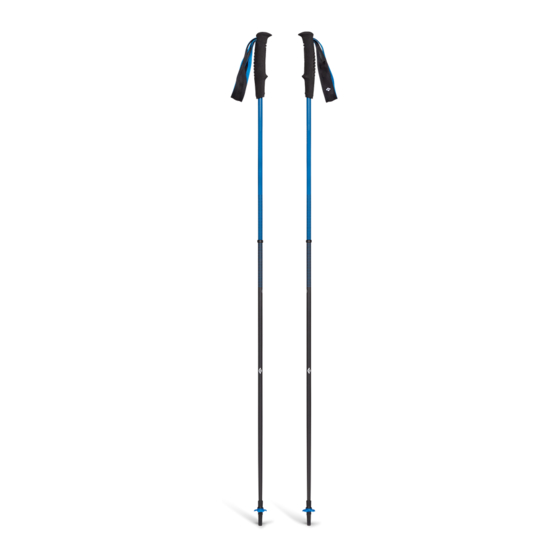
DISTANCE
CARBON
TREKKING POLES
North America: Black Diamond Equipment, Ltd.
2084 East 3900 South
Salt Lake City, UT 84124
Europe: Black Diamond Equipment AG
Hans-Maier-Straße 9
6020, Innsbruck, Austria
BlackDiamondEquipment.com
© Black Diamond Equipment, Ltd. 2021
WARNING [EN]
Distance Carbon Trekking Poles are for hiking and
trail running use only. The strength of carbon fiber is
compromised by dents, gouges, scratches, fractures,
and chipping which may result in catastrophic structural
failure. If the trekking pole has suffered any impact,
carefully inspect its surface for these signs of damage.
Lightweight trekking poles are made to be lightweight,
and will not withstand excessive forces if previously
damaged or if the forces are applied beyond structural
limits. Ultralight carbon fiber poles are more susceptible
to damage than other poles and require frequent
inspection. Failure to follow these warnings may result
in catastrophic failure of the trekking poles, causing
serious injury or death.
INSTRUCTIONS FOR USE
ѥ
Keep instructions for future reference.
CHANGING TIPS
Distance Carbon trekking poles come with carbide tips and
rubber tips. Rubber tips should be replaced once any part of the
metal core starts to show.
To remove:
1. Using fingers or pliers, twist forcefully counter-clockwise and
un-screw until they fall out of the baskets.
To install new tips:
2. Twist by hand or with pliers, clockwise, for 3-4 clicks and very
snug. Rubber tips should bulge when they are completely
tightened.
(See accompanying illustrations)
CARE AND MAINTENANCE
REPLACING POLE STRAPS
1. Use a small flathead screwdriver to turn the plastic pin where
the strap cord enters the grip so that the open side of the slot
is facing the back of the grip
2. using the screwdriver tip, push the plastic pin out to one side
as far as possible. You will see a small metal ball attached
which holds it in place.
3. Pop the small metal ball out of the strap pin
4. Push the plastic pin back out of the grip in the other direction
and remove the metal ball on the other side.
5. To attach new straps to the grip, follow the above directions
in reverse order. Ensure each metal ball on the strap cord is
reinserted into each end of the plastic pin.
NOTE: Once the strap cord is secured inside the plastic pin and
the pin has been centered in the grip, turn the plastic pin slot so
that its open end faces the front of the grip.
(See accompanying illustrations)
INSPECTION & STORAGE
Before and after each use, make sure nothing is deformed or
broken.
(See accompanying illustrations)
LIMITED WARRANTY
For one year following purchase unless otherwise indicated
by law, we will warrant to the original retail buyer only that our
products are free from defects in material and workmanship as
originally sold. If you receive a defective product, return it to us
and we will replace it subject to the following conditions: We do
not warrant products which show normal wear and tear or that
have been used or maintained improperly, modified or altered, or
damaged in any manner.
AVERTISSEMENT [FR]
Les bâtons de course Distance Carbon sont conçus
pour une utilisation en randonnée et trail running
uniquement. Les bosses, les rainures, les éraflures, les
fissures et les écailles compromettent la résistance de
la fibre de carbone et peuvent entraîner des défaillances
structurelles. Si le bâton de randonnée a été soumis
à un quelconque impact, inspectez soigneusement sa
surface afin de repérer tout signe de détérioration.
Les bâtons de randonnée légers sont conçus pour être
légers et ne résisteront pas à des forces excessives
s'ils ont subi des dommages antérieurs ou si les
forces appliquées dépassent leurs limites structurelles.
Les bâtons ultra légers en fibre de carbone sont
davantage sujets aux détériorations que les autres
bâtons et exigent d'être inspectés fréquemment. Le
non-respect des présents avertissements peut causer
une défaillance des bâtons de randonnée, et entraîner
des blessures graves ou la mort.
NOTICE D'UTILISATION
ѥ
Veuillez conserver la notice pour consultation ultérieure.
POUR CHANGER LES POINTES
Les bâtons de course Distance Carbon sont vendus avec des
pointes en caoutchouc et en carbure. Les pointes en caoutchouc
doivent être remplacées dès qu'une quelconque partie de l'âme
métallique commence à apparaître.
Pour les ôter :
1. À la main ou à l'aide d'une paire de pinces, tournez
énergiquement dans le sens inverse des aiguilles d'une
montre et dévissez jusqu'à ce que la pointe se désolidarise
complètement de la rondelle.
Pour installer de nouvelles pointes :
2. Vissez à la main ou à l'aide d'une paire de pinces, dans le sens
des aiguilles d'une montre - tournez 4 à 5 clics fermement. Les
pointes en caoutchouc présentent de légers renflements une
fois complètement vissées.
(Voir les illustrations jointes)
NETTOYAGE ET ENTRETIEN
POUR REMPLACER LES DRAGONNES
1. À l'aide d'un petit tournevis à tête plate, tournez la cheville
plastique située à l'intersection dragonne/poignée, de manière
à positionner son extrémité ouverte vers l'arrière de la poignée.
2. À l'aide de la pointe de votre tournevis, poussez la cheville
plastique pour la faire sortir d'un côté aussi loin que possible.
Vous verrez apparaître une des extrémités du cordon de la
dragonne, muni d'une petite rotule métallique pour le tenir en
place.
3. Sortez la petite rotule métallique de la cheville plastique.
4. Poussez la cheville plastique de la poignée d'un côté et ôtez la
rotule métallique de l'autre côté.
5. Pour fixer de nouvelles dragonnes à la poignée, suivez les
instructions ci-dessus dans l'ordre inverse. Prenez soin
de réinsérer chacune des rotules métalliques du cordon
de dragonne dans chacune des extrémités de la cheville
plastique.
REMARQUE : Une fois que le cordon de dragonne est
solidement fixé à l'intérieur de la cheville plastique et que la
cheville est correctement centrée dans la poignée, tournez
la fente de la cheville plastique de manière à positionner son
extrémité ouverte vers l'avant de la poignée.
(Voir les illustrations jointes)
INSPECTION & STOCKAGE
Avant et après chaque utilisation, repérez toute déformation ou
fissure.
(Voir les illustrations jointes)
LIMITES DE GARANTIE
Nous garantissons pour une durée de un an à partir de la date
d'achat et seulement à l'acheteur d'origine, sauf dispositions
légales contraires, que nos produits sont vendus exempts
de défauts de matériau et de fabrication tels que vendus
initialement. Si vous recevez un produit défectueux, renvoyez-
nous celui-ci. Il sera échangé conformément aux conditions
suivantes : la garantie ne prend pas en charge l'usure normale
des produits, l'utilisation incorrecte ou l'entretien inapproprié, les
modifications ou transformations, ou les dommages de quelque
manière que ce soit.
WARNUNG [DE]
Distance Carbon Trekking Poles wurden ausschliesslich
zum Wandern und Trail Running entworfen. Die
Festigkeit
Karbonfaser wird durch Dellen, Kerben,
Kratzer,
Bruchstellenn
und
Absplitterungen
geschwächt, was zu einem vollständigen strukturellen
Materialversagen führen kann. Wenn ein Trekkingstock
einem Schlag oder Aufprall ausgesetzt war, untersuchen
Sie seine Oberfläche sorgfältig auf diese Anzeichen von
Schäden. Leichte Trekkingstöcke sind auf geringes
Gewicht
ausgelegt
und
können
daher
extremer
Krafteinwirkung nicht standhalten, wenn sie zuvor
beschädigt wurden oder diese Kräfte die strukturelle
Belastungsgrenze überschreiten. Ultraleichte Stöcke
aus Karbonfaser sind empfindlicher als andere Stöcke
und müssen regelmässig überprüft werden. Wenn Sie
diese Warnhinweise nicht lesen und nicht beachten,
kann dies zu einem vollständigen Versagen bzw. Bruch
der Trekkingstöcke und infolge davon zu schweren
Verletzungen oder Tod führen.
GEBRAUCHSANLEITUNG
ѥ
Bewahren Sie die Anweisungen zum späteren Nachschlagen
auf.
AUSTAUSCH DER SPITZEN
Die Distance Carbon Trekking Poles werden mit Karbidspitzen
und Gummispitzen ausgeliefert. Die Gummispitzen sollten
ausgetauscht werden, sobald der Kern aus Metall sichtbar wird.
Entfernen:
1. Drehen Sie die Spitzen mit den Fingern oder einer Zange
gegen den Uhrzeigersinn, bis sie aus dem Teller herausfallen.
Einsetzen von neuen Spitzen:
2. Drehen Sie die Spitzen mit den Fingern oder einer Zange
im Uhrzeigersinn für 4 bis 5 Klicks, bis sie fest sitzen.
Gummispitzen sollten sich leicht wölben, wenn sie vollständig
festgezogen wurden.
(Siehe Abbildungen).
PFLEGE UND WARTUNG
AUSTAUSCH DER HANDRIEMEN
1. Verwenden Sie einen kleinen Schlitzschraubenzieher, um
den Kunststoffstift, in den die Befestigungsschnur für den
Riemen eingesetzt ist, so zu drehen, dass die offene Seite der
Aussparung zur Rückseite des Griffs zeigt.
2. Verwenden Sie die Spitze des Schraubenziehers, um den
Stift auf einer Seite so weit wie möglich herauszuschieben.
Hier sehen Sie eine kleine Metallkugel, mit der die Schnur
eingesetzt wird.
3. Nehmen Sie die Schnur mit der Metallkugel aus dem Stift.
4. Schieben Sie den Stift nun in die andere Richtung ganz aus
dem Griff heraus, und entfernen Sie die Kugel auf der anderen
Seite.
5. Um neue Riemen am Griff zu befestigen, befolgen Sie die
vorangehende Anleitung in umgekehrter Reihenfolge. Stellen
Sie sicher, dass jede Metallkugel an der Befestigungsschnur
wieder in die beiden Enden des Kunststoffstifts eingesetzt
wird.
HINWEIS: Nachdem die Befestigungsschnur wieder sicher im
Stift eingesetzt und der Stift im Griff zentriert wurde, drehen
Sie ihn so, dass die offene Seite der Aussparung im Stift zur
Griffvorderseite zeigt.
(Siehe Abbildungen).
ÜBERPRÜFUNG & LAGERUNG
Vor und nach jedem Gebrauch, stellen Sie sicher, dass nichts
verformt oder beschädigt ist.
(Siehe Abbildungen).
BEGRENZTE GEWÄHRLEISTUNG
Wir gewährleisten dem ursprünglichen Käufer, der das Produkt
aus dem Einzelhandel erworben hat für ein Jahr ab Kaufdatum,
soweit gesetzlich nicht anders vorgeschrieben, dass unsere
Produkte frei von Defekten an Material und Ausführungsqualität
sind. Im Falle des Erwerbs eines defekten Produkts geben Sie
dieses an uns zurück, und wir ersetzen es unter den folgenden
Bedingungen: Wir übernehmen keine Garantie bei normaler
Abnutzung und normalem Verschleiss, bei unsachgemässer
Verwendung oder Wartung, jeglicher Modifizierung, Änderung
oder bei jeglichen Beschädigungen.
AVVERTENZE [IT]
Distance Carbon Trekking Poles sono indicati solo per
il trekking e trail running. La resistenza della fibra di
carbonio viene compromessa da ammaccature, graffi,
crepe e scheggiature che possono poi provocare la
rottura della struttura globale del bastoncino. Se il
bastoncino da trekking ha subito un forte impatto,
controlla attentamente la superficie per identificare
eventuali segni di danno. I bastoncini da trekking
leggeri sono costruiti per essere tali, e non sono quindi
in grado di sopportare forze eccessive se sono stati
precedentemente danneggiati o se la forza applicata
è al di sopra del limite strutturale del bastoncino. I
bastoncini in fibra di carbonio ultraleggeri sono piu'
soggetti a danno rispetto ad altri bastoncini e hanno
bisogno di un controllo frequente. Errori nel rispetto
di queste avvertenze possono provocare la rottura del
prodotto e causare incidenti o addirittura portare alla
morte.
ISTRUZIONI PER L'USO
ѥ
Conservare le istruzioni per riferimenti futuri.
SOSTITUZIONE DELLE PUNTE
Gli Distance Carbon Trekking Poles sono dotati di punte in
gomma e punte in carburo duro. Le punte in gomma dovrebbero
essere sostituite ogni qualvolta sia visibile la parte metallica.
Per rimuoverle:
1. Utilizzando le dita o delle pinze, girare con forza in senso
antiorario e svitarle fino a che non escono dalla rondella.
Per installare delle punte nuove:
2. Gira con la mano o con delle pinze, in senso orario fino a
sentire 4 o 5 click e in modo molto stretto. Le punte in gomma
dovrebbero gonfiarsi quando sono strette fino all'ultimo giro
possibile.
(Vd le illustrazioni allegate)
Advertisement

Related Manuals for Black Diamond Equipment DISTANCE CARBON RUNNING POLES


Summary of Contents for Black Diamond Equipment DISTANCE CARBON RUNNING POLES
- Page 1 Vor und nach jedem Gebrauch, stellen Sie sicher, dass nichts not warrant products which show normal wear and tear or that d’achat et seulement à l’acheteur d’origine, sauf dispositions North America: Black Diamond Equipment, Ltd. verformt oder beschädigt ist. have been used or maintained improperly, modified or altered, or légales contraires, que nos produits sont vendus exempts...
- Page 2 Replacing Replacing Z-Pole Tech Straps Snow Baskets Tips (sold separately) “Clicks”...
- Page 3 den ene side ud så langt som muligt. Du vil se en lille fastgjort CURA E MANUTENZIONE CUIDADOS Y MANTENIMIENTO CUIDADOS E MANUTENÇÃO metalkugle, som holder den på plads. CAMBIAR LAS CORREAS SUBSTITUIR AS ALÇAS DO BASTÃO Z SOSTITUIRE I LACCIOLI 3.
- Page 4 BEGRENSET GARANTI Zorg ervoor dat elke metalen kogel van de band wordt OSTRZEŻENIE [PL] VAROITUS [FI] teruggeplaatst in elk uiteinde van de kunststof pin. Vi garanterer at produktet skal være uten feil i utførelse og Hiilikuituiset juoksusauvat tarkoitettu vain Kijki trekkingowe z włókna węglowego przeznaczone materiale i ett år fra den datoen da produktet ble kjøpt.
- Page 5 VAROVÁNÍ [CS] UPOZORNENIE [SK] OPOZORILO [SL] FIGYELEM! [HU] Běžecké hole Distance Carbon jsou určeny pouze Uhlíkové bežecké palice Distance sú určené iba na Tekaške palice Distance Carbon Trekking Poles A Distance Carbon terepfutó bot kizárólag túrázáshoz pro chůzi a běh po stezkách. Pevnost uhlíkových pešiu turistiku a beh v prírode.
-
Page 6: Правила Пользования
закреплен внутри пластмассового штифта, а штифт будет най-далеч. Ще видите прикрепено малко метално ВНИМАНИЕ [RU] AVERTISMENT [RO] отцентрирован в ручке, поверните паз пластмассового топче, което го държи на място. Bețele de alergare din carbon trebuie utilizate numai Углеродные палки для ходьбы... - Page 7 göreceksiniz. 2. χρησιμοποιώντας τη μύτη του κατσαβιδιού, σπρώξτε 接进手柄) , 使槽的开口侧朝向手柄的背面 3. 스트랩 핀에서 작은 금속 볼을 꺼냅니다 3. Küçük metal topu kayış piminden çıkarın τον πλαστικό πείρο προς τα έξω από τη μία πλευρά όσο 4. 플라스틱 핀을 다른 방향으로 밀어 다른 쪽의 금속 볼을 2.
- Page 8 して下さい。ストラップコード末端の小さな金属カシメが出てきま す。 3. ストラップコードの金属カシメをプラスチックピンから外して下さ い。 4. プラスチックピンを反対側から押し出し、残った金属カシメを外し て下さい。 5. 上の手順を逆に行って、新しいストラップを取り付けて下さい。ス トラップコードの金属カシメがプラスチックピンに元通りにセット されていることを確認して下さい。 注意:プラスチックピンをグリップに戻したら、プラスチックピンの 溝がグリップ前方を向くように回して下さい。 点検と保管 使用前後に変形や破損がないことを点検して下さい。 ( 該当イラストを参照 ) 限定付き製品保証 ご購入いただいてから 1 年間、第一購入者に限り、品質もしくは製造 上の欠陥が見つかった場合、無償修理 / 交換いたします。不具合が見 つかった場合、ご購入店にお持ち込みいただくか、輸入代理店にお問 い合わせの上直接お送り下さい。ブラックダイヤモンド社は通常の損 耗や摩耗、誤った使い方やメンテナンス、改造や改変、その他の損傷 については保証を適用いたしません。 ブラックダイヤモンド日本総代理店 株式会社ロストアロー 〒 112-0012 東京都文京区大塚 3-4-7 茗溪ビル tel:03-6902-2131( 代表 ) e-mail:ec@lostarrow.co.jp ※製品に関するご質問や修理につきましては、...
Need help?
Do you have a question about the DISTANCE CARBON RUNNING POLES and is the answer not in the manual?
Questions and answers