Table of Contents
Advertisement
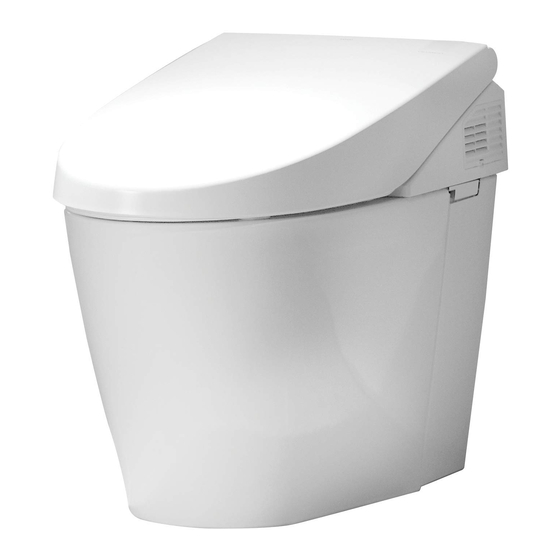
FEATURES
• Cyclone
siphon jet fl ushing system, low
®
consumption (1.05GPF/4.0LPF and 1.6GPF/6.0LPF)
• SanaGloss
ceramic glaze - SanaGloss glaze
®
prevents debris, and mold from sticking to ceramic
surfaces, leading to fewer chemicals and less water
in cleaning.
• Auto lid open/close, auto fl ush
• Convenient remote control
• Adjustable heated seat
• Adjustable spray position
• Washlet with three wash modes (front, rear, soft)
• Oscillating and pulsing comfort washing
• Energy saver timer
• Built-in air purifying system
MODELS
• MS980CMG
With SanaGloss ceramic glaze
COLORS/FINISHES
• #01 Cotton
#11 Colonial White
#12 Sedona Beige
PRODUCT SPECIFICATION
The Neorest 550 uses our Cyclone fl ushing system
toilet shall be 1.02GPF/4.0LPF and 1.6GOF/6.0LPF.
Toilet shall have SanaGloss ceramic glaze. Toilet shall
be of skirted design, elongated front bowl with auto
open and close seat. Toilet shall be TOTO Model
MS980CMG_____.
Neorest 550 Elongated Toilet/Bidet
CODES/STANDARDS
• Meets and exceeds ASME A112.4.2, ASME
A112.19.2/CSA B45.1, ASME A112.18.1/CSA
B125.1, UL 1431, CSA C22.2 # 68
• Certifi cations: IAPMO(cUPC), Intertek, State of
Massachusetts, City of Los Angeles and others
• Code Compliance: UPC, IPC, NSPC, NPC Canada,
and others
MS980CMG
Advertisement
Table of Contents


Need help?
Do you have a question about the MS980CMG and is the answer not in the manual?
Questions and answers
Remote does not work
If the Toto MS980CMG remote does not work, follow these troubleshooting steps:
1. Check if the low battery warning LED is flashing.
2. If flashing, replace the AA batteries:
- Remove the remote control from the hanger.
- Open the battery cover.
- Replace with new AA dry cell, alkaline batteries of the same brand.
- Do not use rechargeable batteries.
3. If not using the remote for a long time, remove the batteries.
4. If the remote still does not work, use the buttons on the control panel as an alternative.
This answer is automatically generated