Table of Contents
Advertisement
Quick Links
Table of Contents
I.
FCC RF Exposure Compliance Requirements - for Occupational Use Only.................
II.
About Topaz3......................................................................................................... 3
III.
About Your Legacy ProLine Radios......................................................................... 3
IV. Unpacking and Checking Equipment...................................................................... 4
V.
Radio Control Buttons / Operation Features............................................................
VI. Getting Started........................................................................................................ 6
ProLine
i
PL5164
Operating
Instru tions
PL5161 /
2
5
Advertisement
Table of Contents

Related Manuals for Legacy ProLine PL5151

Summary of Contents for Legacy ProLine PL5151
-
Page 1: Table Of Contents
Instru tions Table of Contents FCC RF Exposure Compliance Requirements - for Occupational Use Only..……… About Topaz3...........…………………………………………………….. 3 III. About Your Legacy ProLine Radios.....…………………………………………………… 3 IV. Unpacking and Checking Equipment..…………………………………………………… 4 Radio Control Buttons / Operation Features..…………………………………………………. VI. Getting Started.........……………………………………………………... 6... - Page 2 ....…………………………………………………… Charging the NiMH Battery Pack ..………………………………………………….. Attaching and Removing the Battery Pack ......……………………………………………………. 6 Installing the Antenna ......……………………………………………………. Installing the Belt Clip ..…………………………………………………… Installing the Speaker Mic. Jack Cover ....…………………………………………………… Attaching the Optional Speaker Mic VII. Radio Operation........…………………………………………………….........…………………………………………………….. Power On / Transmit VIII.
-
Page 3: Fcc Rf Exposure Compliance Requirements For Occupational Use Only
November 7, 1997, has adopted a safety standard for human exposure to Radio Frequency (RF) electromagnetic energy emitted by FCC regulated equipment. Topaz3 / Legacy subscribes to the same safety standard for the use of its products. Proper operation of this radio will result in user exposure far below the Occupational Safety and Health Act (OSHA) and Federal Communications Commission limits. -
Page 4: About Topaz3
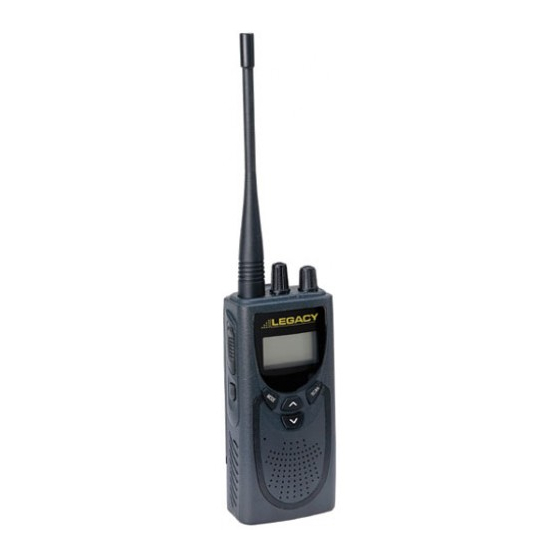
ALWAYS use authorized accessories. www.topaz3.com For additional information on our product line, visit our website: III. About Your Legacy ProLine Radios The Legacy ProLine models PL5161 (VHF) and PL5164 (UHF) are fully programmable, synthesized radios featuring: 16 Channels of operation • 8 Character alphanumeric display •... -
Page 5: Unpacking And Checking Equipment
the operation of the radio, please consult with your radio communications Dealer, or contact the Topaz3 Customer Service Department: 1-800-821-7848, Ext. 499. Unpacking and Checking Equipment Carefully unpack the radio and its accessories. Use the item list below to identify the components included in the product packaging, to ensure that no items are discarded in the packing materials. -
Page 6: Radio Control Buttons / Operation Features
If any items are missing or damaged, you should contact the Topaz3 Customer Service Department for assistance: 1-800-821-7848, Ext. 499. Radio Control Buttons / Operation Features A) Push-To-Talk (P-T-T) button (left side of radio) Press and hold while speaking into the radio microphone, release to listen to incoming messages B) Monitor button (left side of radio) Press and hold to turn radio squelch off. -
Page 7: Getting Started
Getting Started Charging the NiMH Battery Pack You will need to charge the battery pack fully before initial use. For best results from your charging cycle, follow these tips: Ensure the ambient temperature is between 41 and 104° F (5 and 40° C) while charging. •... -
Page 8: Installing The Belt Clip
Screw the antenna into the connector on the top of the radio by holding the antenna at its base and turning it clockwise until seated. Do not overtighten. The antenna should never be used to carry your radio, or as a base to clip radio accessories. -
Page 9: Radio Functions
only one more transmission - change or charge your battery. Refer to the “ Low Battery Warning ” section of this manual. VIII. Radio Functions Tone Signaling To help block out unwanted calls to your radio, the PL5151 and PL5164 can be programmed by your radio communications Dealer to look for tones. -
Page 10: Tx Delay
When used in conjunction with busy channel lockout, the transmitter is allowed to operate as long as valid RX tone is received. Dealer programming makes this feature active or disabled. TX Delay The TX will remain active for approximately 180 seconds even though P-T-T button is released when using CTCSS tones. -
Page 11: Channel Change
** Channel Change Rotate Channel Knob to select the channel among 16 channels your display will change with each channel selection. Your channel display reading will vary depending on how your dealer programmed each channel description. ** Transmit Press PTT button to transmit. If PTT button is released, the radio returns to receive mode. -
Page 12: Menu Tree
Menu Tree Each Channel Setting Rx Stand- System Option Display Option Each Tone Channel Optio Setting CTCSS 1 ~ 49 023 ~ 754 023 ~ 754 Invert CTCSS 1 ~ 49 023 ~ 754 Invert 023 ~ 754 Tx Output Power Power High/Low Normal Scan List Normal Scan... - Page 13 Level 1 ~ Time Out 1 ~ 990 Penalty 1 ~ 100 Penalty Busy Lock Busy Lock Marked Idle Marked Idle Scan Set Scan Mode Normal Priority Priority Look Back Scan Priority Vacant Channel Scan Scan Speed 50 ~ 500 Scan Delay 1 ~ 30 sec Look Back...
-
Page 14: Channel Option, System Option & Display Option Setting
Slide Off Channel Option, System Option & Display Option Setting. To enter Menu Setting, press and release Mode button in receive mode or stand-by mode. In Menu Setting, press Up/Down buttons to move in an up or down direction in the current menu display setting. -
Page 15: Rx/Tx Tone Option Setting
BEEP BEEP BEEP ** Rx/Tx Tone Option Setting Each Channel Option Menu Setting Mode Mode BEEP BEEP Rx Tone Menu Setting Mode BEEP BEEP Up/Down buttons Up/Down buttons BEEP BEEP Tx Tone Menu Setting Up/Down buttons BEEP Up/Down buttons... -
Page 16: No Tone Select
BEEP ** No Tone Select Mode BEEP Under the above, if MODE button or PTT Button is pressed, it sets No tone for RX or TX Tone option and Exits to receiving stand-by mode. ** CTCSS Tone Select Mode BEEP BEEP Up/Down buttons BEEP... -
Page 17: Invert Dcs Tone Select
Under the above mode, press Up/Down buttons to select desired DCS Tone and then press Mode button or PTT button to set RX or TX tone option. The radio will then save selection and exit to receiving stand-by mode. ** Invert DCS Tone Select Mode Mode BEEP... -
Page 18: Normal Scan List On/Off Setting
** Normal Scan List On/Off Setting Mode BEEP BEEP Up/Down buttons BEEP Under the above mode, press Up/Down buttons to select On or Off and then press Mode buttons or PTT button to set the scan option On or Off for the current channel. The radio will then save selection and exit to receiving stand-by mode. -
Page 19: System Option Setting
BEEP Mode BEEP BEEP Up/Down buttons BEEP Mode BEEP BEEP Up/Down buttons BEEP Under the above mode, press Up/Down buttons to select On or Off and then press Mode button or PTT button to set 2-Tone Option (Individual, Group, Super-Group) On or Off for the current channel. -
Page 20: Beep Tone On/Off Setting
BEEP BEEP BEEP BEEP BEEP BEEP BEEP BEEP BEEP BEEP ** Beep Tone On/Off Setting Mode BEEP BEEP Up/Down buttons BEEP Under the above mode, press Up/Down buttons to select On or Off and then press Mode button or... -
Page 21: Vox Option On/Off Setting
PTT button to set Beep Tone On or Off. The radio will then save selection and exit to receiving stand-by mode. ** VOX Option On/Off Setting Mode BEEP BEEP Up/Down buttons BEEP Under the above mode, press Up/Down buttons to select On or Off and then press Mode button or PTT button to set VOX Option On or Off. -
Page 22: Time-Out-Timer Setting
** Time-Out-Timer Setting Mode Mode BEEP BEEP BEEP Up/Down buttons In this mode, if MODE button or PTT Button is pressed, TOT function is disabled and exits to receiving stand-by mode. BEEP BEEP Under the above mode, press Up/Down buttons to select desired time and then press Mode button or PTT button to set T-O-T time. -
Page 23: Marked Idle On/Off Setting
Mode BEEP Up/Down buttons BEEP Under the above mode, press Up/Down buttons to select On or Off and then press Mode button or PTT button to set Busy Channel Lock Out. The radio will then save selection and exit to receiving stand-by mode. ** Busy Channel Lock Out : If the channel is busy, it inhibits transmission. -
Page 24: Scan Setting
** SCAN Setting ** Scan Setting Menu Mode BEEP BEEP Up/Down buttons BEEP BEEP BEEP ** Scan Mode Setting Mode Mode BEEP BEEP BEEP Up/Down buttons BEEP Under the above mode, press Up/Down buttons to select the desired Scan operation. Press Mode button or PTT button to set a scan mode. -
Page 25: Scan Speed Time Setting
** Scan Speed Time Setting Mode Mode BEEP BEEP BEEP BEEP Under the above mode, press Up/Down buttons to select desired time and then press Mode button or PTT button to set. The radio will then save selection and exit to receiving stand-by mode. -
Page 26: Look Back Time Setting
** Look Back Time Setting Mode Mode BEEP BEEP BEEP Up/Down buttons BEEP Under the above mode, press Up/Down buttons to select desired time and then press Mode button or PTT button to set. The radio will then save selection and exit to receiving stand-by mode. -
Page 27: Power Save Setting
Up/Down buttons BEEP Under the above mode, press Up/Down buttons to select On or Off and then press Mode button or PTT button to set. The radio will then save selection and exit to receiving stand-by mode. ** Tx Delay : This function is to remove Squelch tail of receiving Radio by creating a CTCSS Turn-Off (No Tone) during 180msec after TX is completed if TX tone option is set by CTCSS Option. -
Page 28: Power Save Off Time Setting
PTT button to set. The radio will then save selection and exit to receiving stand-by mode. ** Power Save Off Time Setting Mode Mode BEEP BEEP BEEP Up/Down buttons BEEP Under the above mode, press Up/Down buttons to select the desired time and then press Mode button or PTT button to set. -
Page 29: Roger Beep On/Off Setting
Under the above mode, press Up/Down buttons to select On or Off and then press Mode button or PTT button to set. The radio will then save selection and exit to receiving stand-by mode. ** Clear To Talk : This function issues a beep tone when pressing the PTT Button, letting you know speaking may begin. -
Page 30: Display Slide On/Off Setting
The Federal Communications Commission requires the operator of this radio be properly licensed under the applicable Part and / or Parts of the FCC Rules and Regulations. Consult with an authorized Topaz3 / Legacy radio communications Dealer, or contact the nearest FCC Field Office for information about obtaining a license. -
Page 31: Service
DO NOT tamper with internal radio adjustments - damage to the equipment and / or improper operation may result. There are no serviceable items inside the radio. It is recommended that you return the radio to a qualified Topaz3 / Legacy radio communications Dealer for any service or repairs. - Page 32 THE EXPRESS WARRANTIES CONTAINED HEREIN ARE IN LIEU OF ALL OTHER WARRANTIES, EITHER EXPRESSED OR IMPLIED OR STATUTORY, INCLUDING, WITHOUT LIMITATION, ANY WARRANTY OF MERCHANTABILITY OR FITNESS FOR A PARTICULAR PURPOSE. FOR ANY PRODUCT WHICH DOES NOT COMPLY WITH THE WARRANTY SPECIFIED, THE SOLE REMEDY WILL BE REPAIR OR REPLACEMENT.
Need help?
Do you have a question about the ProLine PL5151 and is the answer not in the manual?
Questions and answers