Table of Contents
Advertisement
Quick Links
Advertisement
Table of Contents

Related Manuals for Sharp K-61P27BNM


Summary of Contents for Sharp K-61P27BNM
- Page 1 Home Appliances K - 61P27BNM - EN Cooking User Manual...
- Page 2 Thank you for choosing this product. This User Manual contains important safety information and instructions on the operation and maintenance of your appliance. Please take the time to read this User Manual before using your appliance and keep this book for future reference. Icon Type Meaning...
-
Page 3: Table Of Contents
CONTENTS 1.SAFETY INSTRUCTIONS ....................4 1.1 General Safety Warnings ....................4 1.2 Installation Warnings ......................6 1.3 During Use ........................7 1.4 During Cleaning and Maintenance .................8 2.INSTALLATION AND PREPARATION FOR USE ............10 2.1 Instructions for the Installer ..................10 2.2 Installation of the Oven ....................10 2.3 Electrical Connection and Safety.................. -
Page 4: Safety Instructions
1. SAFETY INSTRUCTIONS • Carefully read all instructions before using your appliance and keep them in a convenient place for reference when necessary. • This manual has been prepared for more than one model therefore your appliance may not have some of the features described within. - Page 5 the oven. • Handles may get hot after a short period during use. • Do not use harsh abrasive cleaners or scourers to clean oven surfaces. They can scratch the surfaces which may result in shattering of the door glass or damage to surfaces.
-
Page 6: Installation Warnings
cooking food and is intended for indoor domestic household use only. It should not be used for any other purpose or in any other application, such as for non-domestic use, in a commercial environment or for heating a room. • Do not use the oven door handles to lift or move the appliance. -
Page 7: During Use
should be collected and removed immediately. • Protect your appliance against atmospheric effects. Do not expose it to effects such as sun, rain, snow, dust or excessive humidity. • The material around the appliance must be able to withstand a minimum temperature of 100°C. •... -
Page 8: During Cleaning And Maintenance
off and cover the pan with its lid or a fire blanket. • If the product will not be used for a long period of time, turn the main control switch off. • Make sure the appliance control knobs are always in the “0”... - Page 9 You may notice differences between these instructions and your model. Disposal of your old machine This symbol on the product or on its packaging indicates that this product should not be treated as household waste. Instead it should be handed over to the applicable collection point for the recycling of electrical and electronic equipment.
-
Page 10: Installation And Preparation For Use
2. INSTALLATION AND do not use it and contact an authorised service person or qualified technician PREPARATION FOR USE immediately. WARNING : This appliance must be • Make sure that there are no flammable installed by an authorised service or combustible materials in the close person or qualified technician, according to vicinity, such as curtains, oil, cloth etc. -
Page 11: Electrical Connection And Safety
Installation in a wall unit After making the electrical connections, appliance’s power rating (also indicated insert the oven into the cabinet by pushing on the identification plate). it forward. Open the oven door and insert • During installation, please ensure 2 screws in the holes located on the oven that isolated cables are used. - Page 12 • Fix the supply cable in the cable clamp and then close the cover. • The terminal box connection is placed on the terminal box. Blue Brown Yellow+Green EN - 12...
-
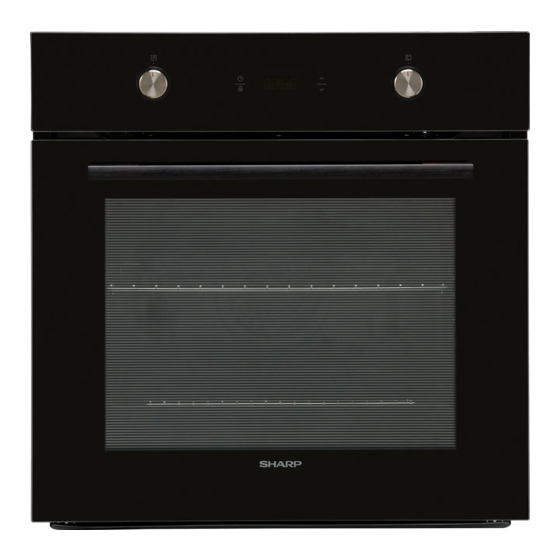
Page 13: Product Features
3. PRODUCT FEATURES Important: Specifications for the product vary and the appearance of your appliance may differ from that shown in the figures below. List of Components 1. Control Panel 2. Oven Door Handle 3. Oven Door Control Panel 4. Timer 5. -
Page 14: Use Of Product
4. USE OF PRODUCT Grilling Function: The oven’s thermostat and Oven Functions warning lights will * The functions of your oven may be switch on, and the grill different due to the model of your product. heating element will start operating. This Defrost Function: The function is used for oven’s warning lights... -
Page 15: Cooking Table
Warning: When grilling, the oven door Grilled 10-15 must be closed and the oven meatballs temperature should be adjusted to 190°C. Chicken 50-60 Pyrolytic Cleaning Function: This Chop 15-25 function allows you to clean the inside of the oven thoroughly. Beefsteak 15-25 *If available cook with roast chicken skewer. - Page 16 3. The symbol will remain illuminated, the time will be saved and the warning will be set. 2. Adjust the time using the “+” and “-” When the timer reaches zero, an audible buttons while the dots are flashing. warning will sound and the symbol will flash.
- Page 17 3. Select the desired cooking time period using the “+” and “-” buttons. 1. Select the desired cooking function and the temperature using the control knobs. 4. The current time will reappear on the screen, ´and the symbols “ ” will remain illuminated.
-
Page 18: Accessories
Sound Adjustment • Trays and wire grids can be positioned To adjust the volume of the audible warning on any level from 1 to 5. sound, press the “ ” button three times • Telescopic rails can be positioned on while the signal is sounding. -
Page 19: Cleaning And Maintenance
The Shallow Tray The shallow tray is best used for baking pastries. Put the tray into any rack and push it to the end to make sure it is correctly placed. 5. CLEANING AND MAINTENANCE The Wire Grid 5.1 CleaninG The wire grid is best used for grilling or for WARNING: Switch off the appliance processing food in oven-friendly containers. - Page 20 Cleaning the Stainless Steel Parts (if available) • Clean the stainless steel parts of your appliance on a regular basis. • Wipe the stainless steel parts with a soft cloth, soaked in only water. Then, dry them thoroughly with a dry cloth. Do not clean the stainless steel parts while they are still hot from cooking.
-
Page 21: Maintenance
Removal of the Wire Shelf 3. Place the glass under the location To remove the wire rack, pull the wire rack as bracket (x) in the direction of C. shown in the figure. After releasing it from the clips (a), lift it up. If the oven door is a triple glass oven 5.2 MaintenanCe door, the third glass layer can be... -
Page 22: Troubleshooting&Transport
6. TROUBLESHOOTING&TRANSPORT 6.1 troubleShootinG If you still have a problem with your appliance after checking these basic troubleshooting steps, please contact an authorised service person or qualified technician. Problem Possible Cause Solution Check whether there is power supplied. Oven does not switch Power is switched off. -
Page 23: Technical Specifications
7. TECHNICAL SPECIFICATIONS 7.1 enerGy fiChe Brand Model K-61P27BNM-EN Type of Oven ELECTRIC Mass 35,9 Energy Efficiency Index - conventional 103,6 Energy Efficiency Index - fan forced 94,0 Energy Class Energy consumption (electricity) - conventional kWh/cycle 0,87 Energy consumption (electricity) - fan forced... - Page 24 Service & Support Visit Our Website sharphomeappliances.com...
Need help?
Do you have a question about the K-61P27BNM and is the answer not in the manual?
Questions and answers