
Related Manuals for SELFSAT SNIPE DOME 2


Summary of Contents for SELFSAT SNIPE DOME 2
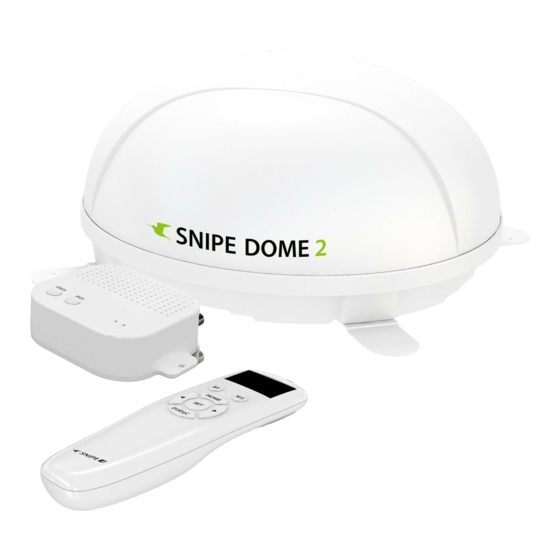
- Page 1 Stationary Automatic Camping Satellite Antenna User’s manual • Bedienungsanleitung • Manuel utilisateur ver. 1.0 www.selfsat.com...
-
Page 2: Table Of Contents
................7-2. Required space for SNIPE DOME 2 . -
Page 3: General Information
Correct and safe operation of the system can only be ensured by following these instructions. Your SNIPE DOME 2 is an intelligent satellite TV reception antenna system which can align itself towards a preset satellite automatically as long as the system is located within the footprint of this satellite. -
Page 4: Proper Use And Operation
Please carefully read and follow the operating instructions in this manual and use the SNIPE DOME 2 for its intended purpose. Upon installation of SNIPE DOME 2, please ensure the installation is done with supplied cables and ensure the cables are not modified in any way. -
Page 5: Accessory Included
2. Contents 2-1. Accessory included Main unit PI box Remote control Cable holder Remote control Bracket Cable gland PI cable - 1.5m Signal cable -10m Cigarette lighter adaptor (x2 for twin outputs) M4 ×20(15) User manual Power adaptor (Optional) ※ Actual components may differ from the above images. -
Page 6: Name Of Parts
2-2. Name of parts Main unit Antenna to PI (ANT Port) to Receiver (optional) Mounting plate PI box Remote control STB LED Display window POWER LED BT button Pairing antenna HOME button with remote control Mode button POWER button HOME button SET button Fixed hole Arrow button... -
Page 7: Operating Instruction
3. Operating Instruction 3-1. Connection diagram Remote control Mobile App PI box Power input cable Cigar jack MAIN UNIT Turn on the PI power after all cables connections are complete. When not using the antenna, turn off the PI power. ENGLISH - 6... -
Page 8: Functional Description
3-2. Functional description 1. PI box A. Button and LEDs STB LED i. POWER Button Press the POWER button to turn on the PI POWER LED box, and power to the antenna unit. HOME button (Power LED ON) POWER button Press and hold for more than 3 seconds to turn off... - Page 9 B. Basic Features The remote control automatically searches for nearby antenna unit. CONNECTING If there is an antenna that has been connected before, connect it Remote control immediately Version : 00 When use antenna and remote control for the first time or when you delete the antenna list stored in the remote control, a list of products that SELECT MAC can be connected will appear.
- Page 10 DiSEqC setting Refer SNIPE DOME 2’s pre-satellites for DiSEqC 1.1 when user setup at STB Satellite LNB 1 ASTRA1 LNB 2 ASTRA2 LNB 3 ASTRA3 LNB 4 ASTRA1 LNB 5 Hot Bird LNB 6 Eutelsat 9 LNB 7 ASTRA 4...
- Page 11 C. Additional settings BT button Press BT button to change to BT setting screen. Press the arrow to move to the desired function and set with the SET button Delete the MAC Address of antenna stored in the remote control. BT SET Used to connect to other products REMOVE MAC...
-
Page 12: Quick Reference
When the satellite search is complete, watch the broadcast. NOTE In order to ensure that your SNIPE DOME 2 works properly you must ensure that it is following by the Operating Instructions in this manual and used as intended purpose. -
Page 13: Troubleshooting
5. Troubleshooting There are a number of common issues that can affect the signal reception quality or the operation of the unit. The following sections address these issues and potential solutions. A. No function when power on the antenna Check again all the cable connections have been made correctly. Connection between the power and the PI box. -
Page 14: Dimension
6. Specifications 6-1. Dimension SNIPE DOME 2 31.5cm 66.0cm 66.0cm PI box 129 mm 34 mm 105 mm 28 mm 102 mm 35 mm 102 mm 85mm Remote control 50 mm 15 mm 155 mm 155 mm 69 mm 25 mm... - Page 15 L.O. Frequency 9.75 / 10.6 GHz Input Voltage DC 12 V Power Consumption 30 W (in searching) Model SNIPE DOME 2 Remote control Frequency 2.4 GHz Support Bluetooth version Ver 4.2 / 5.0 (the latest) TX power up to +3 dBm...
-
Page 16: Caravan/Motorhome Installation
7. Installation 7. Caravan/Motorhome Installation 7-1. Precaution before installation The product is shipped with internal lock for protecting the unit and preventing damage while transportation. Prior to the installation, remove the locking bolt in the bottom of the product, which is indicated with “Remove (allow mark)”... -
Page 17: Required Space For Snipe Dome 2
7-2 . Required space for SNIPE DOME 2 Take care, that there is enough space for the SNIPE DOME 2, just as for the operation range. Vehicle rear 66.0cm Driving direction 31.5cm ENGLISH - 16... -
Page 18: Equipment For Installation
7-3. Equipment for installation Silicone Masking tape Cleaner 2mm drill bit, over 20mm drill bit Power drill Cable holder Cable gland M4 ×20(15) PI box PI cable (1.5m) Signal cable (10m) Remote conteol Remote conteol bracket Cigarette lighter adaptor (Power input cable) 7-4. - Page 19 B. Assemble 2pcs of M4x20 bolt to fix the four(4) mounting plates each Place main unit on the top of fixed plate. Put back Apply silicone on the holes the mounting plate on the silicone applied and make two(2) holes (2mm) with power drill Assemble mounting plate using two(2) M4x20 Re-apply silicone to cover tightened screws screws...
- Page 20 D. Cable holder installation Arrange cable holder in front of (30cm apart Apply masking tape 5mm from away the from) antenna center by facing open side of outside of holder and drill a 20mm hole in the cable holder. Then attach masking tape center to allow the cable can pass through.
- Page 21 E. PI box and Remote control installation Get Power input cable and plug into cigar To source power from car battery, cut off lighter socket (12V outlet) cigar-jack connector to take inner three cables out and peel off each to take copper cable out approx.1.5m 12V DC Fix PI Box where it should be fixed using two(2)
- Page 23 Inhaltsverzeichnis 1. Allgemeine Informationen 1-1. Produktvorstellung ................. . . 1-2.
-
Page 24: Allgemeine Informationen
1-1. Produktvorstellung Die Bedienungsanleitung beschreibt die Funktion und die Bedienung, selbstnachführenden Satelliten-Systems SNIPE DOME 2. Der korrekte und sichere Betrieb des Systems ist nur gewährleistet, wenn die Bedienungsanleitung befolgt wird. Ihre SNIPE DOME 2 ist ein intelligentes Satelliten-TV-Empfangssystem, das sich automatisch auf die gespeicherten Satelliten ausrichten kann, solange es sich in der Ausleuchtzone befindet. -
Page 25: Sicherheitshinweise
Komponenten gemäß der vorliegenden Anleitung angeschlossen sind und wie vorgesehen verwendet werden. Stellen Sie bei der Installation von SNIPE DOME 2 sicher, dass die Installation mit den mitgelieferten Kabeln erfolgt und dass die Kabel in keiner Weise verändert werden. -
Page 26: Verpackungsinhalt
2. Verpackungsinhalt 2-1. Lieferumfang Haupteinheit PI box Fernbedienung Kabelhalter Fernbedienungshalterung Kabelverschraubung PI-Kabel - 1,5 m Signalkabel - 10m Stromversorgungskabel (x2 für optionale 2 Ausgänge) (Zigarettenanzünder-Kabel) M4 ×20(15) Bedienungsanleitung Netzteil (Optional) ※ Die tatsächlichen Komponenten können sich von den obigen Bildern unter- scheiden. -
Page 27: Bezeichnung Der Teile
2-2. Bezeichnung der Teile Haupteinheit Antenne zu PI-box ("ANT" Port) zu empfänger (optional) Montageplatte PI-box Fernbedienung STB LED Anzeige POWER LED BT -Taste Koppeln Antenne mit HOME-Taste Fernbedienung Mode -Taste POWER-Taste Home-Taste Set-Taste Befestigungsloch Pfeiltaste DiSEqC-Taste Halterung Power zu empfänger Zur Haupteinheit DEUTSCH- 5... -
Page 28: Bedienungsanleitung
3. Bedienungsanleitung 3-1. Anschlussplan Fernbedienung Mobile Applikation PI-box Stromversorgungskabel Zigarettenanzünder STB (Empfänger) Fernseher Haupteinheit * Schalten Sie den PI-box, nachdem alle Kabel Verbindungen hergestellt sind. * Wenn die Antenne nicht verwendet wird, schalten die PI-box ausgeschaltet. DEUTSCH- 6... -
Page 29: Funktionsbeschreibung
3-2. Funktionsbeschreibung 1. PI-box A. Taste und LEDs STB LED i. POWER -Taste Drücken Sie die POWER-Taste, um die POWER LED PI-Box einzuschalten und die Antennene- HOME-Taste inheit mit Strom zu versorgen. (Power LED EIN) POWER-Taste Halten Sie die Taste länger als 3 Sekunden gedrückt, um das Gerät auszuschalten. - Page 30 B. Grundfunktionen Die Fernbedienung sucht automatisch nach einer Antenneneinheit in CONNECTING der Nähe. Remote control Wenn zuvor eine Antenne angeschlossen wurde, schließen Sie diese sofort an Version : 00 Wenn Sie Antenne und Fernbedienung zum ersten Mal verwenden oder wenn Sie die in der Fernbedienung gespeicherte Antennenliste löschen, SELECT MAC wird eine Liste der Produkte angezeigt, die angeschlossen werden O - 09 : 39 : E4...
- Page 31 USER2 Fur den Einsatz von DiSEqC muss der Benutzer die DiSEqC-Satellitenliste bei STB zuordnen, sie ist in der gleichen Reihenfolge wie die oben voreingestellte Liste von SNIPE DOME 2 ※ Die DiSEqC-Funktion ist deaktiviert, wenn sich die Antenne in der Position HOME befindet.
- Page 32 C. Zusätzliche Einstellungen BT -Taste Drücken Sie die BT-Taste, um zum BT-Einstellungsbildschirm zu wechseln. Drücken Sie den Pfeil, um zur gewünschten Funktion zu gelangen, und stellen Sie sie mit der SET-Taste ein Löschen Sie die MAC-Adresse der auf der Fernbedienung gespeicherten BT SET Antenne.
-
Page 33: Kurzanleitung
Wenn die Satellitensuche abgeschlossen ist, sehen Sie sich die Sendung an. HINWEIS Um sicherzustellen, dass Ihr SNIPE DOME 2 ordnungsgemäß funktioniert, müssen Sie sicherstellen, dass es der Bedienungsanleitung in diesem Handbuch entspricht und bestimmungsgemäß verwendet wird. Wenn das System aufgrund von Fahrlässigkeit des Benutzers nicht vollständig entfernt werden kann, liegt es in Ihrer Verantwortung, zu... -
Page 34: Fehlerbehebung
5. Fehlerbehebung Es gibt eine Reihe Ursachen, die die Signalempfangsqualität oder den Betrieb des Gerät beeinträchtigen können. Der folgende Abschnitt befasst sich mit den häufigsten Ursachen und deren eventuellen Lösungen. A. Keine Funktion beim Einschalten der Antenne Überprüfen Sie erneut, ob alle Kabelverbindungen korrekt hergestellt wurden. Überprüfen Sie die Verbindung zwischen Stromversorgung und PI-Box. -
Page 35: Abmessungen
6. Technische Daten 6-1. Abmessungen SNIPE DOME 2 31.5cm 66.0cm 66.0cm PI-box 129 mm 34 mm 105 mm 28 mm 102 mm 35 mm 102 mm 85mm Fernbedienung 50 mm 15 mm 155 mm 155 mm 69 mm 25 mm... - Page 36 950 ~ 2,150 MHz L.O. frequenz 9.75 / 10.6 GHz Spannungsversorgung DC 12 V Stromverbrauch 30 W (wahrend des Suchlaufs) Modell SNIPE DOME 2 Fernbedienung Frequenz 2.4 GHz Unterstützt Bluetooth-Version Ver 4.2 / 5.0 (das Neueste) Sendeleistung bis zu +3 dBm BLE gewinn Empfangsempfindlichkeit...
-
Page 37: Installation Von Wohnmobil/Reisemobil
7. Installation 7. Installation von Wohnmobil/Reisemobil 7-1. Vorsichtsmaßnahme vor der Installation Das Produkt wird mit interner Verriegelung zum Schutz des Gerätes und zur Vermeidung von Beschädigungen während des Transports geliefert. Vor der Installation die mit dem "Remove"-Aufkleber gekennzeichnete Verriegelungss- chraube in der Unterseite des Gerätes entfernen (siehe nachfolgendes Bild) Die Antennenabdeckung nicht öffnen, um die Schraube zu entfernen. -
Page 38: Erforderlicher Platz Für Installation
7-2 . Erforderlicher Platz für Installation Es ist darauf zu achten, dass es für SNIPE DOME 2 genügend Platz gibt, genauso wie für den Betriebsbereich. Rücken des Fahrzeugs 66.0cm Fahrtrichtung 31.5cm DEUTSCH- 16... -
Page 39: Ausrüstung Für Die Installation
PI-kable (1,5m) Signal-kable (10m) Fernbedienung Fernbedienungshalterung Stromversorgungskabel 7-4. Instruction for installation A. SNIPE DOME 2 -Installation auf dem Dach (Gleiches gilt für alle vier (4) Montageplatten) FRONT Die Oberfläche mit einem Reinigungsmittel Die Antenne in die Mitte des Fahrzeugdachs reinigen aufstellen Das Abdeckband außerhalb der Montageplatte... - Page 40 B. Montieren Sie 2 Stück M4x20 Schraube der Montageplatte(4) zu befestigen Das Hauptgerät auf die Oberseite der festen Silikon auf die Löcher auftragen Platte stellen. Die Montageplatte auf das aufgetragene Silikon zurückstellen und 2 Löcher (2 mm) mit Bohrmaschine machen Die Montageplatte mit 2 Schrauben M4x20 Silikon auf die angezogenen Schrauben zusammenbauen wieder auftragen...
- Page 41 D. Kabelhalter Installation Ordnen Sie den Kabelhalter vor der Antennen- Bringen Sie 5 mm von der Außenseite des mitte (30 cm von der Antenne entfernt) an. Halters entfernt Klebeband an und bohren Sie Bringen Sie dann das Abdeckband außerhalb ein 20-mm-Loch in die Mitte, damit das Kabel des Kabelhalters an hindurchführen kann approx.
- Page 42 E. PI-box, Fernbedienung und Fernbedienunghalterung Installation Nehmen Sie ein Stromversorgungskabel und Für die Stromversorgung von der Autobatterie machen Sie den Zigarrenstecker stromlos, um stecken Sie es in Zigarettenanzünder (12V innere drei Kabel herauszunehmen und Steckdose) ein loskoppeln, um Kupferkabel herauszunehmen (Empfänger) ca.
- Page 44 Contenu 1. Informations générales 1-1. Introduction ................... 1-2.
-
Page 45: Informations Générales
1-1. Introduction Ces instructions décrivent les fonctionnalités et le fonctionnement du système satellite de SNIPE DOME 2. Un fonctionnement correct et sûr du système ne peut être assuré qu’en suivant ces instructions. Votre SNIPE DOME 2 est un système d'antenne de réception TV satellite intelligente qui peut s'aligner vers un satellite prédéfini automatiquement tant que le système se trouve... -
Page 46: Utilisation Et Fonctionnement Corrects
1-3. Consignes de Sécurité Veuillez lire attentivement et suivre les instructions de fonctionnement de ce manuel et utiliser le SNIPE DOME 2 aux fins pour lesquelles il a été conçu. Lors de l'installation de SNIPE DOME 2, veuillez vous assurer que l'installation est effectuée avec les câbles fournis et que les câbles ne sont en aucun cas modifiés. -
Page 47: L'ensemble Des Composants
2. Contenu 2-1. L’ensemble des composants Unité principale Boîtier PI Télécommande Support de câble Support de télécommande Presse-étoupe Câble PI - 1,5m Câble de signal - 10m Câble d'entrée d'alimentation (x2 pour les sorties jumelles optionnelles) (Adaptateur allume-cigare) M4 ×20(15) Manuel d'utilisation Manuel d'utilisation Adaptateur (optionel) -
Page 48: Nom Des Pièces
2-2. Nom des pièces Unité principale Antenne au Boîtier PI (port "ANT") au récepteur (optionnel) Plaque de montage Boîtier PI Télécommande Voyant LED de récepteur Écran à distance Voyant LED d'alimentation Bouton BT Couplage d'antenne Bouton HOME avec télécommande Bouton Mode Bouton POWER Bouton HOME Bouton SET... -
Page 49: Instructions De Fonctionnement
3. Instructions de fonctionnement 3-1. Diagramme de Connection Télécommande Application mobile Boîtier PI Câble d'entrée d'alimentation Adaptateur allume-cigare Récepteur satellite Télé Unité principale Allumez la puissance Boitier PI après toutes les connexions des câbles sont complets. Lorsque vous n'utilisez pas l'antenne, coupez l'alimentation Boitier PI. FRANÇAIS - 6... -
Page 50: Description Fonctionnelle
3-2. Description fonctionnelle 1. Boîtier PI A. Bouton et LEDs Voyant LED de récepteur i. Bouton d'alimentation Appuyez sur le Bouton POWER pour Voyant LED d'alimentation allumer le boîtier PI et alimenter l'antenne. Bouton HOME (LED d'alimentation allumée) Bouton POWER Maintenez la bouton enfoncée pendant plus de 3 secondes pour éteindre l'appareil. - Page 51 B. Fonctions de base La télécommande recherche automatiquement l'unité d'antenne à CONNECTING proximité. Remote control S'il y a une antenne qui a été connecté avant, connectez-vous Version : 00 immédiatement Lorsque vous utilisez l'antenne et la télécommande pour la première fois ou lorsque vous supprimez la liste d'antennes stockée dans la télécom- SELECT MAC mande, une liste de produits pouvant être connectés apparaît.
- Page 52 i. Reglage de DiSEqC Consultez les pré-satellites SNIPE3 pour DiSEqC 1.1 lors de la configuration de l'utilisateur à STB Satellite LNB 1 ASTRA1 LNB 2 ASTRA2 LNB 3 ASTRA3 LNB 4 ASTRA1 LNB 5 Hot Bird LNB 6 Eutelsat 9 LNB 7 ASTRA 4 LNB 8...
- Page 53 C. Fonction supplémentaire Bouton BT Appuyez sur le bouton BT pour passer à l'écran de réglage BT. Appuyez sur la flèche pour accéder à la fonction souhaitée et réglez avec la bouton SET Supprimez le code produit de l'antenne stockée dans la télécommande. BT SET Utilisé...
-
Page 54: Référence Rapide
Attendez que le message 'FOUND SAT' apparaisse sur l'écran de la télécommande. Une fois la recherche par satellite terminée, regardez l'émission. REMARQUE Afin de vous assurer que votre SNIPE DOME 2 fonctionne correctement, vous devez vous assurer qu'il est conforme au mode d'emploi de ce manuel et utilisé comme prévu. -
Page 55: Dépannage
5. Dépannage Il y a un certain nombre de problèmes communs qui peuvent affecter la qualité de réception du signal ou le fonctionnement de la Unit. Les sections suivantes traitent ces questions et les solutions possibles. A. Aucune fonction lors de la mise sous tension de l'antenne Vérifiez à... -
Page 56: Dimension
6. Spécifications 6-1. Dimension SNIPE DOME 2 31.5cm 66.0cm 66.0cm Boîtier PI 129 mm 34 mm 105 mm 28 mm 102 mm 35 mm 102 mm 85mm Télécommande 50 mm 15 mm 155 mm 155 mm 69 mm 25 mm... - Page 57 9.75 / 10.6 GHz Energie requise DC 12 V Consommation d'énergie 30 W (en mouvement) Modèle SNIPE DOME 2 Télécommande Fréquence 2.4 GHz Prise en charge de la version BT Ver 4.2 / 5.0 (le dernière) Puissance TX +3 dBm ou plus BLE Gain Sensibilité...
-
Page 58: Caravan/Motorhome Installation
7. Installation 7. Caravan/Motorhome Installation 7-1. Précaution avant l'installation Le produit est livré avec une serrure interne pour protéger l'appareil et prévenir les dommages pendant le transport. Avant l’installation, retirez le boulon de verrouillage situé au bas du produit, qui est indiqué par l’autocollant ‘Remove(Retirez ceci)’... -
Page 59: Espace Requis Pour L'installation
7-2 . Espace requis pour l'installation Veillez à ce qu'il y ait suffisamment d'espace pour, tout comme pour la plage de fonctionne- ment. l'arrière du véhicule 66.0cm Direction de conduite 31.5cm FRANÇAIS - 16... -
Page 60: Equipement Pour L'installation
7-3. L'équipement pour l'installation Silicone Ruban de masquage Nettoyant Trépan de 2 mm, trépan de 20 mm Perceuse électrique Support de câble Presse-étoupe M4 ×20(15) Boîtier PI Câble PI (1,5m) Câble de signal (10m) Télécommande, Support de télécommande Adaptateur allume-cigarettes (Cable d'alimentation) 7-4. - Page 61 B. 2pcs à vis de boulon M4x20 pour fixer la Plaque de fixation PPlacer la plaque de montage sur la silicone et Appliquer de la silicone sur les trous faire 2 trous (2 mm) avec une perceuse électrique Visser les 2 trous vis M4x20 Réappliquer de la silicone pour couvrir les boulons vissés C.
- Page 62 D. Installation du Support de câble Disposez le support de câble devant le centre Appliquez du ruban de masquage à 5 mm de de l'antenne (à 30 cm de distance) en orientant l'extérieur du support et percez un trou de 20 le côté...
- Page 63 E. L'installation du Boîtier PI et de télécommand Obtenez le câble d'alimentation et branchez-le Pour alimenter la batterie de la voiture, couper le dans une prise allume cigare (prise 12V) connecteur du cigare pour retirer les trois câbles intérieurs et retirer chacun pour retirer le câble en cuivre 12V DC approx.1.5m...
- Page 64 I DO IT CO., LTD. #637, Smart-Hub Industry-University Convergence Center, 237 Sangidaehak-ro, Siheung-si, Gyeonggi-do, Korea (15073) TEL +82 (0)31 8041 1500 FAX +82 (0)31 8041 1550 E-MAIL sales@selfsat.com WEB www.selfsat.com...
Need help?
Do you have a question about the SNIPE DOME 2 and is the answer not in the manual?
Questions and answers