
Subscribe to Our Youtube Channel
Related Manuals for The Singing Machine STVG785BTW


Summary of Contents for The Singing Machine STVG785BTW
- Page 1 STVG785BT/STVG785BTW INSTRUCTION MANUAL www.singingmachine.com The Singing Machine® is a registered trademark of The Singing Machine Co., Inc.
-
Page 2: Important Safety Information
Warnings WARNING: TO PREVENT FIRE OR SHOCK HAZARD, DO NOT EXPOSE CAUTION THIS UNIT TO RAIN OR MOISTURE. RISK OF ELECTRIC SHOCK FCC WARNING: This device complies with Part 15 of the FCC Rules. DO NOT OPEN Operation is subject to the following two conditions: (1) this device may not cause harmful interference, and (2) this device must accept any interference CAUTION: TO REDUCE THE RISK OF ELECTRIC SHOCK, DO NOT received, including interference that may cause undesired operation. - Page 3 Included Please make sure that the following items are included. Main Unit Wired Microphone AC Adapter Manual Audio/Video Cables — 2 —...
-
Page 4: Master Volume
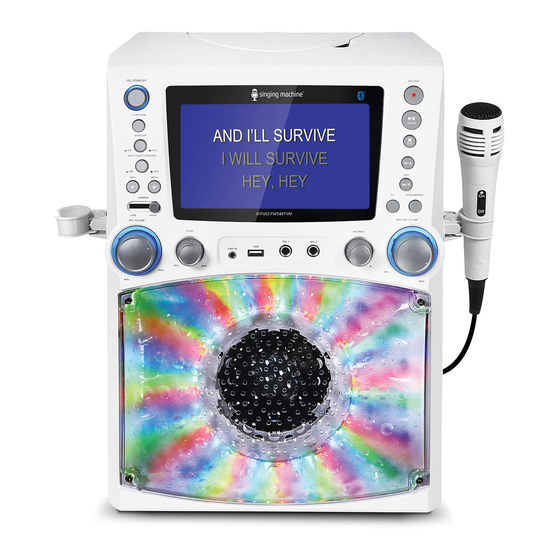
Location of Controls (Top/Front) 1. ON/STANDBY Button 8. Mic Holders 18. Stop </PAIR Button 2. Screen 9. MIC VOLUME Control 19. Skip 9/5 Button 3. FUNCTION Button 10. ECHO Control 20. Skip :/6Button 4. MONITOR ON/OFF 11. LINE IN Jack 21. -
Page 5: Location Of Controls (Rear)
Location of Controls (Rear) 1. AUDIO OUT Left Jack 2. VIDEO OUT Jack 3. AUDIO OUT Right Jack 4. DC IN Jack — 4 —... - Page 6 Connection Connecting the Microphone(s) Microphones: Connect a microphone into MIC Jack 1 u as well as MIC Jack 2 v (when desired). Note: Do not drop or tap the Mic as damage to the Mic or speakers may occur. Do not twirl the microphone cord as it will cause damage to the encased wiring.
- Page 7 Connection Connecting to AC Power Insert the small end of the AC adapter into the DC IN Jack on the rear of the unit. Insert the other end (with the 2 blades) into a conveniently located AC outlet having 120V AC, 60Hz. Note: Make all connections before connecting to AC power.
- Page 8 Operation Playing a CD Connect the unit as described previously. Press the ON/STANDBY button to turn the unit on. Lift open the CD door and insert a CD (with standard or MP3+G files) or a CD+G by gently pressing it on the center spindle.
- Page 9 Operation Playing a CD (Continued) Adjust the volume to a comfortable level using the MASTER VOLUME control. Connect microphone(s) as shown on page 5, and slide the ON/OFF switch on the microphone to the ON position. Adjust the MIC VOLUME control as desired.
- Page 10 Operation Playing a CD (Continued) AUTO VOICE CONTROL can be activated by pressing the AUTO VOICE CONTROL ON/OFF button. The vocals on a multiplex recording will be muted as soon as the singer begins singing into the microphone. When the singer stops singing, the recorded vocals on the multiplex recording will resume to normal.
-
Page 11: Recording Your Singing
Operation Playing a CD (Continued) PROGRAM: You can program up to 20 tracks for playback in any desired order. While in Stop mode, press the PROGRAM/REPEAT button; PROG SET 00:XX (xx is the total tracks) will appear in the display. Select the first track using the Skip 9/5 or Skip :/6buttons, then press the PROGRAM/REPEAT button. - Page 12 Operation Playing Songs from the USB Connect the unit as described previously. Press the ON/STANDBY button to turn the unit on. Insert a USB flash drive into the USB port on the unit so it faces upward. Make sure to download music from the Karaoke store, see page 19.
- Page 13 Operation Playing Songs from the USB (Continued) Connect microphone(s) as shown on page 5, and slide the ON/OFF switch on the microphone to the ON position. Adjust the MIC VOLUME control as desired. Increasing this control will increase the volume of both microphones.
- Page 14 Operation Playing Songs from the USB (Continued) SKIP: Advance or go back one file by pressing the Skip 9/5 or Skip :/6buttons. You can also skip ahead 10 files/tracks using the 10+ button. SEARCH: When playing any audio from the USB, press and hold the Skip 9/5 or Skip :/6buttons.
- Page 15 Operation Playing Songs from the USB (Continued) PROGRAM: You can program up to 20 tracks for playback in any desired order. While in Stop mode, press the PROGRAM/ REPEAT button; PROG SET 00:XX (xx is the total tracks) will appear in the display. Select the first track using the Skip 9/5 or Skip :/6buttons, then press the PROGRAM/REPEAT button.
- Page 16 Operation Using a Bluetooth Device Connect the unit as described previously. Press the ON/STANDBY button to turn the unit on. Repeatedly press the FUNCTION button to select the Bluetooth; “BLUE TOOTH” will appear on the screen. The screen will show your Bluetooth device is ready to connect with a notification sound.
- Page 17 Operation Using a Bluetooth Device (Continued) To control your Bluetooth device from this unit, press the Play/Pause ENTER button to start playback (music app must be open). Press the Play/ Pause /ENTER button during playback to pause the song. Adjust the volume to a comfortable level using the MASTER VOLUME control on this unit as well as the volume on your Bluetooth device.
- Page 18 Operation Using the LINE IN Jack Connect the unit as described previously. Press the ON/STANDBY button to turn the unit on Connect the external unit to the LINE IN Jack on the front of this unit. Connecting an external unit will allow the audio to be played through your Singing Machine.
- Page 19 Operation Using the LINE IN Jack (Continued) Adjust the MIC VOLUME control as desired. Increasing this control will increase the volume of both microphones. Rotate the ECHO control to add an echo effect to your voice. Rotate towards MAX to increase the echo effect. Adjust the BALANCE control to move the audio from the left to right speaker or vice-versa.
-
Page 20: Operation
USB flash drive. • Remove (eject) the USB flash drive from your computer. Download your selected purchase(s) Turn on the Singing Machine and connect the USB from the Singing Machine Digital Locker flash drive. to your USB flash drive. Insert the USB flash drive as shown on •... -
Page 21: Troubleshooting Guide
Troubleshooting Guide Should this unit exhibit a problem, check the following before seeking service: No Power • Power is not on; press the ON/STANDBY button to turn power on. • Confirm that the AC adapter is connected securely to the back of the unit. •... -
Page 22: Specifications
Specifications AUDIO Output Power .........................10 Watts (RMS) Output Impedance ........................4 Ohms CD SECTION Frequency Response ..................... 100Hz - 20kHz Signal-to-Noise Ratio ....................50dB (A-WTD) Number of Programs ............20 Step Random Access Programming Sampling System ....................8 Times Over Sampling BLUETOOTH Bluetooth Version ........................V2.1+RDA Working Distance ...........Up to 30 feet/10 meters measured in open space Format ..............................FAT32 Maximum Compatibility ........................32GB... - Page 23 Shop for Accessories on our Website: www.singingmachine.com The Singing Machine Company, Inc. 4060 E Jurupa Street, Unit B Ontario, CA 91761-1413 USA Copyright © 2016 All Rights Reserved. PRINTED IN CHINA xxxxxxxx-ENG01 — 22 —...
Need help?
Do you have a question about the STVG785BTW and is the answer not in the manual?
Questions and answers