Table of Contents
Advertisement
Advertisement
Table of Contents

Related Manuals for EAE E-LINEKX


Summary of Contents for EAE E-LINEKX
- Page 1 E-LINEKX MANUAL www.eaeelectric.com...
- Page 2 E-LINEKX ...
-
Page 3: Table Of Contents
CONTENTS ........................ 2 Introduction ........................3-4 General ....................5-6 Handling & Storage ........7-8 Points To Be Taken Into Consideration Before Installation ......................9 Joint Structure ..................10 General View Of The Joint ............ 11 Determination Of Special Lengths & Offset Sizing .......... 12-14 Mounting Instructions For Joints (Bolt-on / Plug-in) ........ -
Page 4: Introduction
27001 Dear Customer, EAE Elektrik A.S. Products are designed to provide the maximum benefit in efficiency and service. Our products are manufactured in accordance with Management Systems standards and EAE quality principles in our modern production plants in Istanbul. -
Page 5: General
KXMANUAL General 1- Installation according to the project of the WARNING: busbar system, planning and coordination with other distribution systems (mechanical, heat, Dangerous voltage levels in the electrical steam, air installation etc.) is crucial. components may result in the hazardous injury and death. - Page 6 KXMANUAL General Envoirement Rain Water BUSBARS SHOULD Drops Chemicals Urine NOT BE IN TOUCH WITH ANY LIQUID MATERIAL Please use canopy for outdoor Please use porch applications. for outdoor. CLOSE Please use canopy Please use porch INDIRECT or DIRECT for building expension for outdoor.
-
Page 7: Handling & Storage
KXMANUAL Handling & Storage 1- General guidelines are given to protect the busbar straight lengths and modules and reduce the risk of personal injury and equipment damage during handling on site. 2- As soon as the container or truck arrives on site, a suitable forklift is required for easy and convinient unloading from vehicle directly to the ground level. - Page 8 KXMANUAL Handling & Storage 5- When the lengths and modules are required 9- When busbar straight lengths and modules to be taken from the pallets to the erection area, are to be stored for certain time before those should be hoisted using metal rods or installation, restore the packing for protection bars passed through the 2 sets of holes at each during that period and cover them with...
-
Page 9: Points To Be Taken Into Consideration Before Installation
KXMANUAL Installation Points to be taken into consideration before installation IMPORTANT! 5- If the busbar lines are used in the transition of building dilatations, appropriate dilatation 1- Please read this instruction manual before module should be chosen. Please contact our commencing the busbar installation. - Page 10 KXMANUAL Installation Points to be taken into consideration before installation 8- Protect the busbar against water and 10- The busbar to be installed needs to be moisture from unfinished roofs and walls hanged min 4 points, as shown in below during installation.
-
Page 11: Joint Structure
KXMANUAL Joint Structure Extruded Aluminium Housing PE Fixing Piece Insulation Layers (Epoxy+polyester film) Joint Insulators Joint Cover Belleville Washer Alignment Pin (removable) Conductors IP55 Nut Locking Piece 10. Protection Plastics 11. IP55 Joint Cover Gasket 12. Alignment Pin Slot NB Protective covers 10 are discarded. - Page 12 KXMANUAL Installation General Overview Of The Joint Bolt-on Box Fixing Point Plug-in Box Fixing Point Use special hand clamps if it is difficult to move. www.eaeelectric.com www.eaeelectric.com...
-
Page 13: Determination Of Special Lengths & Offset Sizing
KXMANUAL Determination of Special Lengths of Offset Sizing 1- Special length (particular or custom size) 3- In the case in where custom-made busbars are used in places where standard intermediate-size busbars are required, both sizes do not fit when the busbar is mounted and ends of the intermediate-size busbars can in other similar places. -
Page 14: Mounting Instructions For Joints (Bolt-On / Plug-In)
KXMANUAL Installation Mounting Instructions For Joints (Bolt-on / Plug-in) 1-Align the two busbars so that the parts with 2- Remove the protective covers on the side with and without block joints are opposed. no block joints. 3-Remove the nut locking piece on the busbar 4-Ensure that the insulation plates of the joint, joint and loosen the joint. - Page 15 KXMANUAL Installation Mounting Instructions For Joints (Bolt-on / Plug-in) 250mm PE housing 7-Adjust the channel in order to pivot the 8-Push the two busbars until they rest on each alignment piece to the housing. other. 9-Assemble both the joint covers with the 10-Adjust the torque wrench to 83 Nm (60 lbft) gaskets facing out.
- Page 16 KXMANUAL Installation Mounting Instructions For Joints (Bolt-on / Plug-in) 13-Finally tighten the locking piece to 40 Nm to complete the installation. Ek montajı, talimatına uygun yapılmıştır ve yanda yazılı Nm değerinde ek torklanmıştır. Block Joints have been done according to manual and applied related Nm value to the main bolts.
-
Page 17: Points To Be Taken Into Consideration After Installation
KXMANUAL Installation Points To Be Taken Into Consideration After Installation 1- When the installation has been completed, 2.3- After the busbar system is energized, loads please check the position of the neutral must be switched in sequence (main and sub conductor along the busbar run. - Page 18 KXMANUAL Installation Points To Be Taken Into Consideration After Installation 5- Do not use any other means than original tap off boxes to supply energy from the busbar. 6- Current rating of the busbar run should be equal to the rating of the breaker. Do not exceed busbar nominal current during operation.
- Page 19 KXMANUAL Installation Points To Be Taken Into Consideration After Installation WITHSTAND PERIODS AGAINST TO WATER AS PER STANDARD. IP55 & IP65 IP67 3 Min. Under water 30 min. Pressure Water N L1 L2 L3 N L1 L2 L3 Phase Sequence Changer Vertical Shaft Application 1- The neutral bar of KX busbar shall be at the 2- In order to maintain the neutral bar at the...
-
Page 20: Things To Be Taken Into Consideration In Vertical Distribution Project
EAE is not responsible for the potential risks that may occur in cases where the products in our catalogue are used outside of the standard phase sequences as shown in the catalogue. -
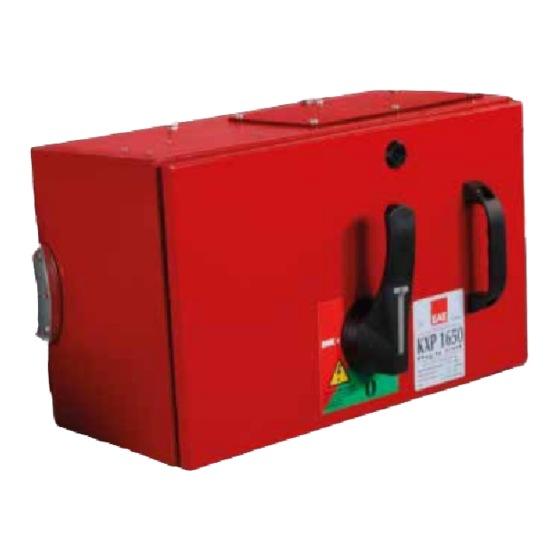
Page 21: Plug-In Busbar Tap Off Boxes (Kxp)
KXMANUAL Installation "Plug-in" Busbar Tap Off Boxes (KXP Box) Vertical Application Warning! * Do not try to install plug-in tap off boxes to bolt-on busbar or vice versa. IEC 60439-2 E L E K T R İ K B o l t - o n U N I T * Do not try to install 4 wire tap off boxes to 5 wire busbar or vice versa. - Page 22 KXMANUAL Installation "Plug-in" Busbar Tap Off Boxes (KXP Box) Horizontal Application 1- Remove the fixing screw of "plug-in" tap off 2- Open and push the cover back, the "plug-in" point cover using cross-recessed screw driver. tap off point cover should be opened to a position which will not block the way for installation of the box.
-
Page 23: Bolt-On Busbar Tap Off Boxes (Kxb)
KXMANUAL Installation "Bolt-on" Busbar Tap Off Boxes (KXB Box) Important! Busbar system must be de-energised before mounting or removing a “bolt-on” tap off box. 180° 1- Remove the locking pieces. Remove the joint side cover plate and keep the plate and the screws for future use. - Page 24 KXMANUAL Installation "Bolt-on" Busbar Tap Off Boxes (KXB Box) IEC 60439-2 E L E K T R İ K B o l t - o n U N I T Rated Insulation Voltage .... (Ui) : 1000 V Rated Frequency : 50/60 Hz ......
- Page 25 KXMANUAL Installation "Bolt-on" Busbar Tap Off Boxes (KXB Box) VERTICAL APPLICATION First Torque Final Torque (20 Nm) (83 Nm) 7- If there are more than one bolt for the same phase, bolts shall tighten hand approximately 20-30Nm as per above sequence, then 83Nm shall be applied at final torque with the same sequence.
- Page 26 KXMANUAL Installation ‘‘Bolt-on" Busbar Tap Off Boxes (KXB Box) HORIZONTAL APPLICATIONS max.1500 mm min. max.1500 mm min. max.1500 mm min. www.eaeelectric.com...
-
Page 27: Cable Feed Box Installation (B10,B11)
KXMANUAL Installation Cable Feed Box Installation (B10, B11) 1- When installing the feeder boxes B10, B11 3- Cable glands should be selected according make sure that the phase sequence of the to the size and number of feeder cables. Please feed box matches the phase sequence of the consult to factory for requirements other the busbar. - Page 28 KXMANUAL Energizing Before Energizing 6.1- It is recommended that no energy is 8- All busbar system should be checked visually applied to the line even if the insulation to be certain that they are clean and secure. resistance test described in section 7.4 is Loose and/or contaminated...
-
Page 29: Energizing The Equipment
''ON''. 2- There should be no electrical load on the 6- EAE busbar system is particularly quiet busbar system when it is energized. when operating normally. In some installations however there may be a moderate hum. -
Page 30: Maintenance
61439-6 and locally applicable safety related work practices should be followed at all times. Tap Off Boxes With Protective Devices 1- EAE tap off boxes are not equipped with any 3- The total continuous load current should be protective device unless they are required by measured by proper instrument that does not customer. - Page 31 KXMANUAL www.eaeelectric.com...
- Page 32 KXMANUAL www.eaeelectric.com...
- Page 33 PRODUCT TYPES BUSBAR ENERGY DISTRIBUTION SYSTEMS CABLE TRAYS TROLLEY BUSBAR ENERGY DISTRIBUTION SYSTEMS INDOOR SOLUTIONS SUPPORT SYSTEMS Please visit our website for the updated version of our catalogues. www.eae.com.tr/EN IRAQ OMAN SUDAN CHILE PERU KENYA LEBANON GHANA SUDAN CHILE CHILE...
- Page 34 Fax: +90 (262) 502 05 70 9001 14001 IEC 61439-6 18001 27001 E 344805 KX Manual / En. / Rev 04 1.000 pcs 07/09/2021 EAE has full right to make any revisions or changes on this catalogue without any prior notice.
Need help?
Do you have a question about the E-LINEKX and is the answer not in the manual?
Questions and answers