
Related Manuals for Lancaster BLL090 128P


Summary of Contents for Lancaster BLL090 128P
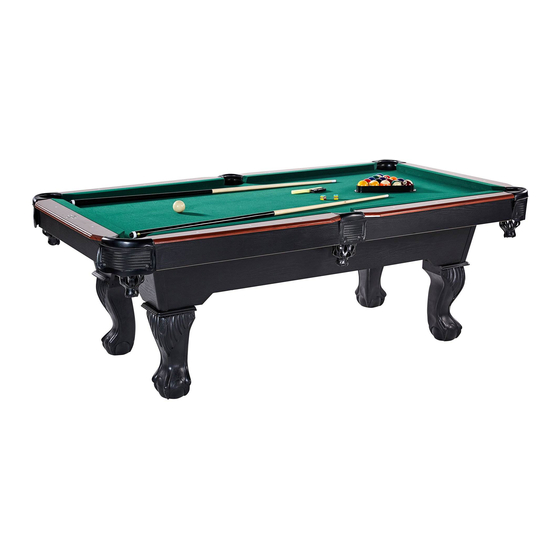
- Page 1 MODEL BLL090_128P SPREETAIL Assembly Instructions Please mention model # BLL090_128P_V2 877-472-4296 www.wearespreetail.com...
- Page 2 Consumer Service Department. Please be aware of your product’s Limited Warranty for the return/refund policy from the store, We, at Lancaster, cannot handle the product which is out of product’s limited warranty since we only provide available parts. Thank you!
-
Page 3: Tools Required
English TOOLS REQUIRED Phillips Screwdriver - Not Included Standard (Flat Head Screwdriver) - Not Included Wrench - Included Allen Key - Included Power Tools: Set to Low Torque RECOMMENDED Electric Screwdrivers may be helpful during assembly; however, please set a low torque and use extreme caution. -
Page 4: Parts Identifier
English PARTS IDENTIFIER PART NUMBER FOR FIG. 13 FIG NUMBER PART QUANTITY PART NAME Mainframe FOR FIG. 1 FOR FIG. 1 FOR FIG. 2 FOR FIG. 11 Leg Top Panel - A Leg Top Panel - B Leg Panel Support Support Board FOR FIG. - Page 5 English ACCESSORIES Chalk Triangle Brush Billiard Ball Set HARDWARE FOR FIG. 2 FOR FIG. 9 FOR FIG. 2, 9 FOR FIG. 1 5/16''x1'' Bolt 5/16''x1-1/2'' Bolt 5/16'' Washer F4x2'' Screw FOR FIG. 5, 9 FOR FIG. 5 FOR FIG. 6 FOR FIG.
-
Page 6: Before Assembly
English PRE-INSTALLED PARTS FOR FIG. 1. 6 FOR FIG. 6 FOR FIG. 13 FOR FIG. 11 Barrel Nut 5/16'' 1/4'' T - Nut Adjustable Bracket BEFORE ASSEMBLY Find a clean, level place to begin the assembly of your product. Verify that you have all listed parts as shown on the part list pages. If any parts are missing, call our customer service. BLL090_128P (Continued on the next page) www.wearespreetail.com... - Page 7 English ASSEMBLY FIG. 1 Pre-installed FIG. 2 Note: Do NOT tighten the Bolts (A1) until FIG. 9. BLL090_128P (Continued on the next page) www.wearespreetail.com...
- Page 8 English ASSEMBLY FIG. 3 Note: For plastic legs - A, B (6 & 7), please follow the illustration and the picture accordingly, lock them together in the order of 1, 2, 3, 4, 5, 6. Note: You will hear a “click” sound when the legs have successfully locked together.
- Page 9 English ASSEMBLY FIG. 4 Note: For plastic legs - C, D (8 & 9), please follow the illustration and the picture accordingly, lock them together in the order of 1, 2, 3, 4. IMPORTANT: You will hear a “CLICK” sound when snapping the Legs together. This will indicate that the Legs are locked firmly in place.
- Page 10 English ASSEMBLY FIG. 5 FIG. 2 Assembly FIG. 3 Assembly FIG. 4 Assembly BLL090_128P (Continued on the next page) www.wearespreetail.com...
- Page 11 English ASSEMBLY FIG. 6 Note: Apply the Glue (18) onto the grooves of the Side and End Top Boards (10 & 12). Pre-installed 10 & 12 Pre-installed BLL090_128P (Continued on the next page) www.wearespreetail.com...
- Page 12 English ASSEMBLY FIG. 7 TOP VIEW: Part 14 SIDE VIEW: Part 14 Note: Flush with Aprons Note: Arrow on the backside of Apron Corners shows direction to slide the Apron Corners down. BLL090_128P (Continued on the next page) www.wearespreetail.com...
- Page 13 English ASSEMBLY FIG. 8 Note: Make sure “FLAPS” on Top Leg Panels are FLUSH AGAINST APRONS before inserting Screws. BLL090_128P (Continued on the next page) www.wearespreetail.com...
- Page 14 English ASSEMBLY FIG.9 Note: After this step, tighten the Bolts (A1) (See FIG. 2). FIG. 5 Assembly BLL090_128P (Continued on the next page) www.wearespreetail.com...
- Page 15 English ASSEMBLY FIG. 10 Note: Avoid sideways pressure Legs when turning over. Note: Go back and make sure that all connections are tightened. DO NOT LEAN THE HOLD BY THE CABINET DO NOT HOLD THE TABLE TABLE ON ITS LEGS TABLETOP BY THE LEGS CAUTION...
- Page 16 English ASSEMBLY FIG. 11 Pre-installed Note: Please note that Adjustable Bracket (P4) and Support Boards (5) must be parallel with each other. FIG. 12 BLL090_128P (Continued on the next page) www.wearespreetail.com...
- Page 17 English ASSEMBLY FIG. 13 Pre-installed SIDE VIEW BLL090_128P (Continued on the next page) www.wearespreetail.com...
- Page 18 English ASSEMBLY FIG. 14 NOTE: DO NOT lift the table by the pockets. If you move the table, do not lift it by placing your hands beneath the pockets and do not lean or put pressure on them. Do not lean or sit on the end or side rails as this may damage the table.
- Page 19 English HOW TO LEVEL YOUR TABLE STEP 2 Level (Not Included) Note: Under the Mainframe (1), adjust the Adjustable Bracket (P4) in order to level the playfield of the Mainframe. ADJUST CONCAVE TABLE ADJUST CONVEX TABLE BLL090_128P (The last page) www.wearespreetail.com...
- Page 20 www.wearespreetail.com...
Need help?
Do you have a question about the BLL090 128P and is the answer not in the manual?
Questions and answers