Advertisement
Quick Links
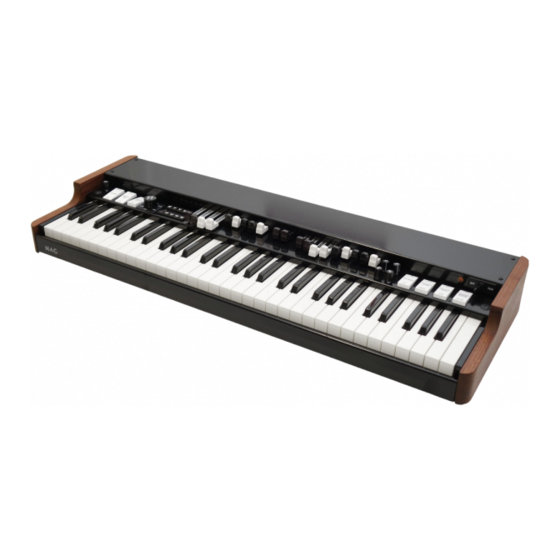
MAG Organs C-Series User Manual
Dear MAG Organs client, thanks for having chosen one of our organs. We hope you will enjoy playing
it as much as we liked building it for you!
According to the options you specified in your order, your instrument might not include all of the
controls/features described below, and/or it might have some additional interfaces with multipin
connectors for specific Leslie™ speaker models.
If you have any questions or needs, please don't hesitate to contact us.
Email: max@magorgans.com
Telephone: +420 605 811 504
Skype: massimo.ghirardi1
1
Advertisement

Related Manuals for MAG C Series

Summary of Contents for MAG C Series
- Page 1 MAG Organs C-Series User Manual Dear MAG Organs client, thanks for having chosen one of our organs. We hope you will enjoy playing it as much as we liked building it for you! According to the options you specified in your order, your instrument might not include all of the controls/features described below, and/or it might have some additional interfaces with multipin connectors for specific Leslie™...
-
Page 2: Table Of Contents
CONTENTS 1. GENERAL INFORMATION ........................3 2. FRONT PANEL CONTROLS ........................4 3. BACK PANEL CONNECTORS ....................... 8 4. PROGRAMMER UNIT (OPTIONAL) ....................10 5. mini VENT ............................11 6. SOFTWARE UPDATING PROCEDURE....................13 7. APPENDIX 1: EXTRA SOUNDS CHART....................14... -
Page 3: General Information
GENERAL INFORMATION MAG Custom Organs use the HX3 sound engine, which offers an incredibly accurate reproduction of the sound generated by the vintage tonewheel consoles. Besides the few typical controls of the consoles, some knobs and buttons offer real-time control of the most frequently adjusted parameters, and “hidden”... -
Page 4: Front Panel Controls
FRONT PANEL CONTROLS The following controls are located on the front panel, from left to right. • REV: This knob continuously adjusts the intensity of the organ reverb effect. This reverb is completely independent of the one associated with the REV I and REV II buttons as described below, and is available for the organ tones only. - Page 5 • VENT: This button inserts or removes the mini VENT from the signal path. When the LED is lit, the mini VENT is inserted in the signal path; when the LED is off, the unprocessed signal is assigned to both L and R/Mono outputs via a true bypass circuit. •...
- Page 6 the mini VENT and the Leslie™ interfaces, which will be re-established as soon as a properly wired footswitch plugged into the ROTARY SPEED socket on the back panel is operated again. • PRES 1-4: Each of these buttons activates a memorized preset. Besides the four presets that can be recalled by pressing a single button, up to 11 additional presets (for a total of 15 presets) can be recalled by simultaneously pressing two, three, or all four preset buttons in any possible combination.
- Page 7 • PERCUSSION ON/OFF: This tab activates the harmonic percussion tone. As in the vintage consoles, when this tab is ON, the 1’ drawbar of the upper manual is not active; this setting can be changed through the external Programmer Unit or the free Editor software. •...
-
Page 8: Back Panel Connectors
• SERIAL: This DB9 serial port socket is for connecting the optional Programmer Unit. • MIDI IN P: This socket is for connecting a MIDI pedalboard. If a MAG pedalboard is used, the needed voltage for the pedalboard is carried by the wires not used for MIDI signals in a 5-wire DIN cable. - Page 9 • EXTRA SOUNDS R + L: These sockets are stereo audio outputs from the Extra Sounds section. • ORGAN DIR.: This socket is a mono audio output from the Organ section. This is the same signal sent to the mini VENT and the Leslie™ interfaces. •...
-
Page 10: Programmer Unit (Optional)
PROGRAMMER UNIT (OPTIONAL) The PU-1 Programmer Unit is an optional compact unit equipped with a display, a rotary encoder and two buttons that provide a very practical way to adjust all of the parameters affecting the sound generation and modifications (carried on inside the AO-28 preamplifier in the vintage consoles) and some more parameters related to the setup of the organ. -
Page 11: Mini Vent
mini VENT When the mini VENT is installed, its stereo audio output signal is presented to the ROTARY (BAL) R/MONO + L sockets on the back panel. The mini VENT R + L signals are balanced to enable direct connection to other professional equipment. If only a mono signal is needed, the R/MONO output delivers the best rotary emulation quality, particularly when the Stop mode is engaged. - Page 12 4. The HI LED shows the current parameter value. Parameter Value Indication Factory Setting -3 (Slower) HI LED blinking 1x, then pause SPEED HI LED blinking 2x, then pause LO LED HI LED blinking 3x, then pause blinking 1x, 0 Standard 122 HI LED always blinking A, B then pause...
-
Page 13: Software Updating Procedure
SOFTWARE UPDATING PROCEDURE The HX3 sound engine installed inside MAG organs routinely receives software updates to improve its sound generation and functionality, and this is a great opportunity to keep the organ updated with the latest features and sound quality. Each new version of software needs to be fully tested on our systems, and we typically release our specific version when the beta phase has been terminated. -
Page 14: Appendix 1: Extra Sounds Chart
APPENDIX 1: EXTRA SOUNDS CHART GM Voice Assignment Parameter # Value Name Preset # Preset Keys Combination 2000 Grand Piano ● ○ ○ ○ 2001 Bright Piano ● ● ○ ○ 2002 Electric Piano 1 ● ○ ● ○ 2003 Electric Piano 2 ●...
Need help?
Do you have a question about the C Series and is the answer not in the manual?
Questions and answers