Advertisement
0IM80503
Install the product properly according to this installation manual for best performance. When the installation
Safety Cautions
Read these "Safety Cautions" carefully before starting installation work. Install the product properly.
This manual uses various indications to ensure a proper, safe installation and to prevent injury to the customer,
injury to other people and damage to property.
The symbols should be interpreted as follows.
Symbol example
Improper use or installation of this product may result in injury or
Caution
property damage.
Items to be observed are classified by type and explained with the following pictograms.
This symbol is used to
indicate no tampering with
this product.
Do not subject the toilet bowl to strong forces or impacts.
Otherwise, the toilet bowl may break causing injury or leaks that
may damage property.
Do not excessively bend or twist the water supply hose.
Otherwise, the flexible water supply hose may break causing leaks
that may damage property.
Prohibited
Do not remove the water supply filter with the water supply
valve being open.
If the water supply valve is not closed, water may gush out causing
leaks that may damage property.
Be sure to use the included or specified parts for installation work.
Otherwise, the product may not be installed properly.
Carry out the installation work according to this installation manual.
Required
Otherwise, damage caused by water leaks may occur.
•
Secure the space required for toilet installation and at the same
time, check door opening/closing for possible interference.
•
Turn on electricity and water supply to the product after
completing all installation work.
•
Use care not to damage the end of the connection hose.
•
The minimum required water pressure (flowing) is 7PSI at
2.64 Gal/min (0.05MPa at 10 L/min) while the maximum
water pressure (static) is 108PSI(0.75MPa).
•
Make sure before installation that the water supply source
and water drain pipe are in the specified positions
according to the diagram.
If it is not positioned properly, the product may not be
able to be installed correctly.
•
Please wash away the dust or sand in the water supply
pipe completely before installing the water supply valve.
•
If there is a gap between the discharge pipe and floor,
fill it with mold-resistant silicone-based seal material
(Mediseal).
Doing otherwise may cause water to leak downstairs.
200±10
For setting water supply Rc 1/2
PVC water drain pipe
Installation manual
C887*** C889*** Integrated Toilet
work is complete, give a detailed explanation of how to use this product to the customer.
(Observe these cautions for safety's sake.)
Meaning
This symbol is used to
indicate a required step in
the use of this product.
Caution
Precaution before installation
20
(mm)
<When distance from
wall to drainage center is
305 mm (12-3/8'')>
<When distance from
wall to drainage center is
400 mm (15-3/4'')>
305±10
400±10
A-1
<When di s tance from wal l to
<When di s tance from wal l to
drai n age center i s 305 mm (12-3/8' ' ) >
drai n age center i s 400 mm (15-3/4' ' ) >
C-1(305)
C-2
C-3
C-5
C-6
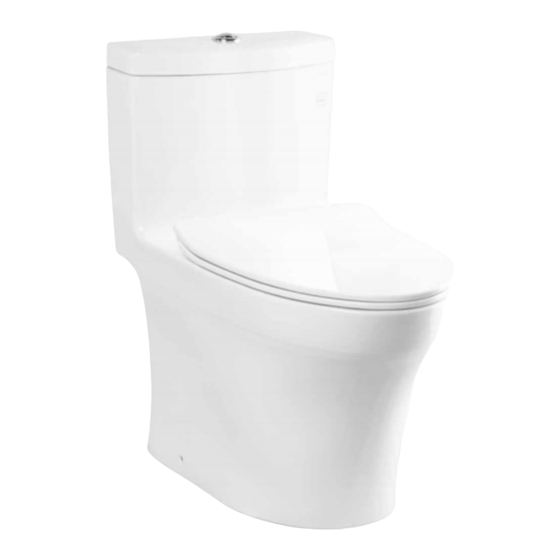
*The product may be slightly different in shape than the product shown in the figure depending on the model.
C887***
Product Diagram
(mm)
727
(mm)
Wall
100 100
E-1
PVC water drain pipe
Included parts
F-1
B-3
B-1
F-2
B-2 (300)
F-3
<There parts are not included in some cases>
E-1
C-1(400)
E-2
E-3
C-4
E-4
E-5
E-6
C889***
Product Diagram
19
701
Wall
115
115
2018.05
F-4
F-5
F-6
D-1
D-2
(mm)
(mm)
E-1
PVC water drain pipe
Advertisement
Table of Contents

Subscribe to Our Youtube Channel
Related Manuals for Toto C887 Series


Summary of Contents for Toto C887 Series
- Page 1 Installation manual 0IM80503 2018.05 C887*** C889*** Integrated Toilet Install the product properly according to this installation manual for best performance. When the installation work is complete, give a detailed explanation of how to use this product to the customer. Safety Cautions Included parts (Observe these cautions for safety’s sake.) Read these “Safety Cautions”...
- Page 2 Part diagram < When using the floor flange > (300) C-1(305) C-1 (400) <When distance from wall to drainage center is 400 mm (15-3/4'')> C-1(400) C-2/C-3/C-5 are not used in this case. Sealant *The product may be slightly different in shape than *The floor flange, T-bolt and sealant the product shown in the figure depending on the model.
- Page 3 <When distance from wall to drainage center is 400 mm (15-3/4'')> C-1(400) C-1(305) < When using the floor flange > Caution Caution in handling of the Sealant When installing the washlet main unit or standard toilet seat main unit, follow the Make sure that the seallant size/installing procedure is different, instructions in the included Installation Guide.
- Page 4 We may change this without prior notification. 3. Do not subject the toilet to strong forces or impacts. Otherwise, the toilet may break, 3. Installing this product with cement is prohibited. TOTO shall not be held responsible causing injury or leaks that may damage property.
Need help?
Do you have a question about the C887 Series and is the answer not in the manual?
Questions and answers