Table of Contents
Advertisement
Quick Links
Advertisement
Table of Contents

Related Manuals for Artusi AO654XP


Summary of Contents for Artusi AO654XP
- Page 1 AP PL I ANC ES FO R L I VI NG AO654XP OPERATION MANUAL...
- Page 2 ARTUSI Family. This instruction manual has been specially created to inform you of the full range of features your ARTUSI appliance has to offer and serves as an introduction to getting the very best out of your ARTUSI appliance.
-
Page 3: Table Of Contents
TABLE OF CONTENTS PAGE TABLE OF CONTENTS PAGE 1 - Safety instructions 15 - Broil Tips and Techniques Broil Chart 2 - Installation of the oven 16 - Convection Roast Tips and Techniques Electricals Convection Roast Chart 3 - Connection to the electrical power mains 17 - Dehydrate Tips and Techniques 4 - Instructions for use... - Page 4 Safety Warnings Built-In Oven - 750SPYKTI The appliance is not intended for use by persons (including children) • with reduced physical, sensory or mental capabilities, or lack of experience and knowledge, unless they have been given supervised or instruction concerning use of the appliance by a responsible person for their safely.
-
Page 6: Safety Instructions
1 - Safety instructions • Do not disassemble any parts prior • Parents and adults should pay particular to having disconnected the oven attention when using the product in presence from the mains. of children. • Do not use the appliance if any part • Children should be overseen so as to ensure is broken (for example a glass). - Page 7 Refer to the figures below for the correct placement of the grills EMBOSSED GUIDES REMOVABLE GUIDES...
-
Page 8: Installation Of The Oven
2 - Installation of the oven To install the oven into the kitchen a cutout should be made in accordance with the dimensions shown in Fig. 1. The apparatus is to be fastened to the top by means of the two screws provided in the kit through the holes made on the oven uprights. - Page 9 FIG. 1 Dimensions are in centimeters...
-
Page 10: Connection To The Electrical Power Mains
3 - Connection to the electrical power mains CABLE TYPES AND MINIMAL DIAMETERS WARNING SASO This apparatus must be earthed. H05RR-F 3x1,5 mm H05RR-F 3x2,5 mm H05VV-F 3x1,5 mm H05VV-F 3x2,5 mm The oven is only for domestic use. H05RN-F 3x1,5 mm H05RN-F 3x2,5 mm... -
Page 11: Instructions For Use
4 - Instructions for use The first time you use the oven Clean the oven thoroughly with soapy water and rinse well. Operate the oven for about 30 minutes at maximum temperature to burn off all traces of grease which might otherwise create unpleasant smells when cooking. -
Page 12: Removable Guides
5 - Removable Guides NOTE Always remove the removable guides before oven self-cleaning by unscrewing the nuts (A) shown in Figure 3b. To remove the lateral frames from smooth-walled ovens, proceed as shown in the figure. Fig. 3b... -
Page 13: Electronic Control
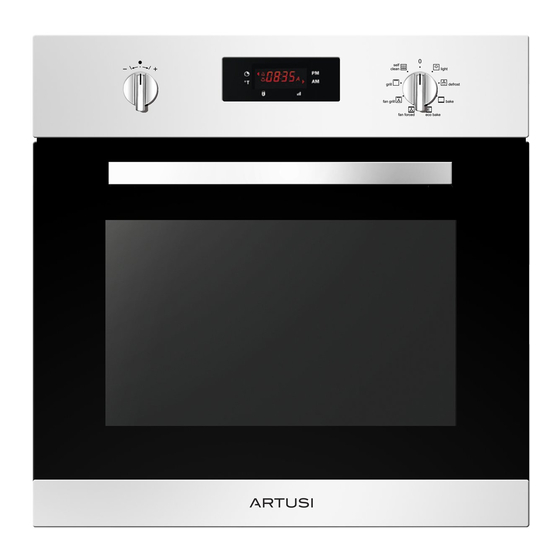
6 - Electronic control Control panel description The oven control panel is made with one display and two knobs. • Time & Temperature display. • Time & Temperature knob (Push & Shuttle). • Mode (oven functions) knob. The push & shuttle knob is mainly for clock or temperature setting and automatic time functions programming. Select the desired item by pushing the knob. -
Page 14: Programming Time Functions
Programming time functions 3 Tone Buzzer Setting At every power-up, the control shows the time of day blinking, With the cooking selector in OFF position press the +/- knob set at 12:00AM as the initial value, and the buzzer will sound until the “ton…” is showed, rotate the same knob count 3 times. - Page 15 Temperature selector knob: MINUS - = decrease PLUS + = increase PUSH = functions scroll Cooking function selector DISPLAY MEAT MODE DEFAULT knob as EXAMPLE: ICON PROBE LIGHT DEFROST 50˚C 210˚C 250˚C BAKE (120˚F) (410˚F) (480˚F) 50˚C 210˚C 250˚C BAKE (ECO) (120˚F) (410˚F) (480˚F)
-
Page 16: Cooking With The Convection Oven
7 - Cooking with the Convection Oven Advantages of Convection Cooking In a conventional oven, the heat sources cycle on and off to • Even baking, browning and crisping are achieved. maintain an average temperature in the oven cavity. • During roasting, juices and flavors are sealed in while the As the temperature gradually rises and falls, gentle air currents exterior is crisp. -
Page 17: Oven Modes
8 - Oven Modes The following illustrations give an overview of what happens in the oven with each mode setting. The arrows represent the location of the heat sources during specific modes. The lower element is concealed under the oven floor. In maximum setting time for heating, it is until 11 hours 59 minutes. -
Page 18: Cooking Functions
9 - Cooking functions Each type of oven is provided for various cooking systems. A system can be selected by bringing the pointer of knob to the relating symbol. The Fig. 8 shows the controls available on the different oven models. Icon Mode Description Used for…... -
Page 19: Quick Tips
10 - Quick Tips Convection Cooking Advantages of Convection Cooking About Convection Cooking Standard cooking modes (Bake, Broil, etc.) use heat radiated • Even baking, browning and crisping. from one or more elements to cook food. Convection modes • Juices and flavors are sealed in. use both heat from the elements and fans in the back of the oven to continuously circulate the heated air throughout the • Air-leavened foods such as cream puffs, soufflés, meringues... -
Page 20: Setting An Oven Function Manually
11 - Setting an oven function manually Turn the mode knob into the desired position, the clock symbol will flashes to indicate that a timed cooking is display shows On for a few seconds. The oven will work for a active. -
Page 21: Convection Bake Tips And Techniques
12 - Convection Bake Tips and Techniques Reduce recipe baking temperatures by 15˚C (25˚F). MULTIPLE RACK PAN PLACEMENT • For best results, foods should be cooked uncovered, in low- sided pans to take advantage of the forced air circulation. Use shiny aluminum pans for best results unless otherwise specified. -
Page 22: Convection Bake Chart
Convection Bake Chart • Reduce standard recipe temperature by 15˚C (25˚F) for Convection Bake. • Temperatures have been reduced in this chart. FOOD ITEM RACK POSITION TEMP. °C (°F) TIME (Min.) (PREHEATED OVEN) Cake Cupcakes 165 (325) 16-20 Bundt Cake 165 (325) 37-43 Angel Food... -
Page 23: Bake Tips And Techniques
13 - Bake Tips and Techniques Baking is cooking with heated air. Both upper and lower • When using heatproof glass, reduce temperature by 15˚C elements in the oven are used to heat the air but no fan is used (25˚F) from recommended temperature. -
Page 24: Convection Broil Tips And Techniques
14 - Convection Broil Tips and Techniques • Place rack in the required position needed before turning on the oven. • Use Convection Broil mode with the oven door closed. • Do not preheat oven. (This mean, “PREHEAT” indication is automatically appear when the Convection Broil mode is selected, but place food inside the oven before selecting the Cooking mode) • Use the 2-piece broil pan. -
Page 25: Broil Tips And Techniques
15 - Broil Tips and Techniques • Place rack in the required position needed before turning on the oven. • Use Broil mode with the oven door closed. • Preheat oven for 5 minutes before use. • Use the 2-piece broil pan. (Without 2 Pans may have risk of fire with drip of the fat from the meat.) • Turn meats once halfway through the cooking time (see Broil Chart). -
Page 26: Convection Roast Tips And Techniques
16 - Convection Roast Tips and Techniques • Do not preheat for Convection Roast. (This mean, IMPORTANT “PREHEAT” indication is automatically appear when the Convection Roast mode is selected, but place food inside Quick and easy recipe tips the oven before selecting the Cooking mode.) Converting from standard BAKE to CONVECTION • Roast in a low-sided, uncovered pan. -
Page 27: Dehydrate Tips And Techniques
17 - Dehydrate Tips and Techniques • Dehydrating can be done using the a lower temperature is used and the circulating heated air slowly removes the moisture for food preservation. • Choose convection bake as the heating mode when dehydrating • The Dehydrate temperatures recommended are 50˚C (120˚F) to 70˚C (160˚F). -
Page 28: Oven Care And Cleaning
18 - Oven Care and Cleaning Self-Cleaning the Oven Preparing the Oven for Self-Cleaning This oven features a pyrolytic Self-Cleaning function that 1. Remove all utensils and bakeware. eliminates the difficult and time consuming manual scrubbing 2. Remove non-porcelain oven racks. of the oven interior. -
Page 29: Setting The Self-Cleaning Mode
19 - Setting the Self-Cleaning Mode Before using the Self-Cleaning Mode please read the Oven The control also locks immediately the door in order to Care and Cleaning page carefully and follow the Preparing guarantee the user safety, given that the temperature inside gets the Oven for Self-Cleaning first. -
Page 30: Sabbath Mode & Meat Probe Function
20 - Sabbath Mode & Meat Probe Function Sabbath Mode Activation Methods 1. Once the probe has been inserted in its receptacle and 1. Rotate selector to BAKE and set the desired temperature by detected by the control turn the cooking mode knob into the +/- knob. -
Page 31: General Oven Care
21 - General Oven Care How to Use the Cleaning Chart 1. Locate the number of the part to be cleaned in the illustration on this page. 2. Find the part name in the Cleaning Chart. 3. Match the letter with the cleaning method on following page. Cleaning Chart Cleaning Method Cleaning Method... -
Page 32: Oven Finishes / Cleaning Methods
22 - Oven Finishes / Cleaning Methods The entire oven can be safely cleaned with a soapy sponge, rinsed and dried. If stubborn soil remains, follow the recommended cleaning methods below. • Always use the mildest cleaner that will do the job. • Rub metal finishes in the direction of the grain. -
Page 33: Replacing An Oven Light
23 - Replacing an Oven Light • Each oven is equipped with two halogen lights located in WARNING the lateral walls of the oven. • The lights are switched on when the door is opened or • Make sure the oven and lights are cool and power to when the oven is in a cooking cycle. -
Page 34: Solving Baking Problems
24 - Solving Baking Problems With either Bake or Convection Bake, poor results can occur Check the Baking Charts from Page 18 to 22 for the for many reasons other than a malfunction of the oven. Check correct rack position and baking time. the chart below for causes of the most common problems. -
Page 35: Solving Operational Problems
25 - Solving Operational Problems Before contacting service, check the following to avoid unnecessary service charges. Cooktop Problem Problem Solving Steps E008 Error appears in the display A problem with latch mechanism occurred. Remove power and turn it back on again after window. -
Page 36: Guidance Temperature An Time Schedule For Cooking
26 - Guidance temperature an time schedule for cooking Traditional cooking Hot-air cooking system Rack position Cooking Cooking FOOD Mode (from the Temperature Temperature time time bottom) °C °C in minutes in minutes Poork, calf 180 ÷ 190 25 ÷ 35 170 ÷... -
Page 37: Removing The "Full Glass" Panoramic
27 - Removing the “FULL GLASS” panoramic door WARNING Make sure that: • The oven is cool and power to the oven has been turned off before removing the door. Failure to do so could result in electrical shock or burns. • The oven door is heavy and fragile. -
Page 38: How To Remove The Inner Glass Of The "Full Glass" Panoramic Door
28 - How to remove the inner glass of the “FULL GLASS” panoramic door 1. Wear protective gloves. 5. Replace the middle panes after cleaning in reverse order, checking that they are oriented so the words INTERNAL 2. Place the door on a flat horizontal surface face down on a SIDE are properly legible. -
Page 39: Replacement Of The Oven Light
29 - Replacement of the oven light WARNING Make sure that: • The oven and lights are cool and power to the oven has been turned off before replacing the light bulb(s). Failure to do so could result in electrical shock or burns. • The lenses must be in place when using the oven. - Page 40 O ce: 2. What is not Covered by the Warranty. 48-50 Moore Street, Leichhardt N.S.W 2040 The Warranty does not apply if an artusi product Post: is defective by a factor other than a defect arising Locked Bag 3000, Annandale, N.S.W 2038...
- Page 41 Last Name: First Name: Address: State: Postcode: Email: Home Phone: Mobile: Purchase Date: (Please attach proof of purchase to validate warranty) SERIAL NUMBER MODEL NUMBER (if you cannot locate the serial number please call ARTUSI on 1300 694 583) 01032014...
- Page 43 Product dimensions indicated in our literature is indicative only. Actual product only should be used to define dimension cutouts. Distributors, and retailers are not agents of ARTUSI and are not authorised to bind ARTUSI by any express or implied undertaking or representation.
Need help?
Do you have a question about the AO654XP and is the answer not in the manual?
Questions and answers