Table of Contents
Advertisement
Quick Links
Preface
Thanks for your favor in our product. This manual is helpful for you to quickly know how to use the
product. To avoid body injury or property loss caused by misoperation, please read the Safety
Information Booklet carefully before use.
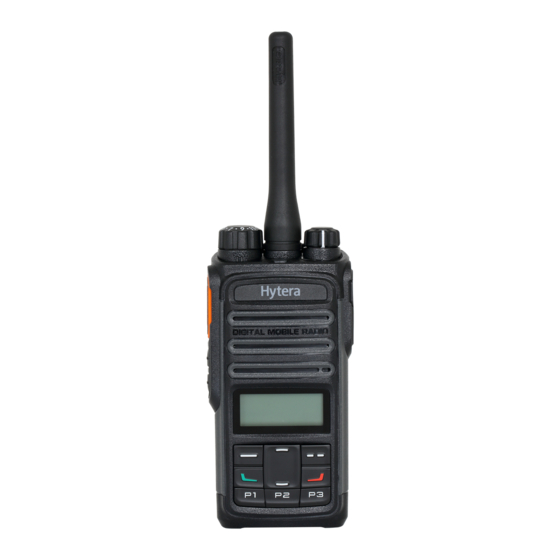
This manual is applicable to the following product:
PD46X Digital Mobile Radio (X may represent 0, 2, 5, 6 or 8)
Advertisement
Table of Contents

Related Manuals for Hytera PD46X


Summary of Contents for Hytera PD46X
- Page 1 To avoid body injury or property loss caused by misoperation, please read the Safety Information Booklet carefully before use. This manual is applicable to the following product: PD46X Digital Mobile Radio (X may represent 0, 2, 5, 6 or 8)
- Page 2 Functions marked with no icon are available on both analog and digital channels. Disclaimer Hytera Communications Corporation Limited (the Company) endeavors to achieve the accuracy and completeness of this manual, but no warranty of accuracy or reliability is given. All the specifications and designs are subject to change without notice due to continuous technology development.
- Page 3 Compliance with RF Exposure Standards Hytera’s 2-way radio complies with the following RF energy exposure standards and guidelines: • United States Federal Communications Commission, Code of Federal Regulations; 47 CFR §§...
- Page 4 Antenna should be kept away from eyes. • When worn on the body, always place the radio in a Hytera’s approved clip, holder, holster, case, or body harness for this product. Using approved body-worn accessories is important because the use of Hytera’s or other manufacturer’s non-approved accessories...
-
Page 5: Table Of Contents
Contents 1. Items in the Package .......................... 1 2. Product Overview ..........................3 2.1 Product Controls ..........................3 2.2 Programmable Keys ........................4 3. Before Use ............................5 3.1 Attaching the Battery ........................5 3.2 Attaching the Antenna ........................5 3.3 Attaching the Belt Clip ........................ - Page 6 8.12 CTCSS/ CDCSS ........................23 8.13 Squelch Off ..........................23 8.14 TDMA Direct Mode ........................ 23 8.15 VOX ............................23 9. Troubleshooting ..........................25 10. Care and Cleaning .......................... 27 11. Optional Accessories ........................28 ...
-
Page 7: Items In The Package
1. Items in the Package Please unpack carefully and check if all items listed below are received. If any item is missing or damaged, please contact your dealer. - Page 8 Radio Battery Charger Power Adapter Antenna Belt Clip Strap Documentation Kit Note The frequency band is marked on the label of antenna; if not, please refer to the label on the radio for frequency band information.
-
Page 9: Product Overview
1. Product Overview Product Controls Part Name Part Name ○ ○ PTT (Push-to-Talk) Key Power On/Off/Volume Control Knob ○ ○ SK1 (Side Key 1) Microphone ○ ○ SK2 (Side Key 2) Cancel/Return Key ○ ○ Channel Selector Knob Call End Key ○... -
Page 10: Programmable Keys
Part Name Part Name ○ ○ P1 Key Belt Clip ○ ○ P2 Key Battery ○ LED Indicator Programmable Keys For enhanced convenience, you may request your dealer to program the SK1, SK2, P1, P2 and P3 keys as shortcuts to certain feature. -
Page 11: Before Use
2. Before Use Attaching the Battery To attach the battery, do as follows. Note To remove the battery, please turn off the radio first. Then slide the battery latch upwards to unlock the battery. Attaching the Antenna Caution Do not hold the radio by its antenna, otherwise the performance and lifespan of the antenna will be reduced. -
Page 12: Attaching The Accessories
Step 1 Remove the screws. Step 2 Align the screw holes on the belt clip with those on the radio’s back, and then tighten the screws. Attaching the Accessories Step 1 Open the accessory connector cover as shown below. Step 2 Align the accessory (such as an audio accessory, or a programming cable) plug with the accessory connector. -
Page 13: Charging The Battery
Charging the Battery Caution Make sure the radio is powered off before charging. Read the Safety Information Booklet in advance to get necessary safety information. Charge a new battery for at least 5 hours before initial use for best performance. ... - Page 14 LED Indication Charging Status glows red. Indicator 90% charged glows orange. Indicator Fully charged glows green. Indicator Charging failure flashes red rapidly.
-
Page 15: Status Indications
3. Status Indications LCD Icon Name Icon Radio Status Battery Power Icon More bars indicate more battery power. Low TX power for the current channel. TX Power Icon High TX power for the current channel. Accessory Icon An accessory is connected. Direct Mode: Under this mode, the radio can communicate with each other directly. -
Page 16: Led Indicator
Name Icon Radio Status Indicates a group call in progress. Indicates a group contact in the contact list. Indicates an all call in progress. Indicates an all call contact in the contact list. LED Indicator LED Indication Radio Status indicator flashes Powering on... -
Page 17: Menu Navigation
4. Menu Navigation The following diagram outlines the menu structure of the radio. You can personalize menu option displayed in the radio via your dealer. To select and confirm the options shown in the menu, press the OK/Menu key and then press the Up or Down key to select your needed option, finally press the OK/Menu key. -
Page 18: Basic Operations
5. Basic Operations Turning the Radio On/Off To turn on the radio, rotate the Power On/Off/Volume Control knob clockwise until you hear a click. To turn off the radio, rotate the knob counter-clockwise until you hear a click. If the Channel Notify upon Power-on feature is enabled by your dealer, the radio will announce the channel number upon power-on. - Page 19 Key Combination: press the OK/Menu key and P1 to lock the keypad; press Any Key and P1 to unlock it. Note Any Key cannot be PTT, SK1, Volume Up/Left, Volume Down/Right and Power On/Off/Esc key. Shortcut key: Press the programmed Keypad Lock key to lock or unlock the keypad. ...
-
Page 20: Call Services
6. Call Services After the radio is powered on, you can make and receive calls. To ensure optimal volume of the receiving radio, keep the microphone about 2.5 to 5 centimeters away from your mouth when transmitting. Private call: It is a voice call between one individual user and another individual user. ... -
Page 21: Call On Analog Channel
If you do not respond to it, the radio will provide appropriate indications. Step 6 Radio A can receive the call without any operation. When receiving, the LED indicator glows green and the radio displays the icon Step 7 Radio A can hold down the PTT key to talk when the LED indicator glows orange and the radio displays the icon ... -
Page 22: Features And Operations
7. Features and Operations Home Screen Description This feature allows the radio to return to the home screen directly. Operation To return to the home screen directly, press Managing the Contact Contact allows you to manage your contacts via the menu, for example, viewing contact’s information, adding new contacts, setting the most-used contacts and deleting contacts. -
Page 23: Call Log
Caution Chinese messages are supported only between TD5 series radios. 7.3.1 Quick Text Description The radio supports a maximum of 10 Quick Text messages programmed by your dealer. Operation Go to “Menu -> Message -> Quick Text” and you can send the quick text directly. 7.3.2 Inbox Description... -
Page 24: Scan
You can select a call log and hold down the PTT key to make a call or delete it. Scan Scan allows you to search for channels with ongoing activities and listen to communication activities on other channels so that you can keep a close track of your team members. 7.5.1 Activating the Scan feature Description... -
Page 25: Setting The Radio
7.5.3 Setting the Scan List Description Scan List allows you to add channels, set priority channels and delete channels. Operation Go to “Menu -> Scan -> Scan List” to access the relevant screen. The radio can support up to 16 scan lists. You can perform the following scan list settings: ... - Page 26 you to communicate with farther radios. Generally, we recommend you to adopt low power for battery saving. Operation Go to “Menu -> Setting -> Radio Set -> Power Level -> High/Low” to toggle the TX power level between high and low. ...
-
Page 27: Device Information
Timed: The backlight will go out automatically if no operation is made or no signal is received within the time preset by your dealer. 7.6.5 Description This feature allows you to set whether to activate the LED indicator. You can set the LED indication for specific features such as TX, RX, Scan, Low Battery, and the like. -
Page 28: Time-Out Timer (Tot)
Touch Call key preset by your dealer. The services are listed below: To initiate group calls or send text messages to the group contact. To initiate private calls or send messages to the private contact. Operation Service Operation To initiate private calls or group calls on Press the One Touch Call key and then hold down the the digital channel. -
Page 29: Ctcss/ Cdcss
7.12 CTCSS/ CDCSS Description CTCSS/CDCSS allows the radio to add signaling with a frequency lower than that of the audio to the carrier. The speaker can be unmuted only when the CTCSS/CDCSS received by the receiving party is matched with that transmitted by the transmitting party. Operation Enable or disable this feature via CPS by your dealer. - Page 30 To use the VOX feature with an external microphone, make sure the PTT/VOX switch is switched to “VOX” before the radio is powered on and the VOX feature is enabled. The VOX feature will be enabled for all the channels. ...
-
Page 31: Troubleshooting
8. Troubleshooting Phenomena Analysis Solution The battery may be improperly Remove the battery and reattach it. installed. The battery power may run out. Recharge or replace the battery. The radio cannot Clean the battery contacts. If the problem be powered on. The battery may suffer from cannot be solved, contact your dealer or poor contact caused by dirtied... - Page 32 Phenomena Analysis Solution You may be too far away from Move towards other members. other members. locate unfavorable position. example, your communication Move to an open and flat area, and restart the The noise is too blocked high radio. loud. buildings or frustrated in the underground areas.
-
Page 33: Care And Cleaning
9. Care and Cleaning To guarantee optimal performance as well as a long service life of the product, please follow the tips below. Product Care Do not pierce or scrape the product. Keep the product far away from substances that can corrode the circuit. ... -
Page 34: Optional Accessories
10. Optional Accessories The following items are the main optional accessories for the product, and please consult your local dealer for more other accessories. Caution Use the accessories specified by the Company only. If not, the Company shall not be liable for any losses or damages arising out of use of unauthorized accessories.
Need help?
Do you have a question about the PD46X and is the answer not in the manual?
Questions and answers