Table of Contents
Advertisement
Quick Links
HomeSeer Products
/
Lighting
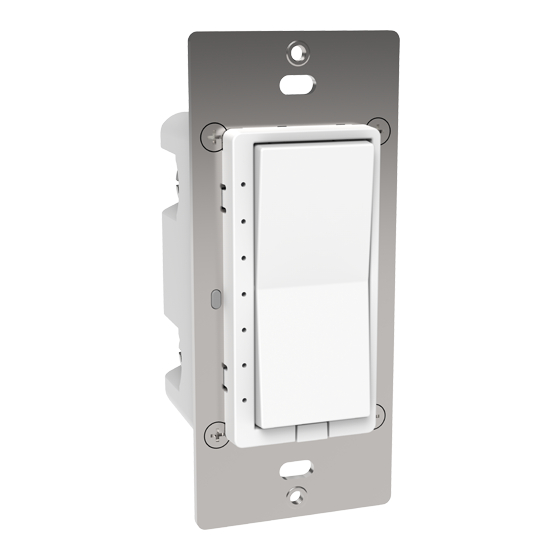
HS-WX300 User Guide
Created by Mark Colegrove, last modified on Aug 03, 2021
Online manual for the HS-WX300 In-wall Dimmer & Switch
Overview
HS-WX300 is a Z-Wave in-wall light switch that may be configured to operate as either a dimmer switch or an on/off switch. It may be installed with or without a neutral wire and
it works with both wired and wireless companion switches in 3-way circuit configurations. This switch has been designed, tested and certified for use in the United States and
Canada.
Important
WARNING RISK OF FIRE | RISK OF ELECTRICAL SHOCK | RISK OF BURNS
DO NOT USE THIS SWITCH TO CONTROL ANYTHING THAT MAY PRESENT A HAZARD WHEN CONTROLLED REMOTELY OR USED IN AN UNATTENDED FASHION.
DO NOT USE WITH MEDICAL AND LIFE SUPPORT INSTRUMENTS.
CAUTION: To Reduce the Risk of Overheating And Possible Damage To Other Equipment, Do Not Install To Control A Receptacle, A Motor-Operated Appliance, A Fluorescent
Lighting Fixture, Or A Transformer-Supplied Appliance.
Circuit Types
Most lighting loads are powered with line (120 VAC) and neutral wires. The line wire always runs through the wall switch box but the neutral may not be present there. If the
neutral wire is present, use the 3-wire method below. If no neutral is present, use the 2-wire method. For 3-way circuits, a neutral is only required at the companion switch
location (using HS-WA100+ or standard 3-way switches).
Single Switch, 3-Wire Circuit
Multi Switch (3-Way) Wiring for 2-Wire & 3-Wire Circuits
Installation
Tools required
Medium Standard (flat head) Screwdriver
Medium Philips Screwdriver
Single Switch, 2-Wire Circuit
Advertisement
Table of Contents

Subscribe to Our Youtube Channel
Related Manuals for HomeSeer HS-WX300


Summary of Contents for HomeSeer HS-WX300
- Page 1 Overview HS-WX300 is a Z-Wave in-wall light switch that may be configured to operate as either a dimmer switch or an on/off switch. It may be installed with or without a neutral wire and it works with both wired and wireless companion switches in 3-way circuit configurations. This switch has been designed, tested and certified for use in the United States and Canada.
- Page 2 2. Remove existing switch’s wall plate and mounting screws. Carefully remove the existing switch from the electrical box but leave the wires connected. 3. There may be up to five wires connected to the existing switch. Make note of these wires and label, if necessary, to ensure correct installation of the HS-WX300. You will need to match these wires with the corresponding screw terminals on the HS-WX300.
- Page 3 HomeSeer Compatibility Your new HomeSeer switch is Z-Wave certified and is ready to be used with a wide variety of home automation hubs and controllers. All features are fully supported by HomeSeer systems but some Advanced Features (see below) may not be fully supported by other controllers. If you’re using another brand of controller, be sure to check with that company to determine compatibility.
- Page 4 Parameter Description Bytes Value Default Dimmer Switch Mode Mode Sets bottom LED operation (in 0 = all LED ON if load is OFF normal mode) 1 = all LED OFF if load is OFF Sets paddle’s load orientation 0 = Top of Paddle turns load ON 1 = Bottom of Paddle turns load ON Sets the lowest dimming threshold Possible values: 1-14...
- Page 5 HomeSeer warrants to the original purchaser that this product, for the warranty period, will be free from material defects and workmanship. This warranty is subject to proper installation and operation of the product. HomeSeer’s sole obligation, under this warranty, is to repair, replace or correct any defect that was present at the time of delivery. This warranty does not extend to consequential or incidental damage to other products that may be used with this product.
Need help?
Do you have a question about the HS-WX300 and is the answer not in the manual?
Questions and answers