Hitachi RAM-68NP3B Service Manual
Hide thumbs
Also See for RAM-68NP3B:
- Installation manual (2 pages) ,
- Service manual (109 pages) ,
- Service manual (80 pages)
Advertisement
Quick Links
SERVICE MANUAL
TECHNICAL INFORMATION
FOR SERVICE PERSONNEL ONLY
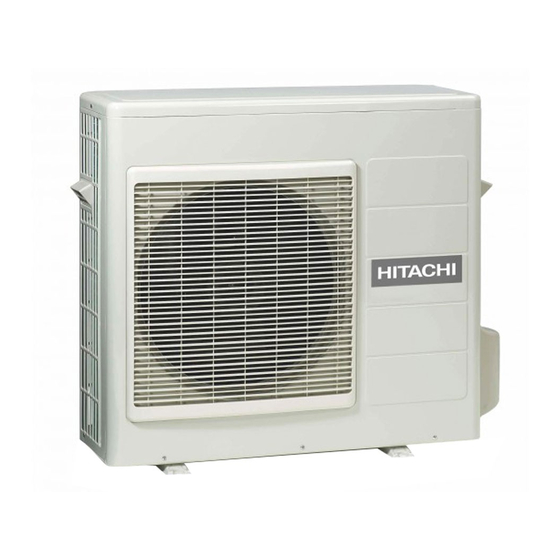
RAM-68NP3B
SPECIFICATIONS
TYPE
MODEL
POWER SOURCE
TOTAL INPUT
TOTAL AMPERES
COOLING CAPACITY
HEATING CAPACITY
DIMENSIONS
(mm)
NET WEIGHT
SPECIFICATIONS AND PARTS ARE SUBJECT TO CHANGE FOR IMPROVEMENT
ROOM AIR CONDITIONER
JANUARY 2015
(W)
(A)
(kW)
(B.T.U.)
W
H
D
(kg)
OUTDOOR UNIT
Refrigeration & Air-Conditioning Division
PM
RAM-68NP3B
REFER TO THE FOUNDATION MANUAL
SPECIFICATIONS ---------------------------------------------------------------------5
FEATURES ---------------------------------------------------------------------------- 10
INSTALLATION ----------------------------------------------------------------------- 14
CONSTRUCTION AND DIMENSIONAL DIAGRAM ----------------------- 18
MAIN PARTS COMPONENT ---------------------------------------------------- 19
WIRING DIAGRAM ----------------------------------------------------------------- 21
CIRCUIT DIAGRAM ---------------------------------------------------------------- 23
BLOCK DIAGRAM ------------------------------------------------------------------ 25
BASIC MODE ------------------------------------------------------------------------ 27
REFRIGERATING CYCLE DIAGRAM----------------------------------------- 47
DESCRIPTION OF MAIN CIRCUIT OPERATION ------------------------- 48
TROUBLE SHOOTING ------------------------------------------------------------ 82
PARTS LIST AND DIAGRAM ---------------------------------------------------- 90
DC INVERTER TRIPLE SYSTEM MULTI
OUTDOOR UNIT
RAM-68NP3B
1ø, 220 - 240V, 50/60Hz
REFER TO THE SPECIFICATIONS PAGE
850
800
298
55
NO. 0585E
CONTENTS
After installation
Advertisement

Related Manuals for Hitachi RAM-68NP3B


Summary of Contents for Hitachi RAM-68NP3B
- Page 1 NO. 0585E RAM-68NP3B SERVICE MANUAL REFER TO THE FOUNDATION MANUAL TECHNICAL INFORMATION CONTENTS FOR SERVICE PERSONNEL ONLY SPECIFICATIONS ---------------------------------------------------------------------5 FEATURES ---------------------------------------------------------------------------- 10 INSTALLATION ----------------------------------------------------------------------- 14 CONSTRUCTION AND DIMENSIONAL DIAGRAM ----------------------- 18 MAIN PARTS COMPONENT ---------------------------------------------------- 19 WIRING DIAGRAM ----------------------------------------------------------------- 21...
- Page 2 SAFETY DURING REPAIR WORK 1. In order to disassemble and repair the unit in question, be sure to disconnect the power cord plug from the power outlet before starting the work. 2. If it is necessary to replace any parts, they should be replaced with respective genuine parts for the unit, and the replacement must be effected in correct manner according to the instructions in the Service Manual of the unit.
- Page 3 WORKING STANDARDS FOR PREVENTING BREAKAGE OF SEMICONDUCTORS 1. Scope The standards provide for items to be generally observed in carrying and handling semiconductors in relative manufacturers during maintenance and handling thereof. (They apply the same to handling of abnormal goods such as rejected goods being returned). 2.
- Page 4 (6) Use a three wire type soldering iron including a grounding wire. Metal plate (of aluminium, stainless steel, etc.) Bare copper wire (for body earth) Working table Resistor 1 M (1/2W) Staple Earth wire Fig. 3. Grounding of the working table Soldering iron Grounding wire Screw stop at the screwed...
- Page 5 CAUTION In quiet or stop operation, slight fl owing noise of refrigerant in the refrigerating cycle is heard occasionally, but this noise is not abnormal for the operation. When it thunders nearby, it is recommend to stop the operation and to disconnect the power cord plug from the power outlet for safety.
- Page 6 SPECIFICATIONS MODEL RAM-68NP3B FAN MOTOR 47 W FAN MOTOR CAPACITOR FAN MOTOR PROTECTOR JU151XC1 COMPRESSOR COMPRESSOR MOTOR CAPACITOR OVERLOAD PROTECTOR OVERHEAT PROTECTOR FUSE (for MICROPROCESSOR) 5.0A POWER RELAY POWER SWITCH TEMPORARY SWITCH SERVICE SWITCH TRANSFORMER 450NR VARISTOR NOISE SUPPRESSOR YES(IC)
- Page 7 SPECIFICATIONS FOR INDOOR UNITS COMBINATION DC INVERTER TRIPLE SYSTEM MULTI COOLING AND HEATING TYPE MODEL OUTDOOR UNIT RAM-68NP3B 1ø, 220 - 240V, 50/60Hz PHASE/VOLTAGE/FREQUENCY CIRCUIT AMPERES TO CONNECT (A) 6.80 CAPACITY (kW) (B.T.U./h) 23,200 COOLING 2,080 TOTAL INPUT (W) (THREE EER (B.T.U./hW)
- Page 8 3 ROOM MULTI-SPLIT INVERTER TYPE RAC: RAM-68NP3B POSSIBLE COMBINATION TO OPERATE (SAME TIME OPERATION) COOLING HEATING CAPACITY OUTDOOR UNIT CAPACITY OUTDOOR UNIT energy energy POSSIBLE COMBINATIONS TO RATING (kW) POWER AMPERE (A) at efficie RATING (kW) POWER AMPERE (A) at...
- Page 9 TRIPLE SYSTEM MULTI R.A.C. RAM-68NP3B INDOOR UNITS COMBINATIONS TO BE ABLE TO INSTALL Two or three indoor units can be installed with one outdoor unit. And total nominal cooling capacity should not be more than 11.0kW Be sure to connect two or three indoor units to this outdoor unit. If not, condensed water may drop, resulting in trouble.
- Page 10 RAM-68NP3B TRIPLE CONNECTING POSITION ON OUTDOOR POSSIBLE COMBINATIONS TO UNIT (VALVE DIAMETER)(mm) SUITABLE ROOM SIZE TO INSTALL (m²) INSTALL (kW) No.1 No.2 No.3 6.35/9.52D 6.35/9.52D 6.35/9.52D 1.5+1.5 (8 ~ 12) + (8 ~ 12) 1.5+1.8 (8 ~ 12) + (8 ~ 12) 1.5+2.5...
- Page 11 – 11 –...
- Page 12 – 12 –...
- Page 13 – 13 –...
- Page 14 – 14 –...
- Page 15 three – 15 –...
- Page 16 One unit of 1.5kW, 1.8kW, 2.5kW, 3.5kW or 5.0kW (5kW unit: Optional flare adaptor for piping is necessary.) One unit of 1.5kW, 1.8kW, 2.5kW, 3.5kW or 5.0kW (5kW unit: Optional flare adaptor for piping is necessary.) One unit of 1.5kW, 1.8kW, 2.5kW, 3.5kW or 5.0kW (5kW unit: Optional flare adaptor for piping is necessary.) –...
- Page 17 – 17 –...
- Page 18 RAM-68NP3B – 19 –...
- Page 19 RAM-68NP3B – 19 –...
- Page 20 RAM-68NP3B – 20 –...
- Page 21 RAM-68NP3B – 21 –...
- Page 22 WIRING DIAGRAM MODEL RAM-68NP3B COLOR LEGEND RED : RED WHT : WHITE BLK : BLACK BLU : BLUE YEL : YELLOW BRN : BROWN GRN : GREEN - 21 -...
- Page 23 TAB2 WH66 C603 R007 RL2 F1 L004 L006 C601 INRUSH CURRENT R610 24 RELAY P DB601 DB602 R611 R614 D601 MODEL RAM-68NP3B U C611 C612 23 U WHT L005 VS8 V 22 V YEL L001 C940 W R612 R615 21 W...
- Page 24 BLOCK DIAGRAM MODEL RAM-68NP3B Outdoor Unit POWER SOURCE 1φ, AC220-240V 50/60Hz Power relay inrush Converter Compressor M protection circuit circuit drive circuit Indoor unit 1 Indoor/outdoor Communication Compressor motor interface circuit 1 selection circuit 1 Main power circuit Outdoor fan motor...
- Page 25 PRINTED WIRING BOARD LOCATION DIAGRAM RAM-68NP3B Main board [component side]...
- Page 26 RAM-68NP3B Main board [solder side]...
- Page 27 RAM-68NP3B Inverter board [component side]...
- Page 28 RAM-68NP3B Inverter board [solder side]...
- Page 29 RAM-68NP3B [Main HIC board] top side [Main HIC board] bottom side [Inverter HIC board] top side [Inverter HIC board] bottom side...
- Page 30 – 33 –...
- Page 31 RAM-68NP3B – 35 –...
- Page 32 Notes: (1) Cool dash is started when the operation is started at fan speed “AUTO” or “HI” or when the fan speed is changed to “AUTO” or “HI” during cooling operation, and when the compressor speed (P item) reaches (CMAX_M or CMAX2_M) or higher. (2) The maximum compressor speed period during cool dash is fi...
- Page 33 – 39 –...
- Page 34 – 41 –...
- Page 35 – 43 –...
- Page 36 – 45 –...
- Page 37 MODEL RAM-68NP3B EXPANSION VALVES The expansion valves are initialized when power is supplied. The valve for unit 1 is fully closed (–520 pulses), and then that for unit 2 is fully opened (480 pulses). The valve for unit 2 is fully closed (–520 pulses), and then that for unit 3 is fully opened (480 pulses).
- Page 38 Unit being operated : [DFCTPS_d] 30sec before balancing period is finish →Synchronized with step-up of rotation speed of compressor, opened by [DFSPPS_d] pulse and reaches MAX opening degree [DFPSMX_d] when rotation speed of compressor reaches [DEFMAX] * indicate number of operating indoor unit RAM-68NP3B – 47 –...
- Page 39 RAM-68NP3B – 48 –...
- Page 40 RAM-68NP3B – 49 –...
- Page 41 RAM-68NP3B – 50 –...
- Page 42 RAM-68NP3B – 51 –...
- Page 43 – 52 –...
- Page 44 RAM-68NP3B...
- Page 45 DESCRIPTION OF MAIN OPERATION CIRCUIT RAM-68NP3B ■ 1. Main Power Supply Circuit MAIN PWB SURGE ABSORBER 2P Terminal Terminal block NV-4V (WHT) PINK (Indoor unit 3) 3P-Terminal (Indoor unit 2) VH-7P (WHT) 3P-Terminal (Indoor unit 1) Microcomputer Standby output Fig. 1-1 3P-Terminal ● AC 220~240V power supplied to the 2P terminal block is supplied to DB2 via the noise filter circuit, 2A fuse (F3), and varistor (VS5). High-voltage DC smoothed by DB2 and C023 is used to create DC voltage on the transformer's secondary side by the switch control IC (IC1) and switching transformer. ● Secondary side DC voltage is used in the following six systems: ⑴...
- Page 46 ● Inverter Microcomputer Power Control The power to the inverter microcomputer is turned ON/OFF by commands from the main microcomputer. Q502, PQ102, Q101, and Q102 are related. ● Specifications and Checkpoints for Main Power Supply Circuits Output Voltage Examples of Possible Failure Modes for Primary Load ± Measurement Location Name Specification Output Failures (for Reference) Indoor/outdoor Tester ⊕ terminal: B-15V indicator (L107) B-15V output 15.5 LD401 ~ LD403 (green) do not light or blink. ±1.5 communication Tester ⊖ terminal: B-0V indicator (J5) Expansion Tester ⊕ terminal: B-12V indicator (R120) LD351 (red) blinks 5 or 6 times (related to B-12V output +4,-2 valve Tester ⊖ terminal: B-0V indicator (J5) refrigerant cycle error) and stops. Main Tester ⊕ terminal: B-5V indicator (J4) LD353 (green) does not blink. LD351 (red) does microcomputer B-5V output ±0.4 Tester ...
- Page 47 2. Converter Circuit POWER RELAY MAIN PWB INVERTER PWB Reactor 5.3mH R007 RY2 L005 DB601 DB602 D601 L004L006 Inrush prevention relay L001 Compressor SURGE ABSORBER C012 motor R008 2P-Terminal Q601Q602 L002 R601 REVERSING REVERSING VALVE RELAY VALVE COIL Q716 Q715 Q714 C751 (RED)...
- Page 48 (3) Smoothing Capacitor (C019~022, 500µF, 450V) Boosts and smoothes (averages) voltage rectified by the diode. Reactor 5.3mH TAB terminal TAB terminal C 6 0 3 Inverter PWB C 6 0 1 R 6 1 0 R 6 1 1 R614 D 6 0 1 D B 6 0 1 D B 6 0 2 Q...
- Page 49 3. Reversing Valve Control Circuit WH63-2(RED) REVERSING VALVE REVERSING VALVE RELAY AC220-240V C N 2 (RD) V H - 2P Main PWB Inverter PWB 1 2 V Inverter H Ⅰ C Inverter Ⅰ C2 Microcomputer Reversing Valve Cooling : Lo Heating : Hi CN23 CN25 XA-4P...
- Page 50 – 59 –...
- Page 51 4. Temperature Detection Circuit Main Microcomputer OVERHEAT THERMISTOR DEFROST THERMISTOR CN10 OUTDOOR AIR OUTDOOR THERMISTOR CN11 Narrow pipe 1 R369 Narrow pipe 1 C339 Narrow pipe 2 R371 B-0V Narrow pipe 2 C341 Narrow pipe 3 R373 B-0V Narrow pipe 3 C343 B-0V XA-8P (RED) CN12...
- Page 52 5. Electric Expansion Valve Circuit H I C B-5V Main C421 Microcomputer H I C Electric B-12V Serial 1 expansion Serial 1 Latch valve 3 IC34 Latch B-12V B-12V Main Electric IC25 Microcomputer expansion C424 C401 valve 2 B-0V B-0V Exp valve B4 Reset CN26 Circuit Exp valve B3...
- Page 53 ● One (IC32) 8-bit type shift register ICs that convert serial signal input to parallel and output the parallel signals are used on the circuits of electric expansion valves 3. ● An example of circuit operation when an expansion valve is powered is shown in the time chart in Fig. 5-3. ① A clock signal (16 cycles at 750µs/cycle) is output from pin ㉒ on the microcomputer. (One cycle for the clock signal is 500µs off, 250µs on.) ② A serial signal of the power pattern is synced with the clock signal and output from pin ㉔ of the microcomputer. #1 #1 The serial signal is the pattern of the current applied to phase 1 or phase 2 of a 4-phase wound wire on an expansion valve, that has then been converted to serial format. A serial signal is output so that the center of the ON serial signal (Hi-level 500µs) aligns with the rising edge of the clock signal. The content of the shift register in IC is updated by operations ① and ② described above. Next, 250µs after the ON signal is output for the 16th cycle of the clock signal, ③ the latch signal from pin ㉓ on the microcomputer is turned OFF (Lo-level 500µs) and then ON again (Hi-level). ④ After the time required to apply current has elapsed, if powering of the expansion valve is required the cycle returns to ① and repeats the operation. With the operation described above, the opening of expansion valves is controlled while applying current to phase 1 or phase 2 of a 4-phase wound wire on an expansion valve, according to the content of the shift register updated when the current is applied. When the opening of the expansion valve reaches the target amount, the stop pattern described in ② above is applied and then operations ① - ④ are performed to complete the control of the expansion valve. 250µs 250µs Microcomputer ㉒ Pin clock signal 500µs ㉓ Pin latch signal 50 0µs 500µs ㉔ Pin serial signal Power pattern, last 13ms...
- Page 54 – 63 –...
- Page 55 – 64 –...
- Page 56 – 65 –...
- Page 57 8. Indoor/outdoor communication circuit Indoor side Outdoor side Outdoor main circuit B-15V 12V Indoor Indoor side Microcomputer (IC601) transmission circuit 0V T301 R342 C341 L805 R864 C864 R863 Outdoor reception The communication Q331 Outdoor switching 1 circuit for Indoor 1 chopper output out of room (30kHz) R331 R332 Outdoor transmitting Indoor Outdoor switching 2 circuit for Indoor 1 Transmision Output...
- Page 58 8. Hibernation Mode Main Microcomputer Standby output Fig. 8-1 ● This model have designed to enter hibernation mode for energy saving and power consumption reduction during stanby. ● Unit will enter hibernation mode during below stanby condition if not received any signal from remote controller and expansion valve already completed initialization . 1) Stanby continuesly 2) Unit in running condition, then off the unit by remote controller and leave the unit in stanby condition. ● During hibernation activation, main microcomputer pin 49 will change to LOW condition. Due to this pin become LOW, Q502, PQ102, and Q101 will be OFF. As Q101 OFF, 12V and 5V will drop to 0V. Due to 5V drop to 0V, Q103 and Q102 will be OFF and causing 16V also drop to 0V. ● During hibernation mode, DC voltage will be as below condition. ⑴ B-15V : Maintain at 15V ⑵ B-5V : Maintain at 5V ⑶ B-12V : Maintain at 12V : Drop to 0V ⑷ 16V : Drop to 0V ⑸ 12V : Drop to 0V ⑹ 5V All LED on the Main P.W.B and Inverter P.W.B (LD301, LD351, LD352, LD353, LD401, LD402 and LD403) will be OFF during this mode. ● If outdoor unit have failure/error, all indication including error diagnosis LED will be OFF once the smoothing capacitor (C019 ~ C021) voltage reduce to 29V. ● For inspection during hibernation mode, service person can measure DC voltage B-15V, B-12V and B-5V on Main P.W.B. But to measure DC voltage 16V, 12V and 5V on Inverter P.W.B., service person shall on the indoor unit by remote controller first. This will change the unit from hibernation mode to normal. ...
- Page 59 – 68 –...
- Page 60 SELF CHECK When it is difficult to judge whether the compressor or the electrical part is faulty resulting self diagnosis lamp LD351 blink 2,3,4 or 5 times, please confirm first the compressor terminal insulation by using mega ohm checker. If the insulation is normal, proceed to below self-check method. ■Self-check diagnosis method 1.
- Page 61 Collect refrigerant using test switch operation 1. Turn OFF the breaker and wait for 1 minute or more before turn ON back the breaker. 2. Detach the electrical cover of outdoor unit and ensure LD353 is blinking once. Wait 20 seconds or more before pressing the test switch for 1 second or more to start the forced cooling operation.
- Page 62 – 71 –...
- Page 63 Lighting mode of the self-diagnosis lamp Lighting mode of the self-diagnosis lamp...
- Page 64 – 73 –...
- Page 65 List of error code when using Self-Diagnosis Memory Function Please refer to the display screen of wireless or wired remote control. (This error code only for error happen at outdoor side) INDOOR WIRELESS WIRED OPERATION REMOTE REMOTE SELF-DIAGNOSE ERROR DESCRIPTION DETAIL MAIN CHECK POINT LAMP CONTROL...
- Page 66 Narror pipe thermistor 7 times abnormal (Indoor no.2) Wide pipe thermistor 7 times abnormal (Indoor no.2) Thermistor's connector not connected 1. Thermistor or thermistor's wire worn out or 2. Connection of thermistor faulty shorted. 3. Thermistor circuit Narror pipe thermistor 7 times abnormal (Indoor no.3)
- Page 67 Checking Electrical Parts of Outdoor Unit Please replace both Main PWB and LD353 always lit? Turn ON circuit breaker. Inverter PWB. No (OFF) Abnormal Measured voltage between L N terminal Turn OFF breaker and re-fitting power Does LD353 blink? Check power cable. is AC220~240V? cable connection.
- Page 68 Please confirm the number of time of LD351 blinks? Please replace Inverter PWB. If still NG after LD351 13 times blink replace Inverter PWB, replace Main PWB. LD301 also 13 times blink (Microcomputer or EEPROM might be broken) EEPROM reading error Please exchange Main PWB.
- Page 69 LD351 Lit Abnormal LD352 3 times blink Secure the connection of outdoor Is the outdoor thermistor connector connected properly? thermistor connector. Outdoor thermistor abnormal Normal Abnormal Please replace outdoor thermistor. Please check outdoor thermistor wire worn out or short circuit Normal Please replace Main PWB.
- Page 70 LD351 4 times blink Compressor start up fail. Un-insert compresor Is service valve open? Please open the service valve. connector and check the conductivity. Switching failure Abnormal Check compressor wire Repair the abnormal portion. LD351 3 times blink conductivity. Operation stop when detect compressor Normal control abnormal.
- Page 71 After unit is restart LD351 11 times blink The wind is heavy? Confirm Once stop when wind is in heavy condition. Outdoor electrical and outdoor fan the unit is restarting. (Takes It will resume back when wind become normal. motor is OK. about few minutes to restart) Fan stop due to strong wind Stop...
- Page 72 DISMANTLE AND ASSEMBLY PROCEDURE RAM-68NP3B 1. Electrical parts (preparation to remove board) 2. Dismantle procedure of inverter board (1) Remove screw that fix the service valve cover and push (1) Un-insert connectors (4 places) and TAB terminal (4 places). it down to take it out.
- Page 73 3. Dismantle procedure of main board 4. Assembly procedure of inverter board (1) Un-insert connector (13 places), TAB terminal (7 places) (1) Preparation before insert back the board. and un-screw 1 piece earth screw. Applied uniformly with small amount to 6 places of electronic part at back side of board.
- Page 74 5. Assembly procedure of main board (3) Arrange the board position so that hole for fixing screw and holes at heat sink are concentric. (1) Insert back the board into pcb support and lock it with hook (2 places). Arrange hole position (7 places) Board insert direction ②基板を挿入...
- Page 75 – 84 –...
- Page 76 MODEL RAM-68NP3B – 85 –...
- Page 78 MODEL RAM-68NP3B QUANTITY/ PART NUMBER PART NAME UNIT KPNT1 PUSH NUT PMRAC-24CP5 TOP COVER PMRAC-25NH4 OVERHEAT THERMISTOR SUPPORT PMRAC-63CA1 TERMINAL BOARD (2P) PMRAC-70YHA SIDE PLATE L PMRAC-70YHA NET COVER PMRAC-70YHA D-GRILL-AS(INCL. MOUTH RING) PMRAC-70YHA PMRAC-70YHA PROPELLER FAN PMRAC-70YHA SUPPORT (FAN MOTOR)
- Page 79 HITACHI PM NO. 0585E RAM-68NP3B Printed in Malaysia...
Need help?
Do you have a question about the RAM-68NP3B and is the answer not in the manual?
Questions and answers