Table of Contents
Advertisement
Quick Links
Advertisement
Table of Contents

Related Manuals for Bosch HGA24W255I


Summary of Contents for Bosch HGA24W255I
- Page 1 Free standing cooker HGA24W255I, HGA24W255M [en] Instruction manual...
-
Page 3: Table Of Contents
Faults in the gas installation/smell of gas ........7 Additional information on products, accessories, replacement Moving the appliance by the gas line or door handle....7 parts and services can be found at www.bosch-home.com and Electrical connection ................7 in the online shop www.bosch-eshop.com Levelling the cooker ................8... -
Page 4: Important Safety Information
: Important safety information Read these instructions carefully. Only then Do not use inappropriate child safety will you be able to operate your appliance shields or hob guards. These can cause safely and correctly. Retain the instruction accidents. manual and installation instructions for This appliance may be used by children future use or for subsequent owners. - Page 5 or switch off the fuse in the fuse box. Shut accessories or ovenware from the cooking off the gas supply. compartment. Hot oil and fat can ignite very quickly. Alcoholic vapours may catch fire in the hot Risk of fire! Risk of burns! ■...
-
Page 6: Causes Of Damage
Incorrect repairs are dangerous. Repairs Risk of electric shock! ■ may only be carried out, and damaged Incorrect repairs are dangerous. Repairs ■ power and gas lines replaced, by an after- may only be carried out by one of our sales engineer trained by us. -
Page 7: Damage To The Plinth Drawer
Cooling with the appliance door open: only allow the cooking appliance door. Always insert the accessories into the ■ compartment to cool when it is closed. Even if the appliance cooking compartment as far as they will go. door is only open a little, front panels of adjacent units could Carrying the appliance: do not carry or hold the appliance by ■... -
Page 8: Levelling The Cooker
Levelling the cooker Measures to be noted during transport Always place the cooker directly on the floor. Secure all mobile parts in and on the appliance using an adhesive tape that can be removed without leaving any traces. Pull out the plinth drawer and lift it up and out. Push all accessories (e.g. -
Page 9: Your New Appliance
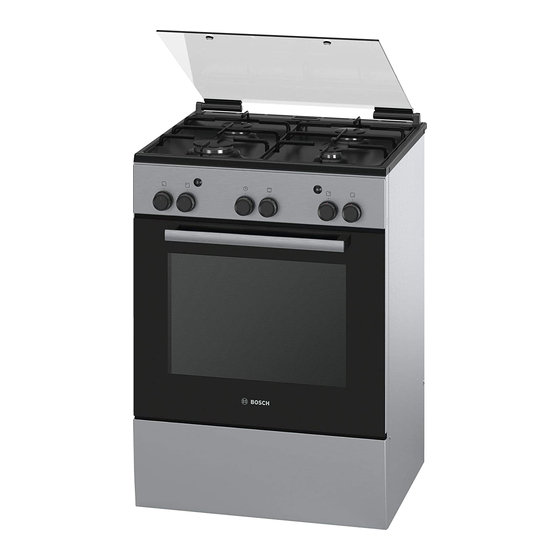
Your new appliance In this section you will find information on the appliance, the operating modes and the accessories. General information Cooking area The design depends on the respective appliance model. Here is an overview of the control panel. The design depends on the respective appliance model. -
Page 10: Control Panel
Control panel Here you can see an overview of the control panel. The design Light button depends on the respective appliance model. This button switches on the oven light. To switch it off, press the multi-function button again. Explanations Ignition button Switch for the gas burner (function selector) This button activates the electronic ignition system. -
Page 11: Your Accessories
Your accessories The accessories supplied with your appliance are suitable for The accessories can be pulled out approximately halfway making many meals. Ensure that you always insert the without tipping. This allows meals to be taken out easily. accessories into the cooking compartment the right way round. When placing the accessories into the oven, check that the There is also a selection of optional accessories, with which indentation is at the back. -
Page 12: After-Sales Service Products
Optional accessories HEZ number Function Pizza tray HEZ317000 Particularly good for pizza, frozen meals and round tarts. You can use the pizza tray instead of the universal pan. Slide the tray in above the wire rack and proceed according to the instructions in the tables. -
Page 13: Before Using The Oven For The First Time
Before using the oven for the first time Procedure for setting the gas grill In this section, you can find out what you must do before using your oven or gas hob to prepare food for the first time. First Open the top cover. -
Page 14: Making Settings On The Hob
Making settings on the hob Your hob is equipped with four gas burners. The following information explains how to light the gas burners and set the size of flame. Advance cleaning of burner cup and cap Clean the burner cap (1) and cup (2) with water and washing- up liquid. -
Page 15: Suitable Pans
Suitable pans Burner/electric hot- Minimum pan Maximum pan diam- plate diameter eter Electric hotplate* 14.5 cm 14.5 cm Wok burner** 3.6 kW 24 cm 28 cm High output burner 24 cm 28 cm Standard burner 1.7 18 cm 24 cm Economy burner 1 kW 12 cm 18 cm * Option (for models with an electric hotplate) -
Page 16: Procedure For Setting The Gas Grill
Close the oven door slowly. at a slightly higher angle and make sure that it latches into the retainers. Preheat the empty oven for approximately 15 minutes before baking. Close the oven door so that it is in contact with the protecting plate. -
Page 17: Care And Cleaning
Care and cleaning With attentive care and cleaning, your hob and oven will retain Zone Cleaning agent its looks and remain in good working order for a long time. We Upper glass cover* Glass cleaner: will explain here how you should care for and clean them Clean with a soft cloth. -
Page 18: Upper Glass Cover
Zone Cleaning agent Zone Cleaning agent Glass hob* Care: Protective/care products for glass Accessories Hot soapy water: Cleaning: Cleaning agents for glass. Soak and then clean with a dish cloth or (depending on Follow the cleaning instructions on the a brush. appliance model) packaging. -
Page 19: Detaching And Refitting The Rails
Detaching and refitting the rails Detaching the door The rails can be removed for cleaning. The oven must have Open the oven door fully. cooled down. Fold up the two locking levers on the left and right (figure A). Close the oven door as far as the limit stop. With both hands, Detaching the rails grip the door on the left and right-hand sides. -
Page 20: Removing And Refitting The Door Panels
Removing and refitting the door panels into the openings on the lower side. The smooth surface must face outwards, while the roughened side must be on the The glass panels can be removed from the oven door to allow inside. (Fig. A). more thorough cleaning. -
Page 21: Replacing The Bulb In The Oven Ceiling Light
Replacing the bulb in the oven ceiling light If the bulb in the oven light fails, it must be replaced. Heat- resistant, 25 watt spare bulbs can be obtained from our after- sales service or a specialist retailer. Only use these bulbs. Risk of electric shock! Switch off the circuit breaker in the fuse box. -
Page 22: Tested For You In Our Cooking Studio
Tested for you in our cooking studio. Here you will find a selection of dishes and the ideal settings for Name of the gas Gas mixture (%) them. We will show you which type of heating and which temperature are best suited for your dish. You can find = 100 information about suitable accessories and the height at which = 86, N... -
Page 23: Baking Tips
Dish Accessories and oven- Level Temperature in °C Cooking time in min- ware utes Pasta bake Glass ovenproof dish, rec- 60-80 tangular* Potato gratin made using raw ingredi- Glass ovenproof dish, rec- 60-80 ents, tangular* Max. 4 cm deep Vegetable goulash Earthenware pot 80-100 * Only use heat-resistant glass dishes. -
Page 24: Tips For Roasting And Grilling
Tips for roasting and grilling The table does not contain information Select the next lowest weight from the instructions and extend the time. for the weight of the joint. How to tell when the roast is ready. Use a meat thermometer (available from specialist shops) or carry out a “spoon test”. Press down on the roast with a spoon. - Page 28 Robert Bosch Hausgeräte GmbH Carl-Wery-Straße 34 81739 München Germany www.bosch-home.com *9001143524* 070895 9001143524...
Need help?
Do you have a question about the HGA24W255I and is the answer not in the manual?
Questions and answers