Table of Contents
Advertisement
Available languages
Available languages
Quick Links
Advertisement
Table of Contents

Related Manuals for Pioneer DMH-A3300DAB


Summary of Contents for Pioneer DMH-A3300DAB
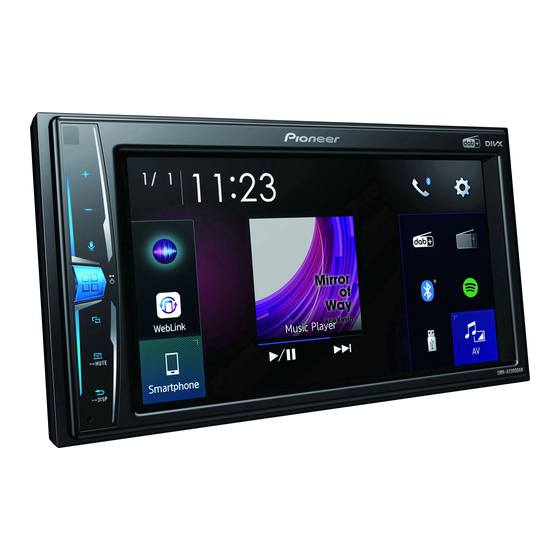
- Page 1 DMH-A3300DAB RDS AV RECEIVER AUTORADIO MULTIMÉDIA RDS SINTOLETTORE AV CON RDS AV RECEPTOR RDS RDS-AV-RECEIVER RDS AV-ONTVANGER Installation Manual Manuel d'installation Manuale d'installazione Manual de instalación Installationsanleitung Installatiehandleiding...
-
Page 2: Important Safeguards
, use speakers over 50 W Pioneer does not recommend that you • It is extremely dangerous to allow cables (Maximum input power) and between 4 install this product yourself. This product is to become wound around the steering Ω... -
Page 3: Power Cord
control terminal, the auto-aerial relay Red (3*) Grey/black: Front right – or high range Power cord control terminal, or the aerial booster Connect to terminal controlled by right – power control terminal (max. 300 mA 12 ignition switch (12 V DC). Green: Rear left + or middle range left + V DC). -
Page 4: Ipod/Iphone With Lightning Connector
USB Type-C cable (Type USB A - USB C) NOTE iPhone with 30-pin (supplied with CD-CU50 (sold Select the appropriate speaker mode connector separately)) between standard mode (STD) and Smartphone network mode (NW). For details, refer to the Operation Manual. NOTE The length of Type USB A - micro USB B Connecting via the USB port... - Page 5 External video component (sold External video component separately) and the display NOTE The appropriate setting is required to use the external video component. For details, refer to the Operation Manual. WARNING NEVER install the rear display in a location that enables the driver to watch the video source while driving.
-
Page 6: Precautions Before Installation
Installation Secure the mounting sleeve by using a screwdriver to bend the metal tabs 5 cm (90°) into place. 182 mm Leave ample Precautions before Before installing space installation • Consult with your nearest dealer if installation requires drilling holes or 5 cm other modifications of the vehicle. -
Page 7: Installing The Microphone
If the pawl interferes with Installation using the screw installation, you may bend it down holes on the side of this out of the way. Dashboard or console product Truss head screw or flush surface screw Be sure to use the screws supplied Fastening this product to the factory with this product. -
Page 8: Précautions Importantes
à un • Assurez-vous que les fils et les câbles ne technicien agréé Pioneer, qui possède les ATTENTION gêneront pas le mouvement des parties compétences et l’expérience nécessaires Votre nouveau produit et le •... -
Page 9: Remarque Concernant Le Fil Bleu/Blanc
À raccorder à la borne commandée par Ce produit Câble d’alimentation l’interrupteur d’allumage (12 V c.c.). Raccordez les fils de même couleur ensemble. Orange/blanc À la borne de l’interrupteur d’éclairage. Position ACC Pas de position ACC Noir (terre) À la carrosserie (métal) du véhicule. •... -
Page 10: Amplificateur De Puissance (Vendu Séparément)
Blanc/noir : Avant gauche – ou aigus À raccorder au câble RCA (vendu Amplificateur de iPod/iPhone muni d’un gauche – séparément) Gris : Avant droit + ou aigus droit + puissance (vendu À la sortie arrière (STD) connecteur Lightning Gris/noir : Avant droit – ou aigus droit – À... - Page 11 Câble d’interface USB pour iPod/iPhone Caméra Composant vidéo (CD-IU51) (vendu séparément) iPhone muni d’un connecteur à externe et écran À propos de la caméra de recul 30 broches Lorsque vous utilisez la caméra de recul, les images vidéo sont automatiquement Smartphone remplacées par celle de la caméra de recul (périphérique Android™)
-
Page 12: Avant L'installation
Installation Composant vidéo externe (vendu séparément) REMARQUE Le réglage approprié est requis pour utiliser un composant vidéo externe. Pour connaître la zone de déploiement des Précautions avant en savoir plus, consultez le manuel airbags avant. d’utilisation. l’installation Avant l’installation ATTENTION Veillez à... -
Page 13: Avant D'installer Ce Produit
• Lors de l’installation, laissez suffisamment Rainure Installation avec le d’espace derrière le panneau arrière pour Fixez la garniture en orientant le côté permettre une dissipation correcte de la support avec la rainure vers le bas. chaleur et enroulez les câbles volants de façon qu’ils ne bloquent pas les orifices Installation à... -
Page 14: Réglage De L'angle Du Microphone
Montage sur le pare- Installation sur le Réglage de l’angle du soleil système de microphone commandes du volant Insérez le fil du microphone dans la Vous pouvez régler l’angle du microphone. rainure. Détachez la base du microphone du clip en la faisant glisser tout en appuyant sur l’onglet. -
Page 16: Norme Di Sicurezza Importanti
50 W (massima potenza Pioneer, adeguatamente formati e dotati modo che non impediscano o ostacolino in ingresso) e tra i 4 Ω e gli 8 Ω (valore di dell’esperienza necessaria con i dispositivi... -
Page 17: Cavo Di Alimentazione
• Per evitare cortocircuiti, coprire il cavo Microfono 3 m Rosso (3*) Cavo di alimentazione scollegato con nastro isolante. È Ingresso remoto cablato Effettuare il collegamento al terminale particolarmente importante isolare tutti i Può essere collegato un adattatore controllato dall’interruttore di fili dell’altoparlante non utilizzati che, se controllo remoto cablato (venduto accensione (12 V CC). - Page 18 Bianco: Sinistro anteriore + o sinistro Amplificatore di potenza (venduto Amplificatore di iPod/iPhone con gamma alta + separatamente) Bianco/nero: Sinistro anteriore – o potenza (venduto Collegare con il cavo RCA (venduto connettore Lightning sinistro gamma alta – separatamente) separatamente) Grigio: Destro anteriore + o destro All’uscita posteriore (STD) gamma alta + All’uscita gamma media (NW)
-
Page 19: Video Camera
Cavo interfaccia USB per iPod/iPhone Videocamera Componente video (CD-IU51) (venduto separatamente) iPhone con connettore a 30 pin esterno e display Informazioni sulla videocamera di vista posteriore Smartphone Quando si utilizza una videocamera per (dispositivo Android™) vista posteriore, l’immagine della vista posteriore passa automaticamente dal video spostando il cambio su RETRO (R). -
Page 20: Precauzioni Prima Dell'installazione
Installazione Alle uscite audio Componente video esterno (venduto separatamente) NOTA Per usare il componente video esterno, è Precauzioni prima Prima dell’installazione richiesta un’impostazione appropriata. Per dettagli, fare riferimento al manuale di dell’installazione • Rivolgersi al rivenditore se l’installazione funzionamento. richiede la creazione di fori o altre AVVERTENZA modifiche del veicolo. -
Page 21: Installazione Con Il Supporto
dietro il pannello posteriore e di Scanalatura Installazione con il avvolgere i cavi allentati affinché non Collegare la ghiera con il lato con la ostruiscano le bocche di ventilazione. supporto scanalatura rivolta verso il basso. Installazione Installare il supporto nel cruscotto. 5 cm Fissare il manicotto di montaggio utilizzando i fori per... -
Page 22: Regolazione Dell'angolazione Del Microfono
Cavo del microfono Linguetta Scanalatura Base del microfono Fissare la clip del microfono al Montare il microfono sul volante. parasole. Nastro biadesivo Clip del microfono Morsetti Morsetti Utilizzare morsetti venduti Utilizzare morsetti venduti separatamente per fissare il cavo separatamente per fissare il cavo laddove necessario all’interno del laddove necessario all’interno del veicolo. -
Page 24: Precauciones Importantes
50 W (potencia de entrada máxima) y de servicio autorizado de Pioneer con manera que no obstruyan o dificulten la entre 4 Ω y 8 Ω (valor de impedancia). No formación y experiencia especial en... -
Page 25: Cable De Alimentación
los cables de altavoz no utilizados; si se Admite conexión de adaptador de Rojo (3*) Cable de alimentación dejan descubiertos podrían causar un control remoto con cable (se vende por Conéctelo al terminal controlado por el cortocircuito. separado). interruptor de encendido (12 V CC). •... -
Page 26: Amplificador De Potencia (Se Vende Por Separado)
Blanco: Delantero izquierdo + o Conéctelo con un cable RCA (se vende Amplificador de iPod/iPhone con un izquierdo de rango alto + por separado) Blanco/negro: Delantero izquierdo – o potencia (se vende por A la salida trasera (STD) conector Lightning izquierdo de rango alto –... -
Page 27: Componente De Vídeo Externo Y Pantalla
Cable de interfaz USB para iPod/iPhone visualiza automáticamente al mover la Cable RCA (suministrado con ND-BC8) Componente de vídeo (CD-IU51) (se vende por separado) palanca de cambios a la posición de Este producto iPhone con conector de 30 patillas marcha atrás (R). El modo Vista de Marrón (R.C IN) externo y pantalla cámara también le permite comprobar lo... -
Page 28: Antes De La Instalación
Instalación A las salidas de audio Componente de vídeo externo (se vende por separado) NOTA Para utilizar el componente de vídeo del vehículo. Consulte el manual del Precauciones previas a externo, es preciso realizar el ajuste propietario de su vehículo para obtener pertinente. - Page 29 unidad hasta que queden encajadas unidad al soporte de montaje de radio de en su sitio. fábrica. Extraiga la unidad del soporte. • Cuando instale el sistema, para garantizar una correcta dispersión del calor durante el uso de este producto, asegúrese de Llave de extracción dejar un amplio espacio por detrás del Anillo embellecedor...
-
Page 30: Instalación En La Columna De Dirección
Montaje en el parasol Instalación en la Ajuste del ángulo del columna de dirección micrófono Coloque el cable del micrófono en la ranura. Desconecte la base del micrófono de Es posible ajustar el ángulo del micrófono. su clip deslizándola a la vez que pulsa la lengüeta. -
Page 32: Wichtige Sicherheitshinweise
• Beachten Sie alle Vorschriften und Anleitung an dem Punkt außer Kraft setzen, an dem Sicherheitshinweise des Kfz-Herstellers, Pioneer empfiehlt nicht, dieses Produkt das Kabel von der Fahrgastzelle in den insbesondere die Vorschriften zu eigenhändig zu installieren. Dieses Produkt • Dieses Produkt, Applikationen und die Motorraum führt. - Page 33 *Informationen zur Anschlussmethode Heckausgang (STD)/Mitteltonausgang Sicherung (oder Zubehör) Anmerkung zum blau/ finden Sie unter Anschluss. (NW) Gelb (1*) • Die schwarze Leitung ist Masse. Bitte weißen Kabel Frontausgang (STD)/Hochtonausgang Mit konstantem 12-V- erden Sie diese Leitung separat von der (NW) Versorgungsterminal verbinden.
- Page 34 Klemmen Sie die Leitung (1) fest und An Mittelton-Ausgang (NW) Leistungsverstärker iPod/iPhone mit klemmen Sie sie dann mit einer Hecklautsprecher (STD) Spitzzange (2) sorgfältig fest. (separat erhältlich) Mittelton-Lautsprecher (NW) Lightning-Anschluss Stromversorgungsseite An Frontausgang (STD) Handbremsenschalter An Hochton-Ausgang (NW) Masseseite Frontlautsprecher (STD) Ohne internen Verstärker Anschluss über den USB- Lautsprecherleitungen...
- Page 35 USB-Schnittstellenkabel für iPod/iPhone Kamera Externe (CD-IU51) (separat erhältlich) iPhone mit 30-poligem Anschluss Videokomponente und Über die Heckkamera Display Wenn Sie die Heckkamera nutzen, Smartphone wechselt das Video automatisch durch (Android™-Gerät) Einstellen des Schalthebels auf den Rückwärtsgang (R) zum Heckkamerabild. Der Kamerasteuerung-Modus ermöglicht Ihnen auch die Prüfung dessen, was sich Anschluss über den USB- während der Fahrt hinter Ihnen befindet.
-
Page 36: Vor Der Installation Zu Beachten
Installation An Rot, Weiß An Videoausgang An Audioausgänge Externe Videokomponente (separat erhältlich) Einzelheiten zum Entfaltungsbereich der Vor der Installation zu HINWEIS Frontairbags finden Sie im Die geeignete Einstellung ist zur Nutzung beachten Benutzerhandbuch Ihres Fahrzeugs. der externen Videokomponente erforderlich. Einzelheiten finden Sie in der Vor dem Einbau Bedienungsanleitung. -
Page 37: Einbau Des Mikrofons
Einrasten an beiden Seiten des Geräts Bringen Sie den Abdeckring an. TIPP ein. Sie können durch das Verschieben der Ziehen Sie das Gerät aus der Position der Schraubenbohrung dieses Halterung. Geräts gegenüber der vorinstallierten Radio-Montagehalterung verändern, wie stark das Gerät aus dem Armaturenbrett/ der Konsole herausragt. -
Page 38: Montage An Der Sonnenblende
montieren. Montieren Sie das Mikrofon in Befestigung an der Anpassen des diesem Fall am Lenkrad. Lenksäule Mikrofonwinkels Montage an der Lösen Sie den Mikrofonsockel vom Der Mikrofonwinkel kann angepasst Sonnenblende Mikrofon-Clip, indem Sie auf die werden. Zunge drücken und den Legen Sie das Mikrofonkabel in die Mikrofonsockel dabei herausschieben. - Page 40 Als de handleiding • Gebruik dit product uitsluitend met een Pioneer raadt het u af om dit product zelf isolatie van de gele draad slijt als gevolg 12-volt batterij en negatieve aarde. Als u te monteren. Dit product is gemaakt om van contact met metalen onderdelen, de •...
- Page 41 brand en/of schade aan de producten witte draad, zelfs als de geluidsbron is Rood (3*) Stroomkabel veroorzaken als de massadraden uitgeschakeld. Aansluiten op de aansluiting die onder losraken. aansturing van de contactschakelaar • Zorg tijdens het vervangen/ staat (12 V DC). Dit product terugplaatsen van een zekering dat u Sluit draden van dezelfde kleur op...
- Page 42 Handremschakelaar Op uitgang achter (STD) Stroomversterker iPod/iPhone met Kant van de massa Op uitgang van middentonen (NW) Luidsprekerdraden (apart verkrijgbaar) Luidspreker achter (STD) Lightning-aansluiting Wit: Links vóór + of hoge tonen links + Luidspreker middentonen (NW) Wit/zwart: Links vóór – of hoge tonen Op uitgang vóór (STD) links –...
- Page 43 USB interfacekabel voor iPod/iPhone van de video automatisch door de Achteruitkijkcamera (ND-BC8) (apart Extern video- (CD-IU51) (apart verkrijgbaar) versnellingspook in de stand ACHTERUIT verkrijgbaar) iPhone met een stekker met 30 pinnen (R) te zetten. Cameraweergave kunt u ook Op video-uitgang onderdeel en het controleren wat zich tijdens het rijden RCA-kabel (meegeleverd met ND-BC8)
-
Page 44: Voorzorgsmaatregelen Voor Installatie
Installatie Op rood, wit Op video-uitgang Op audio-uitgangen Extern video-onderdeel (apart verkocht) OPMERKING • Monteer dit product nooit vóór of naast Voorzorgsmaatregelen Voor het gebruik van een extern video- de locatie in het dashboard, de deur, of onderdeel is een bepaalde instelling voor installatie de stijl van waaruit de airbag geactiveerd vereist. -
Page 45: Installatie Met De Houder
Steek de meegeleverde treksleutel in schroefgat van dit apparaat te verschuiven beide kanten van het apparaat totdat naar de standaard montagebeugel voor de ze op hun plaats klikken. radio. Trek het apparaat uit de houder. • Om verzekerd te zijn van voldoende ventilatie bij gebruik van dit product, dient u er bij de installatie voor te zorgen dat u achter het achterpaneel voldoende... -
Page 46: Montage Op De Zonneklep
Montage op de Montage op de De hoek van de zonneklep stuurkolom microfoon afstellen Monteer de microfoondraad in de Verwijder de microfoonstandaard uit De hoek van de microfoon kan worden gleuf. de microfoonklem door de aangepast. microfoonstandaard te verschuiven terwijl u op de tab drukt. Microfoondraad Gleuf Bevestig de microfoonklem aan de... - Page 48 © 2019 PIONEER CORPORATION. All rights reserved. © 2019 PIONEER CORPORATION. Tous droits de reproduction et de traduction réservés. <CRD5168-A> EW5...
Need help?
Do you have a question about the DMH-A3300DAB and is the answer not in the manual?
Questions and answers