Table of Contents
Advertisement
Quick Links
Advertisement
Table of Contents

Related Manuals for Pioneer DMH-A3300DAB


Summary of Contents for Pioneer DMH-A3300DAB
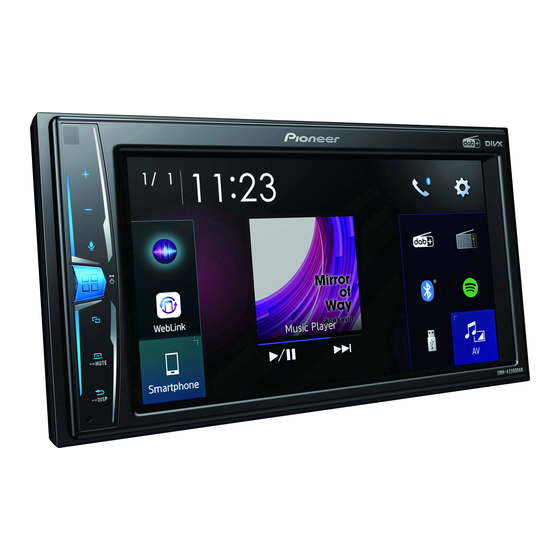
- Page 1 DMH-A3300DAB RDS AV RECEIVER Operation Manual...
-
Page 2: Table Of Contents
Contents Thank you for buying this Pioneer product. Please read through these instructions so you will know how to operate your model properly. After you have finished reading the instructions, keep this document in a safe place for future reference. - Page 3 ■ Appendix ................... 76 - 3 -...
-
Page 4: Precaution
• If liquid or foreign matter should get inside this product, park your vehicle in a safe place, turn the ignition switch off (ACC OFF) immediately and consult your dealer or the nearest authorised Pioneer - 4 -... - Page 5 • If you notice smoke, a strange noise or odour from this product, or any other abnormal signs on the LCD screen, turn off the power immediately and consult your dealer or the nearest authorised Pioneer Service Station. Using this product in this condition may result in permanent damage to the system.
- Page 6 • To prevent data loss and damage to the storage device, never remove it from this product while data is being transferred. • Pioneer cannot guarantee compatibility with all USB mass storage devices and assumes no responsibility for any loss of data on media players, iPhone, smartphone, or other devices while using this product.
- Page 7 • We offer the latest information about PIONEER CORPORATION on our website. • Pioneer regularly provides software updates to further improve it’s products. Please check the support section of the Pioneer website for all available software updates. About this product •...
- Page 8 About this manual This manual uses diagrams of actual screens to describe operations. However, the screens on some units may not match those shown in this manual depending on the model used. Meanings of symbols used in this manual This indicates to touch the appropriate soft key on the touch screen. This indicates to touch and hold the appropriate soft key on the touch screen.
-
Page 9: Parts And Controls
Parts and controls Main unit VOL (+/ Press to activate the voice recognition mode such as Siri when the iPhone is connected to the unit via Bluetooth. Press to display the top menu screen. Press and hold to power off. To power back on, press any button. NOTE icon appears when the power is on. -
Page 10: Basic Operation
Basic operation Resetting the microprocessor CAUTION • Pressing the RESET button resets settings and recorded contents to the factory settings. – Do not perform this operation when a device is connected to this product. – Some of the settings and recorded contents will not be reset. •... - Page 11 3-way system with a high range speaker, middle range speaker and subwoofer (low range speaker) for reproduction of high, middle and low frequencies (bands). WARNING Do not use the unit in Standard Mode when a speaker system for 3-way Network Mode is connected to the unit.
- Page 12 Operating list screens Touching an item on the list allows you to narrow down the options and proceed to the next operation. Appears when all characters are not displayed on the display area. If you touch the key, the rests are scrolled for display. NOTE This function is available only when you stop your vehicle in a safe place and apply the handbrake.
- Page 13 Switches the dimmer duration by day or night. Switches between playback and pause. Skips files forwards or backwards. Performs fast reverse or fast forwards. Displays setting menu screen (page 57). Closes the menu bar. Top menu screen Switches the top menu screen layout. Touch and hold appears at the top of the screen.
- Page 14 Favourite source icons If you select [Power OFF], you can turn off almost all functions. The [Power OFF] mode is released in the following cases: • An incoming call is received (only for hands-free phoning via Bluetooth). • A rear view camera image is input when the vehicle is in reverse. •...
-
Page 15: Bluetooth
Bluetooth Bluetooth connection Turn on the Bluetooth function on the device. Press Touch then The Bluetooth screen appears. Touch [Connection]. Touch The unit starts to search for available devices, then displays them in the device list. Touch the Bluetooth device name. After the device is successfully registered, a Bluetooth connection is established by the system. - Page 16 CAUTION Never turn this product off and disconnect the device while the Bluetooth setting operation is being processed. Menu Item Description [Connection] Connect, disconnect, or delete registered Bluetooth device manually. Touch to delete registered device. To connect a registered Bluetooth device manually, touch the name of the device.
- Page 17 registered devices are already connected, you can connect the remaining third device to use the audio function only from the switch devices key on the audio source screen. • The icon for the mobile phone currently being used is displayed on the Phone menu screen.
- Page 18 The following items are displayed. • Name of the current mobile phone • List number of the current mobile phone • Reception status of the current mobile phone • Battery status of the current mobile phone If you connect two mobile phones to this product at the same time, you can switch between the mobile phones using the switch devices key.
- Page 19 Touch Touch On the [Phone Book] screen, touch the desired name to display the contact’s phone number. Touch ▶Dialling from the preset dial list Touch Touch the desired entry on the list to make a call. The dial screen appears and dialling starts. ▶Deleting a phone number Press Touch...
- Page 20 Press Touch Touch The voice recognition function launches and the voice control screen appears. TIPS • You can also launch the voice recognition function by pressing button. • If two mobile phones are automatically connected to this product with the Bluetooth device auto connect function, the voice recognition function (Siri Eyes Free Mode) will be set on the second phone.
- Page 21 Touch to turn private mode on or off. NOTES • If two mobile phones are connected to this product and the first phone is set to private mode, you can receive incoming calls on the second phone while maintaining the call in progress on the first phone.
- Page 22 ▶The received call and dialled number histories • You cannot make a call to the entry of an unknown user (no phone number) in the received call history. • If calls are made by operating your mobile phone, no history data will be recorded in this product.
- Page 23 The Bluetooth audio playback screen appears. Basic operation Bluetooth audio playback screen Track number indicator Switches between playback and pause. Skips files forwards or backwards. • By pressing then touch , you can also skip files forwards or backwards. • By pressing then touch and hold , you can also perform fast reverse or fast forwards.
-
Page 24: Av Source
AV source Supported AV source You can play or use the following sources with this product. • Radio • Digital Radio • USB The following sources can be played back or used by connecting an auxiliary device. • iPod • Spotify® •... - Page 25 Selecting a source Source on the AV source selection screen Press then touch Touch the source icon. When you select [Source OFF], the AV source is turned off. Source on the source list Press then touch the AV operation key. Touch Touch the source key.
- Page 26 Adjusting the range of favourite source icons area NOTE This function is available only when you stop your vehicle in a safe place and apply the handbrake. Press Touch and hold appears at the top left of the favourite source icons. Drag to the desired position.
-
Page 27: Digital Radio
Digital Radio tuner operations For improved Digital Radio reception, make sure a Digital Radio aerial with phantom power input (active type) is used. Pioneer recommends using AN-DAB1 (sold separately) or CA-AN-DAB.001 (sold separately). Current consumption of Digital Radio aerial should be 100 mA or less. - Page 28 Basic operation Digital Radio screen Recalls the preset channel stored to a key from memory. Stores the current broadcast frequency to a key. Displays the preset channel list. Select an item on the list to switch to the preset service. Selects the DAB1, DAB2, or DAB3 band.
- Page 29 Selects a station. Touch the desired station in the categorised list as follows. [Station]: Displays all stations. [Program Type] (PTY label): Searches from programme type information. [Station Group]: Displays the station group list. If you touch [List Update], you can update station list information manually. NOTES •...
- Page 30 Menu Item Description [TA Interrupt]*1 Receives the traffic announcement from the last selected frequency, interrupting the other sources. [DAB+RDS TA] Receives current traffic information for DAB and RDS (AN-DAB1 has priority) if available. [RDS TA ONLY] Receives current traffic information for only RDS if available.
-
Page 31: Radio
Radio Starting procedure Press then touch Touch [Radio]. The Radio screen appears. Basic operation Radio screen Recalls the preset channel stored to a key from memory. Stores the current broadcast frequency to a key. Displays the preset channel list. Select an item on the list ([1] to [6]) to switch to the preset channel. Selects the FM1, FM2, FM3 or MW/LW band. - Page 32 Manual tuning Seek tuning or non stop seek tuning Releasing the key in a few seconds skips to the nearest station from the current frequency. Keep holding the key for long seconds to perform non stop seek tuning. TIPS • By pressing then touch , you can also switch the preset channels.
- Page 33 Menu Item Description [Local] Local seek tuning allows you to only tune into [Off] radio stations with sufficiently strong signals. FM: [Level1] [Level2] [Level3] [Level4] NOTES MW/LW: [Level1] [Level2] • [Level4] for FM and [Level2] for MW/LW are available only with the stations with the strongest signals. •...
- Page 34 Menu Item Description [Music] Gives priority to the sound quality. *1 This setting is available only when the source is off. *2 This function is available only when you receive the FM band. - 34 -...
-
Page 35: Compressed Files
Compressed files Plugging/unplugging a USB storage device You can play compressed audio, compressed video, or still image files stored in an external storage device. Plugging a USB storage device Pull out the plug from the USB port of the USB cable. Plug a USB storage device into the USB cable. - Page 36 Plug the USB storage device into the USB cable (page 35). Touch [USB]. Playback is performed in order of folder numbers. Folders are skipped if they contain no playable files. Basic operation TIPS • By pressing then touch , you can also skip files/chapters forwards or backwards. •...
- Page 37 Sets a repeat play range for all files/the current folder/the current file. Plays files or does not play in random order. Displays the hidden function bar. You can also display the hidden function bar by flicking the bar from the right to the left.
- Page 38 Selects the previous folder or the next folder. Constructs the database for using the Music Browse mode (page 38). Switches the current music information display. ▶Selecting a file using Music Browse mode You can select files to play back using the category list if the files contain tag information.
- Page 39 Video source screen Hides the touch panel keys. To display the keys again, touch anywhere on the screen. Switches between playback and pause. Performs fast reverse or fast forwards. Touch again to change the playback speed. Stops playback. Performs frame-by-frame playback. Performs slow-motion playback.
- Page 40 Selects a file from the list. Touch a file on the list to playback. Touching a folder on the list shows its contents. You can play a file on the list by touching it. Skips files forwards or backwards. Still image source TIPS •...
- Page 41 Saves the current images as the wallpaper. Touch the following items then touch [Yes] to overwrite the image. [As AV Screen]: Saves the image as the wallpaper for the AV screen. [As HomeScreen]: Saves the image as the wallpaper for the top menu screen. [As Both]: Saves the image as the wallpaper for both the AV screen and top menu screen.
-
Page 42: Ipod
iPod Connecting your iPod When connecting an iPod to this product, the settings are automatically configured according to the device to be connected. For details of the compatiblity, refer to Compatible iPod/iPhone models (page 85). NOTES • Depending on the generation or version of the iPod, some functions may not be available. •... - Page 43 Displays the link search screen. Select a song from the list related to the song currently playing. If you touch the artwork, the list of songs in the album is displayed. NOTE This function is not available while playing Apple Music Radio. Switches between playback and pause.
- Page 44 Audio source screen 2 Changes the audiobook speed. Normal—Fast—Slow Displays the hidden function bar. Apple Music® Radio source Important Apple Music Radio may not be available in your country or region. For details about Apple Music Radio, visit the following site: http://www.apple.com/music/ NOTE This function is only available when using the iPod function with iOS 8 or higher (up to iOS 12) installed on iPhone 7, iPhone 7 Plus, iPhone SE, iPhone 6s, iPhone 6s Plus, iPhone 6, iPhone 6 Plus, iPhone 5s,...
- Page 45 Displays the pop-up menu for Apple Music Radio. • Touch [Play More Like This] to play back songs similar to the current song. • Touch [Play Less Like This] to set it not to play back the current song again. •...
-
Page 46: Weblink
Using WebLink Important • Pioneer is not liable for any issues that may arise from incorrect or flawed app-based content. • The content and functionality of the supported applications are the responsibility of the App providers. • In WebLink, functionality through the product is limited while driving, with available functions determined by the App providers. - Page 47 WebLink Displays the main menu of the WebLink source screen. When the rear display is connected to this unit, video from the WebLink screen can be displayed to the rear display except while the AV source with video content is active even while driving. For iPhone users System requirement iOS 10.0 or higher (up to iOS 12.x)
- Page 48 • The video playback capability depends on the connected Android device. Unlock your smartphone and connect it to this product via USB. Refer to the Installation Manual. Press Touch Touch [WebLink]. Touch desired icon in the tab. The WebLink app is launched. Using the audio mix function You can output the audio mixing AV source and an application for iPhone when WebLink is used.
-
Page 49: Spotify
• Certain functions of the Spotify service are not available when accessing the service through Pioneer car audio/video products. • Spotify is a music service not affiliated with Pioneer. More information is available at https://support.spotify.com/. • The Spotify application is available for most iPhone and smartphone, please visit https://support.spotify.com/ for the latest compatibility information. - Page 50 Touch then Touch [AV Source Settings]. Confirm that [Spotify] is turned on. Press then touch Touch [Spotify]. NOTES • For details on Bluetooth connection, see page 15. • For details on USB connection for iPhone, refer to the Installation Manual. Basic operation Playback screen 1 (Track) Switches between playback and pause.
- Page 51 Displays the hidden function bar. You can also display the hidden function bar by flicking the bar from the right to the left. Switches among connected devices. Selects a track or station from the list. Your Music: Selects a track or station from the list of saved song information. Browse: Selects a track from the category list.
- Page 52 Playback screen 1 (Radio mode) Switches between playback and pause. Skips tracks forwards or backwards. By pressing then touch , you can skip songs forwards. NOTE The number of tracks that are skipped varies depending on the application. Starts new radio mode. Saves or deletes the current song information to or from Your Music.
- Page 53 Playback screen 2 (Radio mode) Displays the hidden function bar. You can also display the hidden function bar by flicking the bar from the left to the right. Gives a Thumbs Up to the playing track. Gives a Thumbs Down to the playing track and skips to the next track. NOTE The number of tracks that are skipped varies depending on the application.
-
Page 54: Aux
You can display the video image output by the device connected to video input. CAUTION For safety reasons, video images cannot be viewed while your vehicle is in motion. To view video images, stop in a safe place and apply the handbrake. NOTE A Mini-jack AV cable (sold separately) is required for connection. - Page 55 Hides the touch panel keys. To display the keys again, touch anywhere on the screen. You can set the screen size for the video image (page 74). Switches between the video input and audio input. - 55 -...
-
Page 56: Av Input
AV input You can display the video image output by the device connected to video or camera input. For details, refer to the Installation Manual. CAUTION For safety reasons, video images cannot be viewed while your vehicle is in motion. To view video images, stop in a safe place and apply the handbrake. -
Page 57: Settings
Settings You can adjust various settings in the main menu. Displaying the setting screen Press Touch Touch one of the following categories, then select the options. System settings (page 57) Theme settings (page 65) Audio settings (page 66) Video settings (page 72) Bluetooth settings (page 15) System settings The menu items vary according to the source. - Page 58 [Auto Mix] Menu Item Description [Auto Mix] Select whether to perform mixing the sound output from [On] [Off] WebLink and AV source sound automatically. NOTE This function is only available when WebLink is used with an iPhone. [Input/Output settings] Menu Item Description [USB MTP] Select whether or not to activate USB MTP (Media Transfer...
- Page 59 CAUTION Pioneer recommends the use of a camera which outputs mirror reversed images, otherwise the screen image may appear reversed. • Immediately verify whether the display changes to the rear view camera image when the gearstick is moved to REVERSE (R) from another position.
- Page 60 Menu Item Description [Parking Assist Guide Adjusting the guidelines by dragging or touching Adjust] on the screen. Touch [Default] to reset the settings. CAUTION • When adjusting the guidelines, be sure to park the vehicle in a safe place and apply the handbrake. •...
- Page 61 [Demo Mode] Menu Item Description [Demo Mode] Setting the demo mode. [On] [Off] [System Language] Menu Item Description [System Language] Select the system language. NOTES • If the embedded language and the selected language setting are not the same, the text information may not display properly. •...
- Page 62 Menu Item Description [Touch panel calibration] Touch [Yes]. Touch two corners of the screen along the arrows then touch the centres of the two [+] marks at the same time twice. Press The adjustment results are saved. Press once again. Proceed to 16-point adjustment.
- Page 63 Menu Item Description [Dimmer Duration] Adjust the time that the dimmer is turned on or off by dragging the cursors or touching You can use this function when [Dimmer Trigger] is set to [Time]. TIPS • Each touch of moves the cursor backwards or forwards in the 15 minute width.
- Page 64 * With some pictures, you cannot adjust [Hue] and [Colour]. NOTES • The adjustments of [Brightness], [Contrast], and [Dimmer] are stored separately when your vehicle's headlights are off (daytime) and on (nighttime). • [Brightness] and [Contrast] are switched automatically depending on the setting of [Dimmer Settings].
-
Page 65: Theme Settings
Theme settings The menu items vary according to the source. Menu Item Description [Background] Select the wall paper from the preset items in this product or original pictures via the external device. The wall paper can be set from selections for the top menu screen and AV operation screen. -
Page 66: Audio Settings
Audio settings The menu items vary according to the source. Some of the menu items become unavailable when the volume is set to mute. Menu Item Description [Graphic EQ] Select or customise the equaliser curve. [Super Bass (S.Bass)] Select a curve that you want to use as the basis of [Powerful] [Natural] customising then touch the frequency that you want to [Vocal] [Flat] [Custom1]... - Page 67 Menu Item Description [Source Level Adjuster] Adjust the volume level of each source to prevent radical [-4] to [+4] changes in volume when switching between sources other than FM. Touch to adjust the source volume after comparing the FM tuner volume level with the level of the source.
- Page 68 Menu Item Description [Time Alignment] Select or customise the time alignment settings to reflect [On] [Off] the distance between the listener’s position and each Listening Position*1*2 speaker. You need to measure the distance between the [Off] [Front Left] [Front head of the listener and each speaker unit. Right] [Front] [All] Touch to select the listening position then...
- Page 69 Menu Item Description [Automatic Level Control] Corrects automatically the audio level difference between the music files or the sources. [Off] Turns the auto level control setting off. [Mode1] Corrects a little the audio level difference between the music files or the sources (for the narrow dynamic range audio signal).
- Page 70 ▶Before operating the Auto EQ function • Perform Auto EQ in a quiet place with the vehicle engine and air conditioning switched off. Also, cut the power of car phones or mobile phones in the vehicle, or remove them in advance. Surrounding sounds may prevent correct measurement of the vehicle’s acoustics.
- Page 71 Disconnect the iPhone or smartphone device. Turn on the ignition switch (ACC ON). If the vehicle’s air conditioner or heater is turned on, turn it off. Switch the AV source to [Source OFF] (page 25). Press Touch then Touch [A-EQ&TA Measurement]. Connect the microphone for acoustical measurement (sold separately) with this product.
-
Page 72: Video Settings
NOTE [Subwoofer Settings] is available only when [Subwoofer] is [On]. Press Touch then Touch [Crossover] or [Subwoofer Settings]. Touch to switch the speaker. Drag the graph line to set the cutoff position. Drag the lowest point of the graph to set the cutoff slope. The following items can also be set. -
Page 73: Favourite Menu
Favourite menu Registering your favourite menu items in shortcuts allows you to quickly jump to the registered menu screen by a simple touch on the [Favourites] screen. NOTE Up to 12 menu items can be registered in the favourite menu. Creating a shortcut Press then touch... -
Page 74: Other Functions
Other functions Setting the time and date Touch the current time on the screen. Touch to set the correct time and date. You can operate the following items: Year, month, date, hour, minute. TIPS • You can change the time display format to [12hour] or [24hour]. •... - Page 75 [Trimming] An image is displayed across the entire screen with the horizontal-to-vertical ratio left as is. If the screen ratio differs from the image, the image may be displayed partly cut off either at the top/bottom or sides. NOTE [Trimming] is for image files only. TIPS •...
- Page 76 → The operation is not compatible with here, contact your dealer or the nearest the video configuration. authorised Pioneer service facility. Random playback in Music Browse mode is released in the USB storage device. Common problems →...
- Page 77 If the error persists, record the error message and contact your Problems with Application dealer or your nearest Pioneer service screen centre. A black screen is displayed. Common →...
- Page 78 – Please log in to the Spotify DAB tuner application. No Signal Antenna Error → The connected device is out of area. → The aerial connection is incorrect or an – Connect the device to a network. unusual voltage has been detected. –...
- Page 79 Pioneer Service Station. – Disconnect the USB storage device and do not use it. Turn the ignition switch to OFF, then to ACC or ON and then connect a compliant USB storage device.
- Page 80 • There may be a slight delay when starting Detailed information playback of audio files encoded with for playable media image data. • Some USB storage devices connected to this product may generate noise on the radio. Compatibility • Do not connect anything other than the USB storage device.
- Page 81 are associated even if the file names are • This product is not compatible with the not the same. following: MP3i (MP3 interactive), mp3 • The subtitle file must be stored in the PRO, m3u playlist same folder as the DivX file. SAMPLING FREQUENCY 8 kHz to 48 kHz •...
- Page 82 • Some special operations may be Maximum frame rate 30 fps prohibited because of the composition of .divx DivX files. Compatible video codec DivX USB storage device Maximum resolution 720 × 576 EXTENSION .divx, .avi Maximum frame rate 30 fps MAX RESOLUTION 720 ×...
- Page 83 OR IMPLIED WARRANTIES, INCLUDING, BUT registered trademarks owned by Bluetooth SIG, NOT LIMITED TO, THE IMPLIED Inc. and any use of such marks by PIONEER CORPORATION is under license. Other WARRANTIES OF MERCHANTABILITY AND trademarks and trade names are those of their FITNESS FOR A PARTICULAR PURPOSE ARE respective owners.
- Page 84 DivX Detailed information regarding connected iPod devices • Pioneer accepts no responsibility for data DivX® Home Theater Certified devices have been lost from an iPod, even if that data is lost tested for high-quality DivX Home Theater video while using this product. Please back up playback (including .avi, .divx).
- Page 85 Requirements to access app-based other countries. connected content services using this product: iTunes • Latest version of the Pioneer compatible connected content application(s) for the iTunes is a trademark of Apple Inc., smartphone, available from the service registered in the U.S. and other provider, downloaded to your countries.
- Page 86 Content application(s) or Using the LCD screen service by its provider. correctly • Pioneer is not liable for any issues that may arise from incorrect or flawed app- based content. • The content and functionality of the Handling the LCD screen supported applications are the responsibility of the App providers.
- Page 87 22 W × 4 (50 Hz to 15 kHz, 5 %THD, 4 Ω visible. In that case, please consult your LOAD, Both Channels Driven) dealer or the nearest authorised Pioneer Service Station. - 87 -...
- Page 88 Load impedance: Hz/100 Hz/125 Hz/160 Hz/200 Hz/250 4 Ω (4 Ω to 8 Ω [2 Ω for 1 ch] allowable) Preout output level (max): 4.0 V Slope: Equaliser (13-Band Graphic Equaliser): -6 dB/oct, -12 dB/oct, -18 dB/oct, -24 Frequency: dB/oct, OFF 50 Hz/80 Hz/125 Hz/200 Hz/315 Hz/ LPF (Mid): 500 Hz/800 Hz/1.25 kHz/2 kHz/3.15...
- Page 89 AAC decoding format: Bluetooth MPEG-4 AAC (iTunes encoded only) (Ver. Version: 12.5 and earlier) Bluetooth 4.1 certified FLAC decoding format: Output power: Ver. 1.3.0 (Free Lossless Audio Codec) +4 dBm Max. (Power class 2) WAV signal format (MSC Mode only): Frequency band(s): Linear PCM 2 400 MHz to 2 483.5 MHz...
- Page 90 © 2019 PIONEER CORPORATION. All rights reserved. <OPM_DMHA3300DABEW5_EG_A> EW5...
Need help?
Do you have a question about the DMH-A3300DAB and is the answer not in the manual?
Questions and answers