Table of Contents
Advertisement
Quick Links
Advertisement
Table of Contents

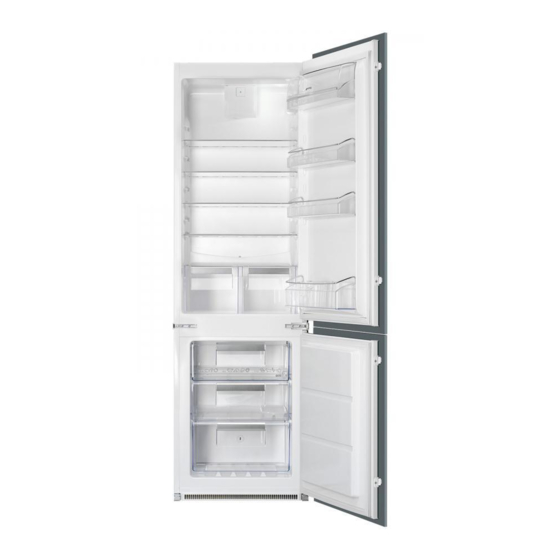
Summary of Contents for Smeg C7280NEP
- Page 1 User Manual Fridge Freezer C7280NEP...
-
Page 2: Table Of Contents
CONTENTS Safety information Care and cleaning Safety instructions Troubleshooting Operation Installation Daily use Noises Hints and tips Technical information Subject to change without notice. SAFETY INFORMATION Before the installation and use of the appliance, carefully read the supplied instructions. The manufacturer is not responsible if an incorrect installation and use causes injuries and damages. -
Page 3: Safety Instructions
Do not use mechanical devices or other means to accelerate • the defrosting process, other than those recommended by the manufacturer. Do not damage the refrigerant circuit. • Do not use electrical appliances inside the food storage • compartments of the appliance, unless they are of the type recommended by the manufacturer. - Page 4 • The mains cable must stay below the • Do not freeze again food that has been level of the mains plug. thawed. • Connect the mains plug to the mains • Obey the storage instructions on the socket only at the end of the installation. packaging of frozen food.
-
Page 5: Operation
OPERATION Control panel Temperature indicator LED FastFreeze indicator FastFreeze button Temperature regulator ON/OFF button Switching on However, the exact setting should be chosen keeping in mind that the 1. Insert the plug into the wall socket. temperature inside the appliance depends 2. -
Page 6: Daily Use
DAILY USE Freezing fresh food WARNING! Refer to Safety chapters. The freezer compartment is suitable for freezing fresh food and storing frozen and Movable shelves deep-frozen food for a long time. To freeze small amount of fresh foods it is The walls of the refrigerator are equipped not necessary to change the present with a series of runners so that the shelves... - Page 7 Small pieces may even be cooked still WARNING! Make sure that frozen, directly from the freezer: in this foods do not exceed the load case, cooking will take longer. limit stated on the side of the upper section (where applicable) Fan function The fan function let food cool quickly and a more uniform temperature in the...
-
Page 8: Hints And Tips
HINTS AND TIPS Normal operating sounds wrapped in aluminium foil or polythene bags to exclude as much air as possible. The following sounds are normal during • Bottles: these need a cap and should be operation: stored on the door bottle shelf, or (if equipped) on the bottle rack. -
Page 9: Care And Cleaning
• be sure that frozen foodstuffs are • once defrosted, food deteriorates rapidly transferred from the foodstore to the and cannot be refrozen; freezer in the shortest possible time; • do not exceed the storage period • not open the door frequently or leave it indicated by the food manufacturer. -
Page 10: Troubleshooting
Periods of non-operation WARNING! If the cabinet will be kept on, ask somebody to When the appliance is not in use for long check it once in a while to periods, take the following precautions: prevent the food inside from 1. - Page 11 Problem Possible cause Solution The FastFreeze function is Refer to "FastFreeze function". switched on. The compressor does not This is normal, no error has The compressor starts after a start immediately after press- occurred. period of time. ing the FastFreeze, or after changing the temperature.
-
Page 12: Installation
Only service is allowed to replace the 2. If necessary, adjust the door. Refer to lighting device. Contact your Authorised "Installation". 3. If necessary, replace the defective door Service Centre. gaskets. Contact the Authorised Closing the door Service Centre. 1. Clean the door gaskets. INSTALLATION Positioning current regulations, consulting a qualified... - Page 13 Do a final check to make sure that: • All screws are tightened. • The magnetic seal adheres to the cabinet. • The door opens and closes correctly. If the ambient temperature is cold (i.e. in Winter), the gasket may not fit perfectly to the cabinet.
- Page 14 7. Attach the appliance to the niche with 4 screws. 8. Remove the correct part from the hinge cover (E). Make sure to remove the part 4. Push the appliance in the direction of DX, in the case of right hinge, SX in the arrows (2) against the cupboard on opposite case.
- Page 15 17. Install the part (Ha) on the inner side of the kitchen furniture. ca. 50 mm 10. Install the vent grille (B). 11. Attach the hinge covers (E) to the hinge. 90° 12. Connect the appliance laterally to the kitchen furniture sidewall. 13.
-
Page 16: Noises
8 mm 22. Remove the brackets and mark a 25. Press the part (Hd) on the part (Hb). distance of 8 mm from the outer edge of the door where the nail must be fitted (K). 8 mm Do a final check to make sure that: •... - Page 17 HISSS! BRRR SSSRRR! SSSRRR! HISSS! HISSS!
-
Page 18: Technical Information
BLUBB! CRACK! CRACK! BLUBB! TECHNICAL INFORMATION Technical data Dimensions of the recess Height 1780 Width Depth Rising time Hours Voltage Volts 230 - 240 Frequency The technical information are situated in the rating plate, on the external or internal side of the appliance and in the energy label. - Page 20 222370509-00-372014...


Need help?
Do you have a question about the C7280NEP and is the answer not in the manual?
Questions and answers