Table of Contents
Advertisement
Quick Links
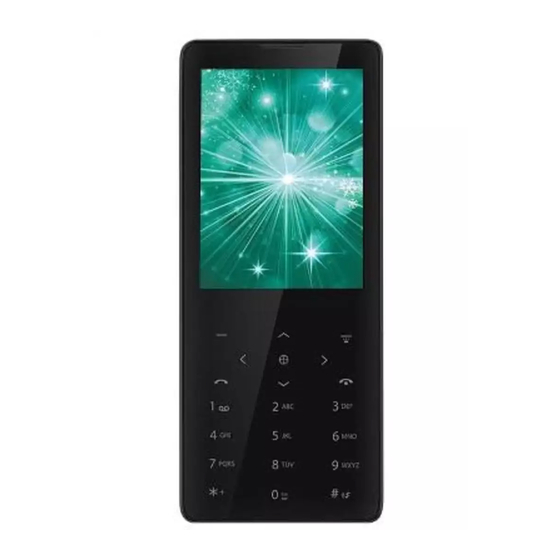
Mobile phone
Nex1
User manual
Contents
Safety....................................................................................................................3
Environment........................................................................................................4
1 Getting Started .................................................................................................5
1.1 Getting to know your touch phone ....................................................5
1.2 Installing the SIM card, battery, and storage card .............................5
1.3 Charging the Battery ..........................................................................6
1.4 Starting up the device.........................................................................7
1.5 Status Icons ........................................................................................9
2 Using phone features ..................................................................................... 11
2.1 Turning the phone function on and off ............................................11
2.2 Making a call ...................................................................................11
2.3 Answering and Ending a call ...........................................................12
2.4 In-call options ..................................................................................12
2.5 Using call history .............................................................................13
2.6 Call settings......................................................................................13
3 Setting on your device....................................................................................14
4 ActiveSync.......................................................................................................18
5 Contacts ..........................................................................................................20
6 Exchanging Messages ....................................................................................23
7 Internet ...........................................................................................................29
1
Advertisement
Table of Contents

Related Manuals for Lava Spark Nex1


Summary of Contents for Lava Spark Nex1
-
Page 1: Table Of Contents
Mobile phone Nex1 User manual Contents Safety........................3 Environment......................4 1 Getting Started ....................5 1.1 Getting to know your touch phone ............5 1.2 Installing the SIM card, battery, and storage card ......5 1.3 Charging the Battery ................6 ... - Page 2 7.1 Ways of Connecting to the Internet ..........29 7.2 Browser ....................29 8 Experiencing Multimedia................31 8.1 Camera & Picture................31 8.2 Music....................34 8.3 FM Radio ..................36 8.4 Sound record ..................36 9 Other applications..................37 9.1 Calendar ...................37 ...
-
Page 3: Safety
Safety Never attempt to disassemble your phone. You alone are responsible for how you use your phone and any consequences of its use. As a general rule, always switch off your phone wherever the use of a phone is prohibited. Use of your phone is subject to safety measures designed to protect users and their environment. -
Page 4: Environment
pacemakers, insulin pumps, etc. It is recommended that a minimum separation of 15 cm be maintained between the phone and an implant. Your doctor or the manufacturers of such equipment will be able to give you any advice you may need in this area. -
Page 5: Getting Started
1 Getting Started 1.1 Getting to know your touch phone 1.2 Installing the SIM card, battery, and storage card You need to remove the back cover before you can install the SIM card and battery. Also, make sure to always turn off the power before installing or replacing the SIM card and battery. -
Page 6: Charging The Battery
use only manufacturer-specified original batteries and accessories. Battery performance depends on many factors, including network configuration, signal strength, and usage patterns. Warning: To reduce risk of fire or burns: • Do not attempt to open, disassemble, or service the battery pack. •... -
Page 7: Starting Up The Device
be used to charge the device. Connect the USB connector of the AC adapter to the sync connector on your device, and then plug in the AC adapter to an electrical outlet to start charging the battery. As the battery is being charged while the device is on, a charging icon appears in the title bar of the Home screen. - Page 8 While not on a call, to lock your control buttons and screen from accidental touch activation, press POWER. You can increase the security of your phone by setting Screen unlock pattern. Once set, in order to unlock your screen, you’ll have to draw the correct unlock pattern.
-
Page 9: Status Icons
added to the Home screen; close the application tab to see it. 4. To remove a shortcut or widget from your Home screen, touch & hold the item to enter “move mode”. The application tab turns into a Trash button. Drag the item to the Trash button and release. - Page 10 Missed call Phone on mute Call forward Battery is low Alarm is set Battery is very low! Bluetooth is on Battery is charging Connected Connected earphone Read your notifications When you see a notification in the status bar, touch the bar and slide your finger down the screen to open the list of notifications displayed in the sliding window.
-
Page 11: Using Phone Features
2 Using phone features 2.1 Turning the phone function on and off To enable or disable Airplane Mode In many countries, you are required by law to turn off the phone while on board an aircraft. Another way to turn off the phone function is to switch your device to Airplane Mode. -
Page 12: Answering And Ending A Call
make a video call. Notice: • SIM slot 1 can be supported video call default (SIM1 card must be supported 3G network). • Your phone must be in of the normal WCDMA network coverage, and the other side (the receiver’s phone and SIM card) can also be supported the video call function of 3G. -
Page 13: Using Call History
• If you have one call in progress and one caller on hold, to end both calls, touch ‘End all’. 6. While on a call, you can conference up to six callers, counting yourself. Note that you can also have an additional caller on hold during a conference call, regardless of how many participants are on the conference. -
Page 14: Setting On Your Device
3 Setting on your device Control phone-wide settings from the Home settings screen: touch select Settings. 3.1 Wireless & networks SIM management You can select to activate or deactivate the SIM card you want to open. Set the default SIM to use voice call, Video call and message, data connection. Wi -Fi Wi-Fi on/off: Select this check box if you prefer to use Wi-Fi for your data connection. - Page 15 unless advised to do so by your wireless operator! 3.2 Device Audio profiles Select one user profile and enter the following options: Vibrate: Select to have your phone vibrate for incoming calls. Volumes: Select to open the volume control, and then slide your finger along the volume bar to set an incoming call ring volume or alarm, playing back music, videos.
- Page 16 Internal phone storage: Reports how much internal storage is free. Applications View all the applications stored on your phone and how much space they occupy. If you’ve downloaded an application from Android Market, you can uninstall it from this screen. Select a specific application to: 1.
- Page 17 3.5 System Date & time Set time, time zone, and date: Use Automatic unless you need to override the network values. Time format: Select from 12 or 24 hour formats. Date format: Select from a variety of formats. Developer options If you are an application developer, you may be interested in these settings: USB debugging: If you want be able to communicate with your phone directly via USB, select ‘USB debugging’...
-
Page 18: Activesync
4 ActiveSync 4.1 Data synchronization Some applications on your phone (Contacts and so on) give you access to the same personal information that you can add, view, and edit on your computer using Web applications. This means that when you add, change, or delete your information in any of these applications on the Web, the updated information also appears on your phone, and vice versa. - Page 19 and try again later. 4.2 Bluetooth You can use Bluetooth to send and receive calls using a headset or hands-free car kit. Turn on Bluetooth services 1. On the Home screen, then touch and select Settings. 2. Select Bluetooth, and then select ‘Bluetooth’ check box to turn on Bluetooth services.
-
Page 20: Contacts
5. Once paired, select the device name to connect. You can also touch & hold the name to open the context menu, and then select Connect. 6. Pairing and connection status appear under the device name. 7. Once the other Bluetooth device shows “connected” status, you can start using it to make and receive phone calls. - Page 21 2. Take action on a contact: On the Contact details screen, you can view call the contact’s number, send a text message, add or remove a star, edit the contact details, or delete the contact. 3. On the Contact details screen, press MENU to open the context menu. From the menu you can select to add or remove a star, edit the contact details, or delete the contact.
- Page 22 Contact details screen. Touch the call number directly to dial that contact’s primary number (first in the list on their details screen). 2. To dial a different number for the contact, select the contact’s name, and then select the number on their details screen and then touch the call number that you want.
-
Page 23: Exchanging Messages
6 Exchanging Messages 6.1 SMS and MMS messaging To open the SMS & MMS Messaging application, on the Home screen, then touch and select the Messaging icon. About text and multimedia messages SMS messages are also know as “text” messages and can each be around 160 characters. - Page 24 2. Reply to a message: Simply start typing your message in the text box at the bottom of the screen to reply to a message. You can always press MENU and select to add a subject or an attachment to convert it to a multimedia message. Select ‘Send’...
- Page 25 characters/messages you’re creating. Remember that text messages have a limit around 160 characters. Once you go over that limit, a new message is actually created but automatically joined into one when received. 6. Select ‘Send’ when ready. You can also save a draft. 7.
- Page 26 Auto-retrieve: To retrieve all your MMS messages automatically (the header plus the message will download to your phone), select this check box. If you clear this check box, then only the message headers will be retrieved and display in your message list. You can retrieve the full message by selecting the Download button that displays in the header.
- Page 27 Once you’ve set up an account, you can do the following: 1. Refresh Inbox: From the Inbox, press MENU and then select ‘Refresh’ to update your Inbox with any previously-unfetched email. 2. Read email: You can display or collapse the messages in your Inbox by selecting Inbox.
- Page 28 2. The Account settings screen appears. You can do the following from this screen: Account name: Select to change the name of your account as it appears on your Accounts screen. Your name: Select to change your name as it appears in outgoing email. Email check frequency: Select this pop-up menu to set how frequently your email account is checked for new messages.
-
Page 29: Internet
7 Internet 7.1 Ways of Connecting to the Internet Your device’s networking capabilities allow you to access the Internet or your corporate network through WLAN, GPRS, EDGE (if available), or WCDMA (if SIM card supported). You can also add and set up a VPN or proxy connection. WLAN WLAN provides wireless Internet access over distances of up to 100 meters (300 feet). - Page 30 and select ‘Refresh’. Open pages in separate windows You can keep more than one Web page open by using multiple windows to display the pages. You can open up to eight windows. Open a new window: From a Web page, press MENU and select ‘Windows’. The Current windows screen opens, showing the Web page you started from, plus a “new window”.
-
Page 31: Experiencing Multimedia
2. In the Page content section, select ‘Set home page’ to open the dialog box. 3. Type the URL of the page you want to set as home, and then select ‘OK’. Download Web files and applications Before you download any files or applications using the Browser, note the following: 1. - Page 32 name and open it. 4. Copy .jpg or other image files into this folder. To organize pictures into albums that will display in the Pictures application, create a folder and copy pictures there for each album you want to display. 5.
- Page 33 select the arrows to scroll through the pictures within that album. If the arrows disappear, touch the picture again to reveal the arrows and zoom controls. Picture options You can do the following while in Pictures. Note: In all the instructions below, you can touch &...
-
Page 34: Music
9. Delete picture: In full-screen view, press MENU and select Delete. The picture will be removed from the Memory card after you confirm. 10. View picture details: In full-screen view, press MENU and select More > Details. The picture details window opens. You can see the title, resolution, file size, and date of the picture. - Page 35 5. When finished copying, close the USB drive window and unmount or eject the drive as required by your computer's operating system. Remove the USB cable from your phone and computer. Play back music At any level in your Library, touch & hold a listing (a song, artist, album, or playlist) to open the context menu.
-
Page 36: Fm Radio
Touch & hold the playlist to open the context menu. You can do the following from this screen: Play, Edit (rearrange songs), Delete and Rename. Create ringtones from songs You can set any of your songs as a phone ringtone: 1. -
Page 37: Other Applications
9 Other applications 9.1 Calendar Calendar views You can view multiple calendars on your phone, so each calendar event is coded with a color. You can view your calendar in a variety of ways. Touch the date on the left-top of the screen to select from Day, Week, Month or Agenda. - Page 38 Days are shown vertically within the Week view. Time slots are defined horizontally in rows. Events are shown as blocks. View event details - Highlight an event to open a small popup window in the lower part of the screen that provides more event information. This window will stay open for three seconds.
-
Page 39: Alarm Clock
• Name that appears in Day view. • Description can be as long as you like. • Select a calendar if you display more than one. • Set a default reminder time. • Set online presence: available or busy. • Select calendar privacy from Default (as defined when calendar was created), Private, or Public. -
Page 40: Calculator
tone, it plays briefly.) Note that when your alarm goes off, the ring tone will play a maximum of five minutes. Vibrate: Select this check box to have your phone vibrate when it goes off. Once your alarm goes off, you will receive an alert with the options to Snooze (for 10 minutes) or Dismiss. -
Page 41: Play Store
Two calculator’s panels are available: basic and advanced. Use the Basic panel to enter numbers and perform basic addition, subtraction, multiplication, and division. Use the Advanced panel to insert advanced operators or delimiters, such as sine, cosine, tangent, square root, parentheses, etc. Switch back and forth between calculator panels by pressing MENU and selecting ‘Advanced panel’... - Page 42 including its overall rating and comments by users. If you scroll down to the about the developer section, you can view more applications by this developer or send the developer an email message. 3. More info about item: User comments about item, Scroll down to view more of this developer’s applications or to email the developer.
- Page 43 2. Select the item you want to uninstall. The Item details screen appears. 3. Select ‘Uninstall’ button at the bottom of the screen. Open downloaded item 1. From the Android Market Home screen, press MENU and select ‘Downloads’. 2. Select the item you want to open. The Item details screen appears. 3.
- Page 44 FCC RF Exposure Information and Statement The SAR limit of USA (FCC) is 1.6 W/kg averaged over one gram of tissue. Device types: Nex1(FCC ID: 2AC27-NEX1) has also been tested against this SAR limit. The highest SAR value reported under this standard during product certification for use at the ear is 1.179W/kg and when properly worn on the body is 0.591W/kg.
Need help?
Do you have a question about the Spark Nex1 and is the answer not in the manual?
Questions and answers