Table of Contents
Advertisement
Quick Links
Mini
Digital
Video
Cassette
This instruction manual covers the OPTURA20 and OPTURA10. Please note that
illustrations and explanation in this manual are based on the OPTURA20.
Ce manuel d'instruction traite des modèles OPTURA20 et OPTURA10. Veuillez noter
que les illustrations et les explications contenues dans ce manuel sont basées sur le
OPTURA20.
Este manual de instrucciones cubre la OPTURA20, y la OPTURA10. Tenga en cuenta
que las ilustraciones y las explicaciones de este manual se basan en la OPTURA20.
Digital Video Camcorder
Instruction Manual
Camescope vidéo numérique
Manuel d'instruction
Manual de Instrucciones
/
Videocámara digital
NTSC
PUB.DIM-536
English
Français
Español
Advertisement
Table of Contents

Related Manuals for Canon 10


Summary of Contents for Canon 10
-
Page 1: Instruction Manual
OPTURA20. Este manual de instrucciones cubre la OPTURA20, y la OPTURA10. Tenga en cuenta que las ilustraciones y las explicaciones de este manual se basan en la OPTURA20. Digital Video Camcorder Instruction Manual Camescope vidéo numérique Manuel d’instruction Videocámara digital... -
Page 2: Important Usage Instructions
Do not make any changes or modifications to the equipment unless otherwise specified in the manual. If such changes or modifications should be made, you could be required to stop operation of the equipment. Canon U.S.A. Inc. One Canon Plaza, Lake Success, NY 11042, U.S.A. Tel No. (516)328-5600 CAUTION: TO PREVENT ELECTRIC SHOCK, MATCH WIDE BLADE OF PLUG TO WIDE SLOT, FULLY INSERT. -
Page 3: Important Safety Instructions
10. Power Sources — The CA-570 Compact Power Adapter should be operated only from the type of power source indicated on the marking label. If you are not sure of the... - Page 4 When replacement of power supply is required, please return it to the responsible nearest Canon Service Center and please replace it with the same type number CA-570. The Adapter can be used with a power supply between 100 and 240 V AC.
-
Page 5: Reference Guide
Internet using the provided software. Available functions depend upon the camcorder model of your contact and networking environment. Trademark Acknowledgements • Canon and Bubble Jet are registered trademarks of Canon Inc. • D is a trademark. • logo is a trademark. -
Page 6: Table Of Contents
Table of Contents Introduction Reference Guide ...5 Thank You for Choosing a Canon ...9 Introducing the OPTURA20/OPTURA10 ...10 Components Guide ...11 Mastering the Basics Preparations Using a Household Power Source ...15 Attaching and Charging the Battery Pack ...16 Installing the Backup Battery ...19 Preparing the Camcorder ...20... - Page 7 Returning to a Pre-marked Position ...87 Editing Recording to a VCR or Digital Video Device ...88 Recording from Analog Video Devices (VCR, TV or Camcorder) ...90 Recording from Digital Video Devices (DV Dubbing)...91 Converting Analog Signals into Digital Signals (Analog-Digital Converter) ...93 Replacing Existing Scenes (AV Insert) ...95...
-
Page 8: Conventions Used In This Manual
: Additional topics that complement the basic operating procedures. ❍ : Precautions related to the camcorder operation. ❍ Capital letters are used to refer to buttons on the camcorder or the wireless controller. ❍ [ ] are used to refer to menu items displayed on the screen. -
Page 9: Thank You For Choosing A Canon
Thank You for Choosing a Canon The Canon OPTURA20/OPTURA10 provides a full range of options and functions. We recommend reading this manual thoroughly before you use the camcorder. It will help you to become more familiar with your camcorder, and learn how to operate it properly. -
Page 10: Introducing The Optura20/Optura10
Direct Print You can print still images by connecting to a Canon printer with Direct Print function. USB Terminal Allows transfer of memory card data to a computer with built-in USB port. You can organize and edit images on your computer using the supplied software. -
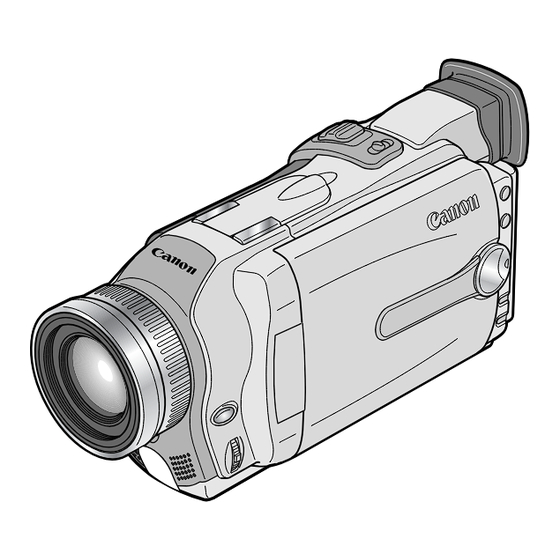
Page 11: Components Guide
Components Guide OPTURA20/OPTURA10 CARD MIX button (p. 128) / SLIDE SHOW button (p. 116)/ (stitch assist) button (p. 111) DIGITAL EFFECTS button (p. 59) Digital effects ON/OFF button (p. 59) LCD screen 3.5 inch 2.5 inch (p. 32) LCD panel OPEN button (p. - Page 12 Viewfinder (p. 20) PHOTO button (p. 53, 105) Start/stop button (p. 28) POWER switch (p. 8) CAMERA PLAY(VCR) Diopter adjustment lever (p. 20) Zoom lever (p. 30) Advanced accessory shoe (p. 71) Accessory Shoe Cover (p. 21) Focus ring (p. 76) Built-in speaker (p.
- Page 13 Terminal cover S-video IN/OUT terminal (p. 40) USB terminal (p. 122, 135) DV IN/OUT terminal (p. 89) MIC terminal (p. 69) CHARGE indicator (p. 16) DC IN terminal (p. 15) AV IN/OUT terminal (p. 40) / (phones) terminal (p. 39, 70) Stereo microphone (p.
- Page 14 WL-D79 Wireless Controller PHOTO button (p. 53, 105) D. EFFECTS (Digital effects) button (p. 59) START/STOP button (p. 28) SELF T. button (p. 68) TV SCREEN button (p. 140) DATA CODE button (p. 84) SEARCH SELECT button (p. 86) ZERO SET MEMORY button (p. 87) 12bit AUDIO OUT button (p.
-
Page 15: Using A Household Power Source
Using a Household Power Source You can operate the camcorder from a household power source using the supplied power adapter. The power adapter converts current from a power outlet (100-240 V AC, 50/60 Hz) to the DC current used by the camcorder. -
Page 16: Attaching And Charging The Battery Pack
Attaching and Charging the Battery Pack Charge the battery pack with the supplied power adapter before you use the camcorder for the first time and subsequently when the message “CHANGE THE BATTERY PACK” appears. 1. Turn the POWER switch to OFF. -
Page 17: Charging Time
Actual time may be shorter. • We recommend that you prepare battery packs 2 to 3 times longer than you think you might need. • To conserve battery charge, turn off the camcorder instead of leaving it in record pause mode. Playback Time... - Page 18 ❍ Although the battery pack’s operating temperature range is from 32˚ F to 104˚ F (0˚ C to 40˚ C), the optimal range is from 50˚ F to 86˚ F (10˚ C to 30˚ C). At cold temperatures, performance will temporarily decline. Warm it in your pocket before use.
-
Page 19: Installing The Backup Battery
Installing the Backup Battery The backup battery allows the camcorder to retain date, time and other camcorder settings while the power source is disconnected. Power the camcorder from a household power source or with a battery pack when replacing the backup battery to retain the setting. -
Page 20: Preparing The Camcorder
Preparing the Camcorder Adjusting the Viewfinder (Diopter Adjustment) 1. Turn on the camcorder and keep the LCD panel closed to adjust the viewfinder. 2. Adjust the diopter adjustment lever. Do not leave the viewfinder exposed to direct sunlight as it may melt (due to concentration of light by the lens). -
Page 21: Attaching The Shoulder Strap
Attaching the Shoulder Strap For extra security and portability, attach the shoulder strap before using the camcorder. Pass the ends through the strap mount and adjust the length of the strap. Removing and Attaching the Accessory Shoe Cover Remove the accessory shoe cover when attaching an accessory to the advanced accessory shoe. -
Page 22: Loading A Cassette
❍ Be careful not to get your fingers caught in the cassette compartment cover. ❍ If the camcorder is connected to a power source, cassettes can be loaded/unloaded even if the POWER switch is set to OFF. ❍ v flashes if no cassette is inserted when turning on the power (in CAMERA and PLAY (VCR) mode). -
Page 23: Protecting Tapes From Accidental Erasure
❍ With cassettes equipped with a memory function, metal plated terminals may become dirty with use and the cassette’s memory function may not work properly. Clean the terminals with a cotton swab after about 10 times of loading/unloading. SAVE SAVE... -
Page 24: Using The Wireless Controller
• AV Insert ( • Audio dubbing ( ❍ Camcorder and wireless controller are equipped with 2 remote sensor modes 48). If the wireless controller does not work, check if camcorder and wireless controller are set to the same mode. -
Page 25: Setting The Time Zone, Date And Time
Setting the Time Zone, Date and Time Set the time zone, date and time when you first start using your camcorder. Install the backup battery before you begin ( Setting the Time Zone/Daylight Saving Time CAMERA PLAY (VCR) SYSTEM 1. Press the MENU button to open the menu. -
Page 26: Setting The Date And Time
❍ Once you have set time zone, date and time, you do not need to reset the clock each time you travel to another time zone. Just set the time zone to the one of your destination, and the camcorder automatically adjusts the clock. ❍ Days per month and leap years will be automatically adjusted. -
Page 27: Displaying Date And Time During Recording
2. Turn the selector dial to select [SYSTEM] and press the selector dial. 3. Turn the selector dial to select [D/TIME SET] and press the selector dial. The year display starts to flash. 4. Turn the selector dial to select the year, and press the selector dial. •... -
Page 28: Recording Movies On A Tape
You can use the LCD screen or the viewfinder when recording. Adjust the angle of the LCD panel or viewfinder for comfortable recording. Before You Begin Recording Make a test recording first to check if the camcorder operates correctly. Before you make important recordings, clean the video heads ( Preparations Connect a power source. -
Page 29: When You Have Finished Recording
❍ Turn the power off if you do not intend to use the camcorder for a longer time. ❍ When you start recording, the camcorder counts from 1 second to 10 seconds (recording reminder). Recordings shorter than 10 seconds may be difficult to edit later. -
Page 30: Zooming
Zooming The camcorder’s zoom lens allows you to choose the best picture angle for your recordings. The camcorder automatically switches between optical zooming and digital zooming. Image resolution is slightly lower with the digital zoom. 16× Optical Zoom (Card: 15×) Move the zoom lever toward angle). - Page 31 ❍ Digital zoom cannot be used in the Night mode and Super Night (OPTURA20) mode. ❍ Digital zoom cannot be used when the multi-image screen is selected. ❍ Because the image stabilizer cannot be used in CARD CAMERA mode, we recommend mounting the camcorder on a tripod at large magnifications.
-
Page 32: Using The Lcd Screen
You can rotate the LCD panel so that the screen faces in the same direction as the lens 33), or push it flat against the camcorder with the screen facing outward. 3. Close the LCD panel after use. • Close the LCD panel firmly until it clicks. -
Page 33: Adjusting The Brightness Of The Lcd Screen
Adjusting the Brightness of the LCD Screen PLAY (VCR) CAMERA DISPLAY SET UP 1. Press the MENU button to open the menu. 2. Turn the selector dial to select [DISPLAY SET UP] and press the selector dial. 3. Turn the selector dial to select [BRIGHTNESS] and press the selector dial. - Page 34 CAMERA DISPLAY SET UP 1. Press the MENU button to open the menu. 2. Turn the selector dial to select [DISPLAY SET UP] and press the selector dial. 3. Turn the selector dial to select [LCD MIRROR] and press the selector dial. 4.
-
Page 35: Searching And Reviewing When Recording
In record pause mode, this function allows you to review the last few seconds of your recording to check if it has been recorded properly. Press and release the c (record review) button. The camcorder rewinds the tape, plays back the last few seconds, and returns to record pause mode. Record Search... -
Page 36: Tips For Making Better Videos
Tips for Making Better Videos Holding the Camcorder For maximum stability, grip the camcorder in your right hand and keep your right elbow pressed against your body. If necessary, support the camcorder with your left hand. Be careful that your fingers do not touch the microphone or lens. -
Page 37: Playing Back A Tape
4. Press the e/a button to begin playback. 5. Press the button to stop playback. ❍ If the playback picture is distorted, clean the video heads using a Canon Head Cleaning Cassette or a commercially available digital video head-cleaning cassette ( 148). -
Page 38: Special Playback Modes
/4a (Reverse Playback) Plays back in reverse at normal speed. Press the button during normal playback. Press the e (play) button return to normal playback. The camcorder goes into stop mode after 5 minutes in reverse playback pause. × 2 (Forward× 2 Playback)/(Reverse 2× Playback) Plays back at 2 times normal speed. -
Page 39: Playing Back With The Built-In Speaker/Headphones
❍ Sound may become distorted when the volume is turned up too high. ❍ The headphone volume can be adjusted in all operating modes. ❍ The camcorder retains the setting even if you turn it off (separately for headphones and built-in speaker). -
Page 40: Playing Back On A Tv Screen
Playing Back on a TV Screen You can connect the camcorder to a TV or VCR to play back your recordings on a TV screen. ❍ Make sure that “H” is not displayed on the screen. If “H” is displayed, change the setting ( ❍... - Page 41 3. Connect the STV-250N Stereo Video Cable to the camcorder’s AV terminal and the audio terminals of the TV/VCR. Connect the white plug to the white AUDIO terminal L (left), and the red plug to the red AUDIO terminal R (right). Do not connect the yellow plug.
-
Page 42: Selecting The Audio Output Channel
• L/L: Stereo: L channel, Bilingual: Main. • R/R:Stereo: R channel, Bilingual: Sub. 5. Press the MENU button to close the menu. The setting resets to the L/R setting when you turn the camcorder off. CARD CAMERA PLAY (VCR) OUTPUT CH••••L/R... -
Page 43: Menus And Settings
Menus and Settings Many of the camcorder’s advanced functions are selected from menus that appear on the screen. Selecting Menus and Settings 1. Set the camcorder to the correct operating mode. 2. Press the MENU button to open the menu. - Page 44 Menu and Default Settings Default settings are shown in boldface. CAMERA Menu (CAM. MENU) CAMERA Submenu Menu Item \CARD MIX MIX TYPE ANIMAT. TYPE MIX LEVEL CAMERA SET UP SHUTTER D. ZOOM IMAGE S. i WHITE BAL. (FLASH) (AF AST LAMP*) 16:9 PHOTO REC VCR SET UP...
- Page 45 PLAY (VCR) Menu (VCR MENU) CAMERA PLAY (VCR) Submenu Menu Item VCR SET UP REC MODE AV/PHONES AV \ DV OUT AUDIO SET UP OUTPUT CH AUDIO DUB. WIND SCREEN AUDIO MODE 12bit AUDIO MIX BALANCE CARD SET UP SI QUALITY MOVIE SIZE FILE NOS.
- Page 46 CARD CAMERA Menu (C. CAM. MENU) CAMERA Submenu Menu Item CAMERA SET UP SHUTTER D.ZOOM WHITE BAL. DRIVE MODE (FLASH) (AF AST LAMP*) FOCUS PRI. CARD SET UP SI QUALITY SI SIZE MOVIE SIZE FILE NOS. VCR SET UP AV/PHONES AUDIO SET UP WIND SCREEN VOLUME...
- Page 47 AV, PHONES H ON, OFF <PLAYBK> DATE, TIME, DATE & TIME A1, A2, OFF A ON, OFF See list of time zones NO IMAGE, CANON LOGO, MY IMAGE1, MY IMAGE2 PATTERN1, PATTERN2, PATTERN3 PATTERN1, PATTERN2, PATTERN3 PATTERN1, PATTERN2, PATTERN3 PATTERN1, PATTERN2, PATTERN3...
-
Page 48: Changing The Remote Sensor Mode
❍ The wireless controller returns to mode 1 when you replace the batteries. Change the mode if necessary. ❍ Make sure that camcorder and wireless controller are set to the same mode. Display the camcorder’s mode by pressing any button on the wireless controller (except of the REMOTE SET button) and set the wireless controller’s mode to... -
Page 49: Customizing The Camcorder
Customizing the Camcorder You can personalize your camcorder by customizing the start-up image and the sound it makes for start-up, shutter, start/stop and self-timer (collectively called the My Camera settings). You can also create your own start-up image. See Creating a Start- up Image ( 136). -
Page 50: Recording
You will hear a beep upon camcorder operations such as power on/off, start/stop, self- timer countdown, automatic shut-off, and unusual conditions of the camcorder. The beep will not be recorded. If you turn off the beep, all camcorder sounds including the ones of the My Camera settings will be turned off. CAMERA SYSTEM To turn the beep off, open the menu and select [SYSTEM]. -
Page 51: Demonstration Mode
With no cassette and memory card inserted, open the menu and select [DISPLAY SET UP]. Select [DEMO MODE], set it to [OFF] and close the menu. To cancel the demo mode, press any button, turn off the camcorder, load a cassette or insert a memory card. CARD CAMERA DEMO MODE••••ON... -
Page 52: Changing The Recording Mode (Sp/Lp)
❍ If you play back a tape that has been recorded in LP mode with another digital device on this camcorder, or vice versa, picture and sound may become distorted. -
Page 53: Recording Still Images On The Tape
2. Press the PHOTO button fully. • F disappears. • The camcorder records the still image for approx. 6 seconds. During this time, the camcorder displays the still image and keeps recording the sound. • The camcorder returns to record pause mode. -
Page 54: During Recording
• The camcorder returns to record pause mode. ❍ When you turn the POWER switch to OFF while the camcorder is recording the still image, it will not turn off until recording is complete. ❍ Record still images under sufficient lighting condition (in which you can identify... -
Page 55: Using The Recording Programs
Using the Recording Programs The camcorder is equipped with the Easy Recording program and several program AE modes. The availability of functions differs depending on the selected mode. Availability of Functions in Each Mode: Position of the Program Selector Position of the... -
Page 56: Sand & Snow
Use this mode to record in dimly lit places. The shutter is fixed at a slow shutter speed. ❍ Moving subjects may leave a trailing afterimage. ❍ Picture quality may not be as good as in other modes. ❍ The camcorder may have difficulty to focus automatically. - Page 57 Night Use this mode to record in dark places. The shutter speed is adjusted automatically. It is useful when recording in places with changing light conditions (such as in amusement parks). ❍ Night mode cannot be used in CARD CAMERA mode. ❍...
- Page 58 Selecting the Program AE Mode CAMERA 1. Set the program selector to 2. Press the selector dial. A list of the program AE modes appears. 3. Select a mode and press the selector dial. The symbol of the mode appears on the upper left corner of the screen.
-
Page 59: Using Digital Effects
Press the DIGITAL EFFECTS button to open the menu. Select [D.EFFECTS |] and press the ON/OFF button. ❍ The camcorder retains the setting even if you turn it off or change the program AE mode. ❍ The digital effect turns off if you switch the program selector to [. - Page 60 Faders Fade Trigger (FADE-T) The image gradually fades in. Wipe (WIPE) The image begins as a vertical line in the center and expands sideways until it fills the whole screen. Corner Wipe (CORNER) The image appears from the corners until it fills the whole screen.
- Page 61 Puzzle (PUZZLE) The image appears in 16 pieces. The pieces move around until the puzzle is solved. Zigzag (ZIGZAG) The image appears in zigzag from the top of the screen. Beam (BEAM) The screen turns yellow, forms a beam that becomes thinner and the image appears.
- Page 62 Selecting a Fader CAMERA 1. In CAMERA mode, set the program selector to 2. Press the DIGITAL EFFECTS button. [D.EFFECTS |], [FADER], [EFFECT] and [MULTI-S] appear. 3. Select [FADER]. 4. Select the fader option. 5. Press the DIGITAL EFFECTS button. The name of the selected fader flashes.
- Page 63 Effects Art (ART) The image becomes like a paint (solarization). Black and White (BLK & WHT) The image becomes black and white. Sepia (SEPIA) The image becomes monochrome with a brownish tint. Mosaic (MOSAIC) The image is blurred through enlarging the size of some pixels. Ball (BALL) The image becomes like a ball.
- Page 64 Selecting an Effect CAMERA 1. In CAMERA mode, set the program selector to 2. Press the DIGITAL EFFECTS button. [D.EFFECTS OFF], [FADER], [EFFECT] and [MULTI-S] appear. 3. Select [EFFECT]. 4. Select the effect. 5. Press the DIGITAL EFFECTS button. The name of the selected effect flashes. 6.
-
Page 65: Using The Multi-Image Screen
Using the Multi-Image Screen The multi-image screen captures moving subjects in 4, 9 or 16 sequences of still images with the Image Capture feature and displays them at one time. Sound will be recorded normally. This feature can be used in CAMERA and PLAY (VCR) mode. You can choose the transition speed at which to capture the subject from manual, fast (every 4 frames), moderate (every 6 frames*) or slow (every 8 frames*). - Page 66 Capturing 10.Press the ON/OFF button. • MANUAL: Images will be captured each time you press the ON/OFF button. The blue frame indicating the next sequence disappears after the last image. To cancel the last captured image, press and hold the ON/OFF button. To cancel the multi-image screen, press and release the ON/OFF button.
-
Page 67: Turning Off The Image Stabilizer
❍ We recommend turning off the image stabilizer when you mount the camcorder on a tripod. ❍ The image stabilizer is designed to compensate a normal degree of camcorder shake. ❍ The image stabilizer cannot be used in CARD CAMERA mode. -
Page 68: Recording With The Self-Timer
• F appears in green when recording begins. • The camcorder records the still image for approx. 6 seconds and returns to record pause mode (in CARD CAMERA mode, it displays the still image when recording is complete). -
Page 69: Audio Recording
Audio Recording Changing the Audio Mode You can record sound in two audio modes—16-bit and 12-bit. The 12-bit mode records sound on two channels (stereo 1), leaving 2 channels free (stereo 2) for adding new sound later. Select the 16-bit mode for higher sound quality. PLAY (VCR) CAMERA AUDIO SET UP... - Page 70 ❍ Low sound may be reduced together with the wind noise. We recommend turning off the wind screen for normal recordings. ❍ The wind screen function cannot be turned on/off during recording. ❍ The wind screen function can also be used for audio dubbing (when [AUDIO DUB.] is set to [MIC.
-
Page 71: Using The Vl-3 Video Light (Optional)
Refer also to the VL-3 Video Light instruction manual. ❍ Always turn off the camcorder before attaching/removing the video light. ❍ Do not touch or place flammable material or plastic close to the lamp or the surrounding parts during or immediately after use;... -
Page 72: Using The Vfl-1 Video Flash Light (Optional)
Using it as video light, you can set it to turn on and off automatically according to the surrounding brightness. Using it as flash, you can set it to fire automatically according to the brightness of the subject and the settings of the camcorder, or to fire a pre- flash to reduce the red-eye effect. - Page 73 ❍ The practical range of the flash is approx. 3.3 to 18 ft. (1 to 5.5 m). The range depends upon the recording condition. ❍ The camcorder fires a pre-flash to obtain the subject’s exposure data and adjusts the main flash to the optimal intensity (flash exposure compensation).
- Page 74 ❍ An image recorded with flash may flicker when played back on a different device. Using the Video Flash Light as Video Light CAMERA 1. Set the camcorder to CAMERA or CARD CAMERA mode. 2. Set the video flash light’s POWER switch to • (Connection) appears.
-
Page 75: Using The Dm-50 Microphone (Optional)
Using the DM-50 Microphone (Optional) The high sensitive Directional Stereo Microphone DM-50 attaches to the advanced accessory shoe for cable-free operation and is powered by the camcorder’s power supply. Use it for recording or dubbing audio. Refer also to the DM-50 Microphone instruction manual. -
Page 76: Adjusting The Focus Manually
Adjusting the Focus Manually Autofocus may not work well on the following subjects: Reflective surfaces Through dirty or wet windows CAMERA 1. Set the program selector to 2. Adjust the zoom. When you operate the zoom after adjusting the focus, the subject may not stay in focus. -
Page 77: Infinity Focus
AF-Assist Lamp (Optional VFL-1 Attached) When you attach the VFL-1 Video Flash Light to the camcorder and set it to fire a flash 73), the AF-assist lamp (White LED) illuminates the subject in the center of the screen to enable the camcorder to focus in dark places. -
Page 78: Adjusting Exposure Manually
Exposure Adjustment When the exposure is locked, you can adjust it manually to handle difficult lighting conditions. The camcorder’s iris can be set to any position from fully closed to fully open. CAMERA Turn the selector dial to adjust the brightness of the image. -
Page 79: Setting The Shutter Speed
1/4000 1/8000 6. Close the menu. ❍ Do not point the camcorder directly at the sun when the shutter speed is set to 1/1000 or higher. ❍ The image may flicker when recording with high shutter speeds. ❍ The setting resets to the auto setting when you switch the program selector to [, or change the program AE mode. - Page 80 ❍ Guidelines for Recording with High Shutter Speeds: - Outdoor sports such as golf or tennis: 1/8000, 1/4000, 1/2000 - Moving objects such as cars or roller coasters: 1/1000, 1/500 or 1/250 - Indoor sports such as basketball: 1/100...
-
Page 81: Setting The White Balance
Setting the White Balance The camcorder’s auto white balance system adjusts the colors to appear natural for different lighting conditions. However, you can use the preset modes to reproduce colors more accurately, or set a custom white balance to obtain the optimal setting. - Page 82 2. Open the menu and select [CAMERA SET UP]. 3. Select [WHITE BAL.]. 4. Point the camcorder at a white object (such as a sheet of paper), zoom in until it fills the whole screen and select [SET W]. • W flashes and stops flashing when settings is complete.
-
Page 83: Magnifying The Image
Magnifying the Image The playback image can be magnified up to 5 times. CAMERA PLAY (VCR) 1. Move the zoom lever toward • The image is magnified by 2 times. • To further enlarge the image, move the zoom lever toward To shrink the image below 2 times magnification, move the zoom lever toward •... -
Page 84: Displaying The Data Code
Selector dial ❍ The data code display turns off when you turn the camcorder off. ❍ The data code may not be displayed if a recording made with this camcorder is played back on a different digital camcorder. ❍ The data code cannot be displayed in frame advance/reverse playback. Camera data may not appear in some special playback modes. -
Page 85: Selecting The Date/Time Display Combination
Selecting the Date/Time Display Combination CAMERA PLAY (VCR) DISPLAY SET UP Open the menu and select [DISPLAY SET UP]. Select [D/TIME SEL.], set it to [DATE] or [TIME] and close the menu. Selecting the Data Code Display Combination CAMERA PLAY (VCR) DISPLAY SET UP Open the menu and select [DISPLAY SET UP]. -
Page 86: Photo Search/Date Search
• Press more than once to search for further still images or date changes (up to 10 times). • Press the + or - button to change the search direction. • Press the 3 (stop) button stop searching. -
Page 87: Returning To A Pre-Marked Position
Returning to a Pre-marked Position If you wish to return to a particular scene later, mark the point with the zero set memory and the tape will stop at that point when you rewind/fast forward the tape. CAMERA PLAY (VCR) 1. -
Page 88: Recording To A Vcr Or Digital Video Device
Recording to a VCR or Digital Video Device You can copy your recordings by connecting the camcorder to a VCR or a digital video device. If you connect a digital video device, you can copy recordings with virtually no generation loss in image and sound quality. - Page 89 Connecting a Digital Video Device Refer also to the instruction manual of the digital video device. Side with an arrow Signal flow Commercially available DV cable...
-
Page 90: Recording From Analog Video Devices (Vcr, Tv Or Camcorder)
Recording from Analog Video Devices (VCR, TV or Camcorder) You can record videos or TV programs from a VCR or analog camcorder on the tape in the camcorder. ❍ Anomalous signals sent from the connected device may be recorded as anomalous picture (although it may not appear so on the screen), or it may not be recorded at all. -
Page 91: Recording From Digital Video Devices (Dv Dubbing)
❍ Copyright protected signals cannot be recorded. ❍ Blank sections may be recorded as anomalous picture. ❍ If the picture does not appear, reconnect the DV cable or turn the camcorder off and back on again. ❍ You can connect only one device with the DV cable. - Page 92 Copyright Signal Certain software tapes are copyright protected. If you attempt to play back such tape, “COPYRIGHT PROTECTED PLAYBACK IS RESTRICTED” appears and you will not be able to view the contents of the tape. If you attempt to record from such tape via the DV terminal, “COPYRIGHT PROTECTED DUBBING RESTRICTED”...
-
Page 93: Converting Analog Signals Into Digital Signals (Analog-Digital Converter)
Converting Analog Signals into Digital Signals (Analog-Digital Converter) By connecting the camcorder to a VCR or 8mm video camcorder, you can convert analog video/audio signals to digital signals and output the digital signals via the DV terminal. The DV terminal serves as output terminal only. - Page 94 ❍ For normal use, set [AV\DV OUT] to [OFF] (so that “AV\DV” does not appear on the screen). If it is set to [ON], digital signals cannot be input via the camcorder’s DV terminal. ❍ Depending on the software and the specifications of your computer, you may not be able to transfer converted signals via the DV terminal.
-
Page 95: Replacing Existing Scenes (Av Insert)
Camcorder: ❍ Use only tapes recorded in SP mode. ❍ AV insert will stop if the camcorder detects a blank section or a section not recorded in SP mode on the tape. Connected device: ❍ Use only tapes without blank sections. - Page 96 4. Locate the scene you wish to replace and pause playback shortly before the scene. You can use the playback buttons on the camcorder or the special playback buttons on the wireless controller. 5. Press the AV INSERT button on the wireless controller.
-
Page 97: Audio Dubbing
❍ Do not connect/disconnect any cable to/from the camcorder while dubbing. ❍ You cannot use the DV terminal for audio dubbing. ❍ If you add sound to a tape not recorded with this camcorder, sound quality may decrease. ❍ Sound quality may decrease when you add sound to the same scene for more than 3 times. -
Page 98: Using A Microphone
CAMERA AUDIO SET UP 1. Set the camcorder to PLAY (VCR) mode and load a recorded cassette. 2. Open the menu and select [AUDIO SET UP]. Select [AUDIO DUB.], set it to [AUDIO IN] or [MIC. IN] and close the menu. -
Page 99: Playing Back The Added Sound
Turn the selector dial down to increase the volume of Stereo 1 and up to increase the volume of Stereo 2. ❍ The camcorder resets to [STEREO1] when you turn the camcorder off. However, the mix balance is memorized by the camcorder. -
Page 100: Connecting To A Computer Using A Dv (Ieee1394) Cable
You can transfer recordings to a computer equipped with a DV (IEEE1394) terminal or IEEE1394 capture board (optional software required). ❍ Do not disconnect the DV cable, or turn off the camcorder or computer while data is being transferred to the computer. -
Page 101: Inserting And Removing The Memory Card
❍ If you use memory cards other than the supplied one, make sure to format them with the camcorder ( ❍ For instructions on how to connect the camcorder to the computer, see Connecting to a Computer Using a USB Cable ( Inserting the Card 1. -
Page 102: Selecting The Image Quality/Size
CARD CAMERA SIZE••••••1280 × 960 1280 × 960 File Size No. of Images per Image 6 images 850 KB 10 images 550 KB 18 images 300 KB CARD PLAY (VCR) CARD PLAY (VCR) 640 × 480 File Size No. of Images... -
Page 103: File Numbers
CONTINUOUS. CONTINUOUS The camcorder memorizes the file number of the last image and assigns the consecutive file number to the next image, even when a new memory card is inserted. (If a higher file number already exists on the memory card, the consecutive number will be assigned.) There will be no duplication of file numbers. - Page 104 When you record 3 images on the supplied memory card. CONTINUOUS CAMERA CARD SET UP To change the setting, open the menu and select [CARD SET UP]. Select [FILE NOS.], set it to [RESET] and close the menu. 101-0101 101-0102 101-0103 When you replace the memory card and record an image.
-
Page 105: Recording Still Images On A Memory Card
1. Set the camcorder to CARD CAMERA mode. A white focusing frame appears in the center of the screen. The camcorder will focus on the subject in the center of the screen. To change the focusing point, see Selecting a Focusing Point ( 106). -
Page 106: Selecting The Focusing Point
❍ The focusing frame gives an indication of the focusing point. Depending on the size of the subject or the distance, the camcorder may focus outside the frame. ❍ When the subject is too bright (overexposed), “OVEREXP” starts flashing. If you have turned off the built-in ND filter, we recommend changing the setting back to AUTO. -
Page 107: Continuous Shooting
❍ The focusing point can be selected only when Focus-Priority is set to [ON] in CARD CAMERA mode. The focusing point returns to the center if you turn off the camcorder, change from CARD CAMERA mode or move the program selector to [. -
Page 108: Auto Exposure Bracketing
The setting resets to [SINGLE] when you turn the camcorder off. Recording from a Tape in the Camcorder You can record images from a tape in the camcorder as still images on a memory card. CAMERA 1. Set the camcorder to PLAY (VCR) mode. - Page 109 Change the setting as necessary ( CAMERA PLAY (VCR) 1. Connect the camcorder to the video device. • S-video/AV terminal: See Playing Back on a TV Screen ( • DV terminal: See Connecting a Digital Video Device ( 2. Set the camcorder to PLAY (VCR) mode.
- Page 110 ❍ The beep does not sound when you press the PHOTO button while recording a movie on the tape. CAMERA CAMERA SET UP 1. Set the camcorder to CAMERA mode. 2. Open the menu and select [CAMERA SET UP]. Select [PHOTO REC], set it to [CARD ] and close the menu.
-
Page 111: Recording Panoramic Images (Stitch Assist Mode)
PhotoStitch detects the overlapping portion of adjoining images and merges them. Try to include a distinctive item (landmark, etc.) in the overlapping portion. CAMERA PLAY (VCR) 1. Set the camcorder to CARD CAMERA mode. 2. Press the button. 3. Select the direction with the CARD +/– button. - Page 112 ❍ Compose each image so that it overlaps 30 to 50% of the adjoining image. Try to keep the vertical misalignment within 10%. ❍ Do not include moving subject in the overlapping portion. ❍ Do not try to stitch images that include both distant and close subjects. They may appear warped or doubled up.
-
Page 113: Recording Motion Jpeg Movies On A Memory Card
1. Set the camcorder to CARD CAMERA mode. 2. Press the start/stop button to begin recording. You can record up to 10 seconds in 320 × 240 and up to 30 seconds in 160 × 120. 3. Press the start/stop button to stop recording. -
Page 114: Recording From A Tape In The Camcorder
3. Press the start/stop button when the scene you wish to record appears. You can record up to 10 seconds in 320 × 240 and up to 30 seconds in 160 × 120. 4. Press the start/stop to stop recording. -
Page 115: Playing Back A Memory Card
❍ Do not turn off the camcorder, disconnect the power source or remove the memory card while the card access display (<<<) in the upper right of corner of the screen or the card access indicator is flashing. -
Page 116: Index Screen
Index Screen CAMERA 1. In single image display, press the INDEX SCREEN button. • Up to 6 images appear. • Movies are displayed with the first scene as a still image indicated by “ ”. 2. Press the CARD +/– button to change the image selection. - Page 117 Card Jump Function You can locate still images/movies without displaying them one by one. The number in the upper right of the screen indicates the image number of the current image by the total number of images. CAMERA PLAY (VCR) In single image display, press and hold the CARD + or CARD –...
-
Page 118: Protecting Images
Protecting Images You can protect important images from accidental erasure during single image display or index screen display. If a memory card is formatted, all images, even protected ones, will be erased permanently. ❍ The sample images recorded on the supplied SD Memory Card are already protected. -
Page 119: Erasing Images
Erasing Images You can erase images singly or all at once. Be careful when erasing images. Erased images cannot be recovered. ❍ Protected images cannot be erased. ❍ Movies can only be erased when the first or last scene is displayed as a still image. -
Page 120: Selecting Still Images For Printing (Print Order)
Selecting Still Images for Printing (Print Order) You can select still images for printing and set the number of copies. These print order settings are compatible with the Digital Print Order Format (DPOF) standards. ❍ Make sure to insert a memory card that contains images. ❍... -
Page 121: Erasing All Print Orders
Erasing All Print Orders CAMERA PLAY (VCR) CARD OPERATIONS 1. In single image display, open the menu and select [CARD OPERATIONS]. 2. Select [ PRINT ORDERS ALL ERASE]. “ERASE ALL PRINT ORDERS?”, [NO] and [YES] appears. 3. Select [YES]. All “ ”... -
Page 122: Printing With The Direct Print Function
❍ Still images not recorded with this camcorder may not be printed correctly on a printer with direct print function. ❍ The direct print function is supported by Canon Card Photo Printers with the logo and Canon Bubble Jet Printers with the ❍... -
Page 123: Selecting The Number Of Copies
4. Connect the camcorder to the printer using the cable. ” ” appears when the printer is properly connected to the camcorder. (Does Print not appear with movies, or still images that cannot be played back with the camcorder.) Printing CAMERA PLAY (VCR) 1. -
Page 124: Setting The Print Style
Setting the Print Style Card Photo Printer: Image Standard Multiple Borders Borderless Bordered • [Multiple] can only be selected when printing on card size paper. • [Borders] can only be selected when [Image] is set to [Standard]. Bubble Jet Printer: Paper Size Borders Borderless... - Page 125 Bubble Jet Printer: Selecting the Paper Size 1. In the print setting menu, turn the selector dial to select [Style] and press the selector dial. 2. Make sure that is selected and press the selector dial. 3. Turn the selector dial to select the paper size and press the selector dial. 4.
-
Page 126: Trimming Settings
❍ The trimming setting applies only to one image. ❍ The trimming setting is canceled with the following operations: - When you turn off the camcorder. - When you disconnect the interface cable. - When you expand the trimming frame beyond its maximum size. -
Page 127: Printing With Print Order Settings
(The [Restart] setting may not appear with some error messages. In that case, select [Stop].) ❍ Follow below procedure when disconnecting the interface cable: 1. Disconnect the cable from the camcorder and printer. 2. Turn off the camcorder. CARD CAMERA 122). -
Page 128: Combining Images (Card Mix)
Adding Still Images from Your Computer to the Memory Card in the DIGITAL VIDEO SOLUTION DISK Software Instruction Manual. ❍ Reselect the card mix image when you have turned off the camcorder, changed the position of the program selector or removed the memory card. - Page 129 Card Luminance Key (CARD LUMI.) Combines illustrations or title with your recordings. The live video recording will appear in place of the light area of the card mix image. You can create your own title or illustration by drawing on a white paper and recording it to the memory card. Mix level adjustment: light area of the still image.
-
Page 130: Selecting The Card Mix Effect
Selecting the Card Mix Effect CAMERA CARD MIX 1. Set the program selector to Q. 2. Open the menu and select [\CARD MIX]. The card mix menu appears. 3. Select the image you wish to combine with the CARD +/– button. 4. - Page 131 F flashes in white and turns green when focus is adjusted. 2. Press the PHOTO button fully. • The camcorder records the still image on the tape for approx. 6 seconds. During this time, the camcorder displays the still image and keeps recording the sound.
-
Page 132: Copying Still Images
Copying Still Images You can copy still images from tape to memory card, or from memory card to tape. ❍ All still images from the selected still image onward will be copied. ❍ The size of a still image copied from tape to memory card will be 640 × 480. ❍... -
Page 133: Copying Still Images From Memory Card To Tape
Copying Still Images from Memory Card to Tape Load a cassette with enough free space, and insert a recorded memory card. Make sure that the protect tab on the cassette is set to allow recording. CAMERA PLAY (VCR) CARD OPERATIONS 1. -
Page 134: Formatting A Memory Card
❍ Images erased by formatting cannot be recovered. ❍ If you use a memory card other than the supplied one, format it with the camcorder. ❍ Makes sure to insert the memory card you wish to format into the camcorder. CAMERA CARD OPERATIONS 1. -
Page 135: Connecting To A Computer Using A Usb Cable
USB cable. ❍ Do not disconnect the USB cable, remove the memory card, change the position of the POWER switch or turn off the camcorder and computer while data is being transferred to the computer (while the camcorder’s card access indicator is flashing). -
Page 136: Creating A Start-Up Image
6. Select [YES]. • The still image will be saved, and the image that was saved to [MY IMAGE1] is erased. • Select this image as start-up image following the procedure in Customizing the Camcorder ( 49). PLAY (VCR) CARD CAMERA CREATE START–UP IMAGE... -
Page 137: Memory Card Information
❍ We recommend saving backups of memory card images on your computer’s hard drive or other external memory device. Image data may be corrupted or lost due to memory card defects or exposure to static electricity. Canon Inc. makes no warranties for corrupted or lost data. -
Page 138: Sample Images
Sample Images 27 sample images are pre-recorded on the supplied SD Memory Card: 8 card chroma key images, 5 card luminance key images, 2 camera chroma key images and 12 card animation images. Card Chroma Key Card Luminance Key Camera Chroma Key Card Animation... - Page 139 Adding Still Images from Your Computer to the Memory Card in the DIGITAL VIDEO SOLUTION DISK Software Instruction Manual. If you cannot use the USB cable to connect the camcorder to a computer, you will need a PC Card Adapter to upload the images to a memory card.
-
Page 140: Screen Displays
• When the POWER switch is set to PLAY (VCR): The displays appear on the connected TV screen and disappear when you press the button again. The setting resets to the OFF setting when you turn the camcorder off. When the TV screen displays are hidden, the displays still appear on the LCD screen. If you turn on the data code, displays other than the data code will disappear from the LCD screen. - Page 141 Screen Displays during Basic Recording/Playback indicates flashing. CAMERA mode (battery pack attached): • Remote sensor mode and audio mode disappear after 4 seconds. PLAY (VCR) mode: • Remote sensor mode and volume bar disappear after 4 seconds. : Fast forward playback/ rewind playback ( PAUSE : ×2 playback...
-
Page 142: Screen Displays During Advanced Recording/Playback
Screen Displays during Advanced Recording/Playback CAMERA Mode Image stabilizer ( Zoom ( Exposure level ( Program AE ( Manual focus ( Shutter speed ( White balance ( Card mix ( 128) Digital effects ( Date and time ( AF/AE locked in Photo mode ( PLAY (VCR) Mode 12bit audio out (... - Page 143 CARD CAMERA Mode Stitch assist ( 111) Zoom ( Program AE ( Exposure level ( Manual focus Shutter speed White balance Date and time ( AF/AE locked in Photo mode ( 105) CARD PLAY (VCR) Mode Print order ( 120) Slide show ( 116) Card access display...
-
Page 144: List Of Messages
Cassette is protected. Replace the cassette or change the position of the protect switch. Camcorder stopped operating to protect the tape. Unload and reload the cassette. DV cable is not connected, or the connected digital device is turned off. - Page 145 NO IMAGES No images are recorded on the memory card. CARD ERROR A memory card error occurred. The camcorder cannot record or play back the image. The error may be temporary. If the message disappears after 4 seconds and the card and reinsert the card.
-
Page 146: Direct Print Related Messages
Canon customer support center listed in the Bubble Jet Quick Start Guide. Turn off the printer and turn it back on. If the error persists, consult the nearest Canon customer support center listed in the Bubble Jet Quick Start Guide. -
Page 147: Maintenance
148). Storage ❍ If you do not intend to use the camcorder for a long time, store it in a place free of dust, in low humidity, and at temperatures not higher than 86˚F (30˚C). ❍ After storage, check the functions of your camcorder to make sure that the camcorder is still working properly. -
Page 148: Video Heads
❍ To maintain the best picture quality, we recommend cleaning the video heads frequently with the Canon DVM-CL Digital Video Head Cleaning Cassette or a commercially available dry cleaning cassette. -
Page 149: Using The Camcorder Abroad
You can use the compact power adapter to operate the camcorder and to charge battery packs in any country with power supply between 100 and 240 V AC, 50/60 Hz. Consult the Canon Service Center for information on plug adapters for overseas use. Playback on a TV Screen You can only play back your recordings on TVs with NTSC system. -
Page 150: Troubleshooting
Troubleshooting If you have a problem with your camcorder, refer to this checklist. Consult your dealer or a Canon Service Center if the problem persists. Power Source Problem Camcorder will not turn The camcorder switches off by itself. Cassette compartment will not open. - Page 151 Tape reached the end ( flashes on the screen). Cassette is protected (v flashes on the screen). Camcorder is set to a mode other than the CAMERA mode. Camcorder will not Autofocus does not work on focus. that subject.
-
Page 152: Memory Card Operation
Memory card is not inserted. File number reached maximum value. SD Memory Card is protected. Camcorder is not set to CARD PLAY (VCR) mode. Memory card is not inserted. Image is protected. SD memory card is protected. Card error occurred. -
Page 153: System Diagram
STV-250N Stereo Video Cable Commercially available DV Cable PC Card Adapter SD Memory Card USB Reader/Writer MultiMediaCard IFC-300PCU USB Cable Canon printers with direct print function CG-570 Battery Charger CA-570 Compact Power Adapter CA-570 Compact Power Adapter BP-500 Series Battery Pack... -
Page 154: Optional Accessories
Optional Accessories Call or visit your local retailer/dealer for genuine Canon video accessories. You can also obtain genuine accessories for your Canon camcorder by calling: 1-800-828-4040, Canon U.S.A. Information Center. BP-500 Series Battery Packs When you need extra battery packs, select from the following: BP-511, BP-512, BP-522 or BP-535. - Page 155 This compact yet powerful video light can be used for both indoor and outdoor shooting. It attaches to the camcorder’s accessory shoe and is powered by BP-900 series battery packs. • Approximate usage time: BP-915: 60 min., BP-930: 120 min., BP-945: 170 min.
-
Page 156: Provided Accessories
This lightweight bag keeps the camcorder within easy reach without weighing you down or getting in the way. This mark identifies genuine Canon video accessories. When you use Canon video equipment, we recommend Canon-brand accessories or products bearing the same mark. -
Page 157: Specifications
SD Memory Card, MultiMediaCard Still image: 1280 × 960, 640 × 480 pixels Movie: 320 × 240 pixels (approx. 10 sec.), 160 × 120 pixels (approx. 30 sec.), 15 frames/sec. The figures in brackets represent the maximum length of one movie clip. - Page 158 Special 4-pin connector (IEEE 1394 compliant) ø3.5 mm minijack Audio input: -10 dBV/40 kohms or more Audio output: -10 dBV (47 kohm load)/3 kohms or less Video: 1 Vp-p/75 ohms unbalanced 1 Vp-p/75 ohms (Y signal), 0.286 Vp-p/75 ohms (C signal) ø3.5 mm stereo mini-jack...
-
Page 159: Index
6-second auto date ... . 85 Abroad, using the camcorder . . . 149 Accessories....9, 154 Advanced accessory shoe . - Page 160 Memory card ....101 Menus ....43-47 Microphone.
-
Page 161: Warranty
OPTURA20/OPTURA10 Digital Video Camcorder (“DV Camcorder”) purchased and used in the United States. Each Canon DV Camcorder, when delivered to you in new condition in its original container, is warranted against defective material or workmanship as follows: for a period of one (1) year from the date of original purchase (three (3) months in the case of the video head part), defective parts or DV Camcorders returned to a CUSA factory service center (“CUSA Center”) - Page 162 Any recovery under this limited warranty shall not exceed the purchase price of the product. Canon Canada does not assume or authorize any other person to assume for Canon Canada any other liability with respect to this Canon product.
- Page 163 15955 Alton Parkway, Irvine, CA 92618 USA CANON U.S.A., INC. HONOLULU OFFICE 210 Ward Avenue, Suite 200, Honolulu, HI 96814 USA ● If you have any questions, call the Canon U.S.A. Information Center toll-free at 1-800-828-4040 (U.S.A. only). CANADA CANON CANADA INC. NATIONAL HEADQUARTERS 6390 Dixie Road, Mississauga, Ontario L5T 1P7 CANON CANADA INC.
Need help?
Do you have a question about the 10 and is the answer not in the manual?
Questions and answers