Table of Contents
Advertisement
Quick Links
Advertisement
Table of Contents

Related Manuals for TECO TDW14WA


Summary of Contents for TECO TDW14WA
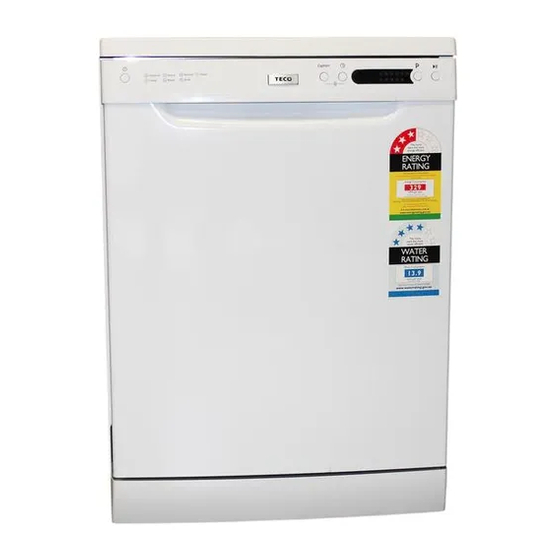
- Page 1 Engineered To Perform DISHWASHER USER MANUAL 14 PLACE SETTING TDW14WA TDW14SA...
- Page 2 READ BEFORE USE Congratulations on your purchase of a TECO dishwasher. We hope the appliance meets your expectations and serves you well for many years. For your safety and correct operation of the dishwasher, read this manual carefully before installation and use. Always keep these instructions with the appliance even if you move or sell it.
-
Page 3: Table Of Contents
CONTENTS Safety Information Quick Start Guide Operating Instructions Control Panel Part Names First Time Use Rinse Aid & Detergent Dispenser Function of Detergent Amount of Detergent to Use Filling Detergent Dispenser Loading the Dishwasher Before & After Loading Baskets Removing the Dishes Loading Upper Basket Loading Lower Basket Folding Cup Shelves... -
Page 4: Safety Information
SAFETY INFORMATION • Do not use electrical items or fi re equipment nearby. • This appliance is not intended for use by persons (including children) with reduced physical, sensory or mental capabilities, or lack of experience and knowledge, unless they have been given supervision or instruction concerning use of the appliance by a person responsible for their safety. -
Page 5: Quick Start Guide
QUICK START GUIDE Step 1 Correctly install the appliance. Ensure it is connected securely to the mains power source and water supply using the supplied hose. Step 2 Switch on the appliance by pressing the ON/OFF button. Check the front panel indicates power is supplied to the appliance. -
Page 6: Operating Instructions
OPERATING INSTRUCTIONS CONTROL PANEL Option Name Function ON/OFF Button Power supply button OPTION Button Selects half load or extra drying function Half Load: Recommended for 6 or less dishes. This mode will use less water and power. Only available in intensive, heavy, normal, glass and 1 hour programs. -
Page 7: Part Names
OPERATING INSTRUCTIONS PART NAMES Front Back Name Name Top spray arm Mains power plug Cutlery rack Inlet pipe connector Upper basket Drain pipe Inner pipe Lower basket Dispenser Cup shelf Lower spray arm Filter assembly FIRST TIME USE Before using your dishwasher for the fi rst time, fi ll the rinse aid and detergent dispenser. Rinse Aid Dispenser - The rinse aid is released during the fi... -
Page 8: Rinse Aid & Detergent Dispenser
RINSE AID & DETERGENT DISPENSER As the rinse aid diminishes, the size of the black dot on the rinse aid level indicator chang- es, as illustrated below. Fig.2 Full 3/4 full 1/2 full 1/4 full - recommended to refi ll at this stage Empty Fig.3a To open the rinse aid dispenser,... -
Page 9: Function Of Detergent
FUNCTION OF DETERGENT Detergents with its chemical ingredients are necessary to remove dirt and transport it out of the dishwasher. Most of the commercial quality detergents are suitable for this purpose. DETERGENTS There are 3 types of detergents: 1. With both phosphate and chlorine 2. -
Page 10: Amount Of Detergent To Use
AMOUNT OF DETERGENT TO USE Fig.5a • If the lid is closed: Press release button. The lid will spring open. (Refer to Fig. 5a) Push latch to open CAUTION: DO NOT • Always add the detergent just before starting each wash cycle. LIFT LATCH. -
Page 11: Loading The Dishwasher
LOADING THE DISHWASHER RECOMMENDATIONS • Consider buying dishes, glassware, mugs, cups, cutlery, etc. which are identifi ed as dishwasher-proof or dishwasher-safe. • Use a mild detergent that is described as ‘kind to dishes’. If necessary, seek further information from the detergent manufacturers. •... -
Page 12: Loading Upper Basket
LOADING UPPER BASKET LOADING LOWER BASKET It is suggested that you place large items The upper basket is designed to hold more and the most diffi cult to clean items to be delicate and lighter dishware such as glass- placed into the lower basket: such as pots, es, coffee and tea cups, saucers, plates, pans, lids, serving dishes and bowls. -
Page 13: Wash Programs
WASH PROGRAMS WASH CYCLE TABLE = This program performs best with rinse aid. Water Program Wash Cycle Wash Cycle Detergent Energy Rinse Time Used Icon & Name Information Details Pre/Main (Kw/h) (min) Pre-wash (50 For heaviest soiled Wash (65 crockery, pots and ... -
Page 14: Start/Pause Button
START/PAUSE BUTTON When you press the Start/Pause button during a wash cycle, the selected program indicator will stop blinking and the buzzer will sound each minute until the Start/Pause button is pressed and the wash cycle resumes. CHANGING THE PROGRAM 1. -
Page 15: Cleaning & Maintenance
CLEANING & MAINTENANCE FILTERING SYSTEM The fi lter prevents larger remnants of food or other objects from getting inside the pump. The residues may block the fi lter, in this case they must be removed. The fi lter system consists of a coarse fi lter,a fl at (main fi lter) and a micro fi lter (fi ne fi lter). Fig.13 1. -
Page 16: Cleaning The Filter
4. Reconnect the water inlet pipe to the water valve. 5. Remove the fi lter at the bottom tub and use a sponge to soak up water in the sump. NOTE: If your dishwasher does not work due to ice, please contact TECO service. SPRAY ARM MAINTENANCE Fig.16... -
Page 17: General Maintenance
EARTHING CONNECTION FROM THE POWER CORD • DO NOT TAMPER WITH THE POWER CORD. IF THE CORD REQUIRES REPLACEMENT, PLEASE CONTACT TECO SERVICE. Refer to the rating label for the rated voltage and connect the dishwasher to the appropriate power supply. Use the required 10 amp fuse, time delay fuse or circuit... -
Page 18: Power Connection- Grounding
• Improper connection of the equipment earthing conductor may increase the risk of an electric shock. • Check with a qualifi ed electrician or TECO service if you have any doubt about the electrical safety of power source or power plug. -
Page 19: Aqua-Stop Hose
AQUA-STOP HOSE The Aqua-stop hose consists of double walls. The hose system guarantees its intervention by blocking the fl ow of water in cases where the supply hose breaks or when the space between the supply hose itself and the outer corrugated hose is full of water. DISCONNECTING THE AQUA-STOP HOSE Step 1 Turn off the water at the source. -
Page 20: Draining Excess Water
DRAINING EXCESS WATER If the sink is greater than 1m high off the fl oor, the excess water in the hoses cannot be drained directly into the sink. It will be necessary to drain excess water from the hoses into a bowl or suitable container that is held outside and lower than the sink. -
Page 21: Troubleshooting
TROUBLESHOOTING TECHNICAL ISSUES Problem Possible Causes Possible solutions Dishwasher does Blown fuse or Check and replace fuse if not start circuit breaker necessary. Reset circuit breaker has been triggered. and remove any appliances sharing the circuit. Power supply is not Check the dishwasher is switched on. - Page 22 TROUBLESHOOTING (CONT.) GENERAL ISSUES Problem Possible Causes Possible solutions White fi lm on the Hard water minerals Wearing rubber gloves, clean inside of dishwasher the interior of the dishwasher with a damp sponge and dish washing detergent. Never use any other chemical or cleaner.
- Page 23 • If an overfl ow occurs, turn off the main water supply before calling WARNING TECO service. • If there is water in the base pan because of an overfi ll or small leak, the water should be removed before restarting the dishwasher.
- Page 24 TECHNICAL INFORMATION with the door closed) Water pressure: 0.04-1.0MPa Power supply: Refer to rating plate Capacity: 14 place settings...
-
Page 25: Technical Information
TECHNICAL INFORMATION... - Page 26 LBD-PV...
Need help?
Do you have a question about the TDW14WA and is the answer not in the manual?
Questions and answers