
Related Manuals for Pfeiffer Vacuum SAS 16


Summary of Contents for Pfeiffer Vacuum SAS 16
- Page 1 OPERATING INSTRUCTIONS Translation of the Original SAS 16 – 160 Dust separators...
- Page 2 These operating instructions describe all models and variants of your product. Note that your product may not be equipped with all features described in this document. Pfeiffer Vacuum constantly adapts its products to the latest state of the art without prior notice. Please take into account that online operating instructions can deviate from the printed operating instructions supplied with your product.
-
Page 3: Table Of Contents
Determine mounting orientations on exhaust side 5.2.1 Install SAS on vacuum pump 5.2.2 Connect exhaust side Operation Maintenance Remove filter insert Clean filter insert Install filter insert Service solutions by Pfeiffer Vacuum Spare parts Technical data and dimensions 10.1 Technical data 10.2 Dimensions 3/30... -
Page 4: About This Manual
Keep the manual for future consultation. 1.1 Validity This operating instructions is a customer document of Pfeiffer Vacuum. The operating instructions de- scribe the functions of the named product and provide the most important information for the safe use of the device. The description is written in accordance with the valid directives. The information in this op- erating instructions refers to the product's current development status. -
Page 5: Stickers On The Product
About this manual Note 1.4.3 Stickers on the product This section describes all the stickers on the product along with their meanings. Rating plate VACUUM The rating plate is located on the cylinder surface of the housing. D-35641 Asslar Mod. Dust Separator SAS Mod.-Nr.: PK Z60 508 Made in Germany 2020/02... -
Page 6: Safety
Safety 2 Safety 2.1 General safety information The following 4 risk levels and 1 information level are taken into account in this document. DANGER Immediately pending danger Indicates an immediately pending danger that will result in death or serious injury if not observed. ►... -
Page 7: Safety Precautions
Safety Risks during maintenance WARNING Health hazard through poisoning from toxic contaminated components or devices Toxic process media result in contamination of devices or parts of them. During maintenance work, there is a risk to health from contact with these poisonous substances. Illegal disposal of toxic sub- stances causes environmental damage. -
Page 8: Proper Use
► Select the SAS that is suitable for the respective pumping speed of the vacuum pump. ► Adhere to the installation, commissioning, operating, and maintenance instructions. ► Do not use any accessory parts other than those recommended by Pfeiffer Vacuum. 2.6 Foreseeable improper use Improper use of the product invalidates all warranty and liability claims. -
Page 9: Product Description
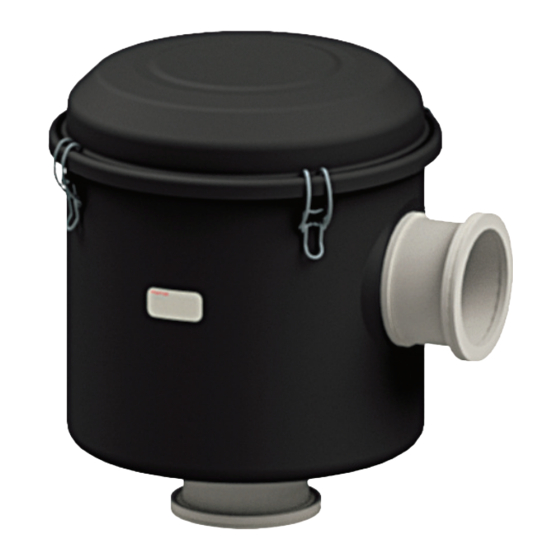
Gas exhaust flange 4 Connection flanges, ISO-K Locking clasp 3.2 Identifying the product ► To ensure clear identification of the product when communicating with Pfeiffer Vacuum, always keep all of the information on the rating plate to hand. 3.3 Product features SAS type... -
Page 10: Scope Of Delivery
Product description 3.4 Scope of delivery ● Dust separator with integrated filter insert ● Protective cover for the connection flange (mounted) ● Operating instructions 10/30... -
Page 11: Storage
Storage 4 Storage We recommend Pfeiffer Vacuum recommends storing the products in their original transport packaging. The filter inserts can absorb moisture, which can negatively influence the filtering effect and service life. Store SAS 1. Store the SAS only in dry, dust-free rooms, within the specified ambient conditions. -
Page 12: Installation
Installation 5 Installation 5.1 Determine mounting orientations on vacuum side The direction of flow inside the SAS is from the outside of the filter insert to the inside. Fig. 3: Permissible mounting orientations Procedure 1. Make sure that the connections to the piping has been sealed sufficiently to prevent leaks. 2. -
Page 13: Connect Vacuum Side
Installation Fig. 4: Install SAS on vacuum flange 1 SAS Vacuum pump 2 Exhaust flange with blank flange Centering ring with O-ring 3 Circlip Procedure 1. Make sure that the centering ring with O-ring and cone strainer are fitted in the vacuum flange. 2. -
Page 14: Install Sas On Vacuum Pump
Installation Fig. 5: Permissible mounting orientations Procedure 1. Make sure that the connections to the piping has been sealed sufficiently to prevent leaks. 2. Install the SAS vertically or horizontally, taking the permissible mounting orientations into account. 3. Make sure that the SAS is easily accessible for maintenance work. 5.2.1 Install SAS on vacuum pump Prerequisite ●... -
Page 15: Connect Exhaust Side
Installation Fig. 6: Install SAS on exhaust flange 1 Scroll pump, here shown as an example Centering ring with O-ring 2 Protective cap Dust separator SAS 25 S 3 Gas exhaust flange Circlip Procedure 1. Remove protective caps. 2. Place the SAS on the exhaust flange of the vacuum pump. –... -
Page 16: Operation
Operation 6 Operation NOTICE Damage to dust separator due to excess temperature The max. permissible gas inlet temperature for the SAS is 104 °C. Higher temperatures cause dam- age to the filter insert and the seals. ► Operate the dust separator only when the seals are in proper condition. ►... -
Page 17: Maintenance
Maintenance 7 Maintenance 7.1 Remove filter insert WARNING Health hazard through poisoning from toxic contaminated components or devices Toxic process media result in contamination of devices or parts of them. During maintenance work, there is a risk to health from contact with these poisonous substances. Illegal disposal of toxic sub- stances causes environmental damage. -
Page 18: Clean Filter Insert
Maintenance Fig. 7: Remove filter insert 1 Filter cover Housing seal 2 Cover seal Filter insert 3 O-ring Wing nut (on SAS 100 and SAS 160) 4 Locking clasp Remove filter cover 1. Remove the SAS from the vacuum pump. 2. -
Page 19: Install Filter Insert
Maintenance Clean polyester filter insert 1. Clean the filter insert by carefully blowing off its surface with dry, oil-free compressed air or by vacuum-cleaning the surface. 2. Wash the filter insert in lukewarm soapy water. 3. Dry the filter insert completely. 4. - Page 20 Maintenance 7. Place the filter cover on the housing. 8. Press the filter cover down and simultaneously fasten the locking clasps at the cover. 9. Fasten the filter cover with the wing nuts, if applicable. – On SAS 160. 20/30...
-
Page 21: Service Solutions By Pfeiffer Vacuum
We are always focused on perfecting our core competence – servicing of vacuum components. Once you have purchased a product from Pfeiffer Vacuum, our service is far from over. This is often exactly where service begins. Obviously, in proven Pfeiffer Vacuum quality. - Page 22 Service solutions by Pfeiffer Vacuum 5. Prepare the product for transport in accordance with the provisions in the contamination declaration. a) Neutralize the product with nitrogen or dry air. b) Seal all openings with blind flanges, so that they are airtight.
-
Page 23: Spare Parts
Filter insert, optional Set of seals Set of seals Polyester [5 µm] Paper [2 µm] consisting of SAS 16 PK E57 009 -T PK E57 005 -T PK E57 001 -T Pos. 1 and 2 SAS 25 S PK E57 009 -T... -
Page 24: Technical Data And Dimensions
-25 – 55 °C perature Weight 0.6 kg 0.6 kg 1.1 kg Tbl. 6: Technical data for SAS 16 | SAS 25 | SAS 25 S for polyester filter inserts Type designation SAS 40 SAS 63 SAS 100 SAS 160 Part number... - Page 25 Technical data and dimensions ±3 DN 16 ISO-KF ±3 DN 16 ISO-KF Fig. 10: Dimensions SAS 16 DN 25 ISO-KF DN 25 ISO-KF Fig. 11: Dimensions SAS 25 S 25/30...
- Page 26 Technical data and dimensions DN 25 ISO-KF DN 25 ISO-KF Fig. 12: Dimensions SAS 25 DN 40 ISO-KF Fig. 13: Dimensions SAS 40 26/30...
- Page 27 Technical data and dimensions ± 6.5 ± DN 63 ISO-K ±6.5 DN ISO 63-K Fig. 14: Dimensions SAS 63 27/30...
- Page 28 Technical data and dimensions ± 3 ± 3 ± 3 DN 100 ISO-K Fig. 15: Dimensions SAS 100 28/30...
- Page 29 Technical data and dimensions 287 ± 6,5 DN 160 ISO-K 412.5 Fig. 16: Dimensions SAS 160 29/30...
- Page 30 Notizen / Notes:...
Need help?
Do you have a question about the SAS 16 and is the answer not in the manual?
Questions and answers