
Subscribe to Our Youtube Channel
Related Manuals for Grundig GCA-C2357V


Summary of Contents for Grundig GCA-C2357V
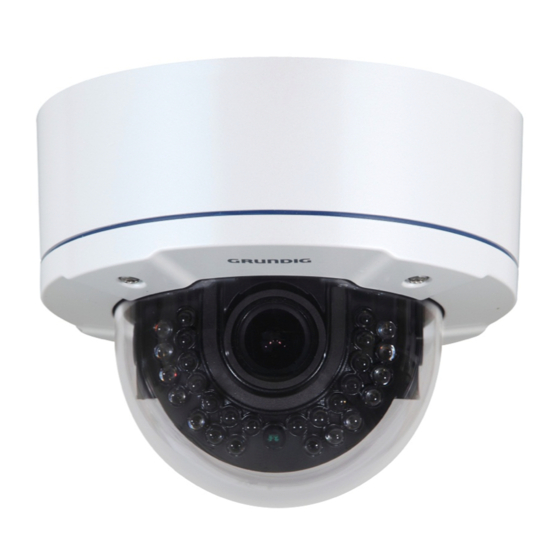
- Page 1 Owner's Manual Analogue Cameras GCA-C2357V 1/4" CCD Vandal Resistant Dome Camera AFZ 3.8~38 mm ICR 28 IR LED 700L ext. GCA-C2357V.123.1.26.09.2013 © ASP AG...
-
Page 3: Table Of Contents
Content: 1. Important Safety Instructions 2. Package Contents 3. Installation 4. Installation 1. 3-Axis Gimbal Adjustment 5. Control Stick 1. OSD Control 2. Zoom & Focus Adjustment 6. OSD Menu 1. FOCUS 2. EXPOSURE 3. WHITE BAL (White Balance) 4. DAY&NIGHT 5. -
Page 4: Package Contents
Continued use in such a condition may cause fire or electric shock. If this product fails to operate normally, contact the nearest service center. Never disassemble or modify this product in any way. (GRUNDIG is not liable for problems caused by unauthorised modifications or attempted repair.) To prevent fire or electric shock, do not expose the inside of this device to rain or moisture. - Page 5 If you want to relocate the already installed product, be sure to turn the power off and then move or reinstall it. 4. Part Names English...
-
Page 6: Axis Gimbal Adjustment
4.1. 3-Axis Gimbal Adjustment 5. Control Stick 5.1. OSD Control - Pressing the SET UP stick: Accesses the menu mode or confirms the setting. - UP / DOWN: Chooses the desired menu. - LEFT / RIGHT: Sets up the value of the selected menu and changes the settings. 5.2. -
Page 7: Osd Menu
6. OSD Menu 1. Press the SET UP stick to access the menu mode. 2. Select the desired feature by using UP/DOWN. 3. If there is a setting for this feature on the right side of the screen, use LEFT/RIGHT to switch between the settings and confirm your choice by pressing the stick. -
Page 8: Exposure
FOCUS MODE [AUTO, INTERVAL, MANUAL, ONE-PUSH]: - AUTO: The focus will be permanently on. Increase or decrease the optical zoom (ZOOM) or the digital zoom (D-ZOOM) using the UP and DOWN directions of the SET UP stick. Through enabling D-ZOOM (ON), the digital zoom will be activated once the optical zoom comes to an end. -
Page 9: White Bal (White Balance)
BRIGHTNESS [0~100] : Sets the value of auto exposure operations. As the value increases, the screen gets brighter. SHUTTER [x265, x128, x64, x32, x24, x16, x14, x12, x10, x8, x6, x4, x2, AUTO, OFF, FLK, 1/250, 1/500, 1/1000,1/2000, 1/5000, 1/10000, 1/20000, 1/50000, 1/100000] : Control the image brightness by adjusting the shutter speed. -
Page 10: Day&Night
MODE [ATW, AWB, AWC→SET, INDOOR, OUTDOOR, MANUAL] : - ATW: Select this mode when the colour temperature is between 1,800˚K and 10,500˚K. - AWB: This function is used to search for colours that match the ambient environment well. Select this mode when the colour temperature is between 3,000˚K and 7,000˚K. -
Page 11: Backlight
- COLOR: The picture will be always displayed in colour. - BW: The picture will be always displayed in black & white. In BW mode, you can turn the BURST signal ON or OFF. - EXTERNAL: Day and Night can be distinguished by the external output. DWELL TIME [0SEC~60SEC] : You can select here the duration of the change from day to night mode and night to day mode. - Page 12 MODE [OFF, D-WDR, BLC, HSBLC] : - OFF: Deactivated. - D-WDR: This function provides intelligent light level control to overcome even strong backlight conditions. - BLC: BLC is used to counterbalance the screen image by increasing the brightness so that a subject which appears dark due to a strong backlight can be displayed in more detail.
-
Page 13: Dnr (Digital Noise Reduction)
Here you can set the area of the HSBLC. > HBLC (ON, OFF): You can turn the HBLC ON or OFF. > H. START (0~14): Here you can set the starting position of the area from the left. > V. START (0~14): Here you can set the starting position of the area from the top. -
Page 14: Image Adj
FDNR COLOR [0~10] : If FDNR MODE is set to MANUAL, you can set here the colour level of FDNR from 0 to FDNR EDGE [0~10] : If FDNR MODE is set to MANUAL, you can set here the edge enhancement of FDNR from 0 to 10. -
Page 15: Special
- MODE [LCD, CRT] : > LCD: Select this option when you use an LCD monitor. Then you can adjust the gamma, pedestal level and blue/red gain setttings. > CRT: Select this option when you use a CRT monitor. Then you can adjust the gamma, pedestal level and blue/red gain setttings. - Page 16 6.8.2. COMM ADJ This function is for setting up the communication information. CAM ID [000-255] : Choose a desired ID for this camera. PROTOCOL [VISCA, LG-NEW, SAMSUNG, PELCO-D, ALL] : Set up the protocol. When you choose ALL, you can use all protocols. BAUDRATE [2400, 4800, 9600, 19200, 38400] : Choose a desired value for the baudrate.
- Page 17 H. START [0~240] : Here you can set the starting position of the area from the left. V. START [0~128] : Here you can set the starting position of the area from the top. WIDTH [0~240] : Here you can set the horizontal size of the area. HEIGHT [0~128] : Here you can set the vertical size of the area.
- Page 18 - P/T LOCK [ON, OFF] : Choose OFF to be able to change the vertical/horizontal position of the mask area under TILT POSI and ZOOM POSI. - WIDTH [0~80] : Here you can set the width of the mask area. - HEIGHT [0~60] : Here you can set the height of the mask area.
- Page 19 FUNC. OSD [ON, OFF] : In case of lens operation, the zoom/focus operation status will be displayed as "ZF" for 5 sec. INIT. LOGO [ON, OFF] : When ON is selected, the firmware version will be displayed when the camera is turned 6.8.7.
-
Page 20: Reset
Preset Settings : RECALL: First you need to load the settings for the preset mode that you selected under POSITION. Move the SET UP stick in the right direction and wait until CALLED is displayed. Then the settings for the selected preset mode are loaded. SAVE [ON, OFF] : When CUSTOM is selected under POSITION, you can make the settings for your own customised mode and then you can save here your settings when you select ON. - Page 21 Specifications GCA-C2357V Image Sensor 1/4" CCD Sony 960H Ex-view HAD II Scanning System PAL, 50Hz, 625L (V), 2:1 Inter Line Transfer Pixels - Effective 976(H) x 582(V) Resolution 650 (H) lines colour, 700 (H) lines b&w Col/B&W Auto, Color, Removable IR-Cut Filter (ICR) Sensitivity Colour 0.9 lux(50IRE)@F1.8 (SensUp=0, AGC Off), 0.00001 lux 15IRE...
- Page 22 Power Consumption 7.8 (LED on) W Weight 1.14 kg Dimensions (wxhxd) 99 x 223.5 mm Dimensions English...
- Page 23 EC Declaration of Conformity GCA-C2357V 1/4" CCD Vandal Resistant Dome Camera AFZ 3.8~38 mm ICR 28 IR LED 700L ext. It is hereby certified that the products meet the standards in the following relevant provisions: EC EMC Directive 2004/108/EC Applied harmonised standards and technical specifications:...
Need help?
Do you have a question about the GCA-C2357V and is the answer not in the manual?
Questions and answers