
Related Manuals for Infoblox 4005 Series


Summary of Contents for Infoblox 4005 Series
- Page 1 Infoblox Installation Guide 4005 Series Appliances Trinzic TE-4015 and TE-4025 Network Insight ND-4005 Trinzic Reporting TR-4005...
-
Page 2: Table Of Contents
1.1 Infoblox Trinzic TE-4015 and TE-4025 Product Overview ....... . . -
Page 3: Introduction To The Infoblox 4005 Series
Administrator Guide Infoblox provides tamper evident FIPS labels that you must affix on the HDD cover, all PSU and fan canisters, over the IPMI port of the appliance to make it FIPS compliant. You must install the FIPS tamper evident labels correctly onto the device for compliance with FIPS. This label is valid for Infoblox Trinzic TE-4015 and TE-4025 appliances only. - Page 4 Install a sticker on both of the back corners of the top cover as shown in this picture Install stickers for each of the fans into the chassis as shown in this picture Install a sticker for each power supply module as shown in this picture Copyright ©2018, Infoblox, Inc.All right reserved.
-
Page 5: Infoblox Network Insight Nd-4005 Product Overview
Infoblox Reporting TR-4005 Product Overview The Infoblox Reporting TR-4005 is a high performance network appliance that collects data from Infoblox Grid members, stores the data in the reporting database, and generates reports that provide statistical information about IPAM, DNS, DHCP, and system activities and performance. -
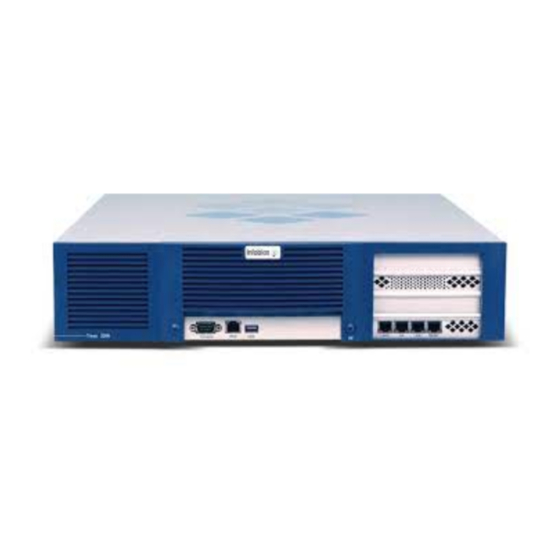
Page 6: Infoblox 4005 Series Hardware Components
Note: The Trinzic Reporting TR-4005 does not support HA operation and acts only as a Grid member. Infoblox 4005 Series Hardware Components The Infoblox 4005 Series are 2-U appliances that you can efficiently mount in a standard equipment rack. For information about rack mounting, Rack Mounting Procedures... - Page 7 USB-to-Serial dongle for connection to the serial console port. If the dongle is connected to a laptop, the laptop also must be properly grounded. Failure to do so may cause damage to the serial console port of the Infoblox appliance.
- Page 8 In optional configurations for the Infoblox 4005 Series (any appliance that does not use the internal Ethernet ports), the Infoblox 1GbE SFP or 10GbE SFP+ ports replace the functionality in the original system MGMT, LAN1, HA and LAN2 ports, thereby disabling the built-in MGMT, LAN1, HA and LAN2 ports.
- Page 9 RJ-45 rollover cable and two female RJ-45-to-female DB-9 adapters, or a female DB-9-to-female DB-9 null modem cable. The RJ-45 pin assignments follow IEEE 802.3 specifications. All Infoblox Ethernet ports are auto-sensing and automatically adjust to standard straight-through and cross-over Ethernet cables.
- Page 10 Appliance Rear Panel The Infoblox 4005 Series appliances ship with dual AC power supplies and six fan modules. The power supplies and fan modules are field replaceable. The power supplies are also hot-swappable so you can replace any one of them at a time without disrupting the operations of the appliance.
-
Page 11: System, Environmental, And Power Specifications
System specifications describe the physical characteristics of the Infoblox 4005 Series appliances. Environmental specifications describe Infoblox 4005 Series temperature and moisture limits. Power specifications describe the electrical range within which the appliance circuitry can operate. This chapter reports power usage and heat generation characteristics against the hardware configuration for the Infoblox 4005 Series appliances. -
Page 12: Dc Power Cable Color Codes
ND-4005-1GE-DC: 316W ND-4005-10GE-DC: 335W Fan FRU (Field-Replaceable Unit) SKU (Stock Keeping Unit) The Infoblox 4005 Series appliances ship with inbuilt fans that can be replaced. The following table lists the fans supported on an Infoblox 4005 series appliance: Description FRU, Trinzic 1405, 2205, and 4005 Series AC Power Supply Unit, 600W... - Page 13 Recommended System: 2 GHz (or higher) CPU with at least 1 GB of RAM available for the Infoblox GUI, and network connectivity to an Infoblox appliance Monitor Resolution: Minimum: 1280 x 768 Recommended: 1280 x 1024 or better CLI Access Secure Socket Shell (SSH) client that supports SSHv2 Terminal emulation program, such as minicom or Hilgraeve Hyperterminal®...
-
Page 14: Connecting To The Appliance
To change these settings to suit your network, use the console port. Console Port The Infoblox appliance has a male DB-9 console port on the front panel. You can log in to the appliance through this port and specify initial network settings using the NIOS CLI. -
Page 15: Auto Provisioning Nios Appliances
Auto Provisioning NIOS Appliances In addition to using the Grid Setup Wizard or accessing the Join Grid dialog box to join appliances to a Grid, you can set up an Infoblox appliance using the auto provision feature, which allows a DHCP server to automatically assign an IP address to the appliance. You can then join the auto-provisioned appliance to a Grid. -
Page 16: Infoblox Nios Cli
.) You can also enable remote console SSHv2 (Secure Shell version 2) access through the Infoblox Grid Manager or CLI, and then access the CLI from a remote location using an SSHv2 client. (For more information, refer to Infoblox NIOS Administrator Guide Using CLI Help You can display a list of available CLI commands by typing help at the command prompt. -
Page 17: Installing The Infoblox 4005 Series Appliance
The Infoblox 4005 Series appliances mount into a standard 19” (48 cm) equipment rack. The appliances ship with accessory kits that contain the following: a pair of rack slide brackets and chassis slide rails, a pair of rack ears, eight (8) 10-32 screws, and eight (8) 8-32 screws. Infoblox also offers a four-post and an adjustable rail four-post rack mounting kits that you can order separately. - Page 18 Two-Post Rack Mounting Infoblox provides a pair of rack mounting ears as part of the Accessory Kit for your appliance. For optimal physical stability of the appliance in a two-post installation, you use the provided ears to mount the appliance from its rear to the posts of the rack.
- Page 19 Adjustable Rail Four-Post Rack Mounting Infoblox provides an adjustable four-post rail kit with 600mm to 900mm depth adjustment, designed to allow one person to perform physical installation of the rail kit and the appliance. This kit is provided as a field-replaceable unit. For more information, see...
- Page 20 Perform Steps 2 and 3 for the second rack rail assembly. Attach the chassis slide rails to each side of the chassis with three (3) flathead 8-32 screws, in the orientation shown in the figure below. Chassis slide rails Installation Copyright ©2018, Infoblox, Inc.All right reserved.
-
Page 21: Powering The Appliance
Powering the Appliance The Infoblox 4005 Series appliances ship with two (2) hot-swappable AC power supply modules (PS1 and PS2) and matching AC power cables. Infoblox also offers optional DC power supply modules. Infoblox recommends using the power cables that ship with the appliances to connect each power supply to separate power circuits. -
Page 22: Managing The Disk Subsystem
The Grid Manager also displays detailed status of the RAID array. In the event of a disk failure, you must replace the failed disk with one that is qualified and shipped from Infoblox and has the same disk type as the rest of the disks in the array. The appliance displays information about mismatched disks in the Detailed Status panel. -
Page 23: Hard Disk Drive Replacement
Grid Manager operation. When you replace a failed disk, you must replace it with an Infoblox supplied disk. To ensure that you receive the correct replacement disk, report the disk type or part number of the failed disk. The appliance also displays the disk type in the Detailed Status panel of the Grid Manager. - Page 24 40 hours. On a Grid Master serving a very large Grid, expect the rebuild process to take at least 24 hours. Replace a failed or mismatched disk only with a replacement disk shipped from Infoblox. When you request a replacement disk, report Copyright ©2018, Infoblox, Inc.All right reserved.
-
Page 25: Replacing Fan Modules
NIOS within the downed system detects the new hard disk and initializes it for NIOS usage. If the appliance runs in an Infoblox Grid, the system then communicates with the current Grid Master, downloads any remaining configuration, and then automatically rejoins the Grid. -
Page 26: Changing Dc Power Supplies
Reconnect the power cable. If the power supply is fully seated and operating properly, the LED glows steady green. Notes on Changing AC Power to DC Power Infoblox offers the ability to change an AC-equipped Infoblox 4005 Series appliance to use DC power supply units (PSUs) by ordering Copyright ©2018, Infoblox, Inc.All right reserved. -
Page 27: International Ac Power Cords
Infoblox. Keep your DC power supplies in your facility until you receive your replacement appliance. International AC Power Cords Infoblox offers replacement AC power cords for international markets as listed below . For availability, contact your Infoblox sales representative.
Need help?
Do you have a question about the 4005 Series and is the answer not in the manual?
Questions and answers