
Related Manuals for Infoblox 1405 Series


Summary of Contents for Infoblox 1405 Series
- Page 1 Infoblox Installation Guide 1405 Series Appliances Trinzic TE-1405, TE-1415, and TE-1425 Advanced Appliance PT-1405 Network Insight ND-1405 Trinzic Reporting TR-1405...
-
Page 2: Table Of Contents
1.2 Infoblox Advanced Appliance PT-1405 Product Overview ........ -
Page 3: Introduction To The Infoblox 1405 Series
Trinzic Reporting TR-1405 Product Overview You can configure and manage Infoblox 1405 Series appliances through the Infoblox Grid Manager, a GUI that works seamlessly in Windows, Linux, and Mac environments using standard web browsers. For more information about the Grid Manager, refer to the Infoblox NIOS Administrator Guide All Infoblox 1405 Series network appliances are Class A digital appliances per FCC regulations, and are RoHS and WEEE compliant. -
Page 4: Trinzic Reporting Tr-1405 Product Overview
Trinzic Reporting TR-1405 Product Overview The Trinzic Reporting TR-1405 is a high performance network appliance that collects data from Infoblox Grid members, stores the data in the reporting database, and generates reports that provide statistical information about IPAM, DNS, DHCP, and system activities and performance. - Page 5 If the dongle is connected to a laptop, the laptop also must be properly grounded. Failure to do so may cause damage to the serial console port of the Infoblox appliance. Infoblox is not responsible for such damage. For DB-9 pin assignments, see...
- Page 6 Infoblox NIOS Administrator Guide Infoblox provides tamper evident FIPS labels that you must affix on the HDD cover, all PSU canisters, over the IPMI port of the appliance to make it FIPS compliant. You must install the FIPS tamper evident labels correctly onto the device for compliance with FIPS. This label is valid for Trinzic TE-1425 appliances only.
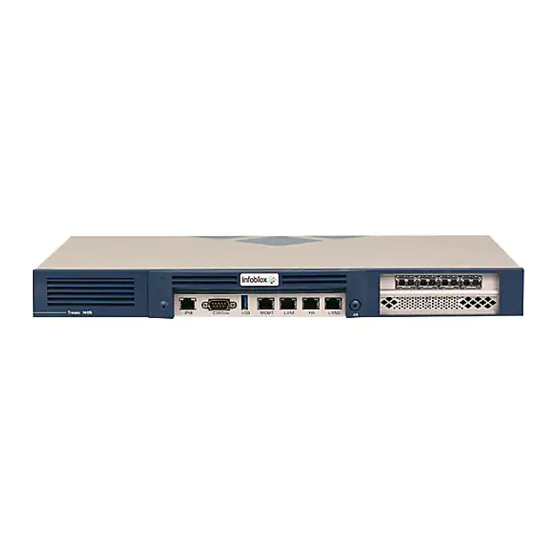
- Page 7 View the Activity and Link LEDs to see link activity and connection speeds on Ethernet ports. Figure 2 describes the status conveyed by Ethernet port LEDs through their color and illumination (steady glow or blinking). Figure 2 Ethernet Port LEDs (inc. SFP+ interfaces where noted) Copyright ©2018, Infoblox, Inc.All right reserved.
- Page 8 The TE-1415 and TE-1425 appliances support four active 10GbE interfaces in the optional 1GbE SFP and 10GbE SFP+ configurations. Other appliances in the Infoblox 1405 Series, comprising the ND-1405 and TR-1405, support three active interfaces in the optional 1GbE SFP and 10GbE SFP+ configurations.
- Page 9 RJ-45 rollover cable and two female RJ-45-to-female DB-9 adapters, or a female DB-9-to-female DB-9 null modem cable. The RJ-45 pin assignments follow IEEE 802.3 specifications. All Infoblox Ethernet ports are auto-sensing and automatically adjust to standard straight-through and cross-over Ethernet cables.
- Page 10 TE-1405, TE-1415, TE-1425, PT-1405, and ND-1405 Appliance Rear Panel Infoblox 1405 Series rear panel components include the power connectors, hard disk drive, fans, and the UID LED, as shown in Figure 5 Figure 5 Infoblox 1405 Series, Rear View Table 3 Infoblox 1405 Series Rear Panel Components...
-
Page 11: System, Environmental, And Power Specifications
Manager or CLI command Dark = UID is deactivated When UID is activated, the LCD on the front panel blinks at the same time. Power The 1405 Series appliances have two power supplies that provide redundancy. Each power supply has a power outlet for Supply connecting the appliance to a standard AC or DC (Direct Current) power source. -
Page 12: Installing The Infoblox 1405 Series Appliance
FRU, Trinzic 1405, 2205, and 4005 Series DC Power Supply Unit, 600W Installing the Infoblox 1405 Series Appliance Refer to the sections below to rack mount appliances in the Infoblox 1405 Series appliance, connect them to a power source, and cable them to a network. Before proceeding, review the Infoblox Safety Guide and follow the necessary precautions. - Page 13 Caution The 600mm chassis rack rails kit provided with the Infoblox 1405 Series appliance provides only a limited range of travel. It does not extend across the entire depth of the equipment rack. Exercise caution when withdrawing the appliance from its position in the equipment rack.
- Page 14 Adjustable Rail Four-Post Rack Mounting Infoblox provides an adjustable four-post rail kit with 600mm to 900mm depth adjustment, designed to allow one person to perform physical installation of the rail kit and the appliance. This kit is provided as a field-replaceable unit; for information, see the section...
-
Page 15: Powering The Appliance
The TE-1415, TE-1425, PT-1405 and ND-1405 appliances ship with one (1) AC power supply module or one DC power supply module. You can order an additional power supply to set up a redundant hot-swappable 1+1 configuration. In the 1+1 configuration, Infoblox recommends using the power cables that ship with the appliances to connect each power supply to separate power circuits. -
Page 16: Accessing The Infoblox 1405 Series Appliance
Accessing the Infoblox 1405 Series Appliance The management system is the computer from which you configure and monitor the Infoblox appliance. You can access the appliance from the management system remotely across an Ethernet network or through a serial console cable. After completing the steps in... -
Page 17: Connecting To The Appliance
Recommended System: 2 GHz (or higher) CPU with at least 1 GB of RAM available for the Infoblox GUI, and network connectivity to an Infoblox appliance Monitor Resolution: Minimum: 1280 x 768 Recommended: 1280 x 1024 or better CLI Access Secure Socket Shell (SSH) client that supports SSHv2 Terminal emulation program, such as minicom or Hilgraeve Hyperterminal®... -
Page 18: Auto Provisioning Nios Appliances
Auto Provisioning NIOS Appliances In addition to using the Grid Setup Wizard or accessing the Join Grid dialog box to join appliances to a Grid, you can set up an Infoblox appliance using the auto provision feature, which allows a DHCP server to automatically assign an IP address to the appliance. You can then join the auto-provisioned appliance to a Grid. -
Page 19: Specifying Appliance Settings
You can deploy an appliance individually or in an HA (high availability) pair, for hardware redundancy. A single appliance or an HA pair without a Grid license runs independently from a Grid. A Grid is a group of two or more Infoblox appliances that share sections of a common, distributed, built-in database and which you configure and monitor through a single, secure point of access —... -
Page 20: Infoblox Nios Cli
The NIOS CLI allows you to configure and monitor the appliance using a small set of NIOS commands. Some tasks, such as resetting the appliance, can be done only through the CLI. You can access the NIOS CLI through a direct console connection from your management system to the Infoblox appliance. (For more information, see Console Port .) You can also enable remote console SSHv2 (Secure Shell version 2) access... - Page 21 Likewise, to see a complete list of the commands, enter . For information about the CLI commands, refer to show help show Infoblox CLI Guide Copyright ©2018, Infoblox, Inc.All right reserved.
Need help?
Do you have a question about the 1405 Series and is the answer not in the manual?
Questions and answers