
Subscribe to Our Youtube Channel
Related Manuals for Intel VTech VNT846


Summary of Contents for Intel VTech VNT846
- Page 1 VNT846 Go to businessphones.vtech.com AC1600 WIFI ROUTER to register your product for enhanced warranty support and the latest VTech product news. User’s manual...
- Page 2 Congratulations on your purchase of this VTech product. Before using this product, please read the Important safety information. This user’s manual provides you with the complete installation and setup instructions. For customer service or product information, visit our website at businessphones.vtech.com or call 1 (888) 370-2006.
- Page 3 Important safety information When using your equipment, basic safety precautions should always be followed to reduce the risk of fire, electric shock and injury, including the following: Read and understand all instructions. Do not use this product near water such as near a bath tub, wash bowl, kitchen sink, laundry tub or a swimming pool, or in a wet basement or shower.
- Page 4 Important safety information Electromagnetic fields (EMF) This VTech product complies with all standards regarding electromagnetic fields (EMF). If handled properly and according to the instructions in this user’s manual, the product is safe to be used based on scientific evidence available today.
- Page 5 Parts checklist Your router package contains the following items. Save your sales receipt and original packaging in the event warranty service is necessary. Router Ethernet cable Power adapter...
-
Page 6: Table Of Contents
Table of contents Getting started.........1 Router overview ........1 Connect your system ........4 Mount the router on the wall (optional) ..5 Configure your computer network ....6 For Windows XP/2000 ......6 For Windows Vista/7/8 ......9 Configure your router......12 Login to the web management page ..12 Web management page overview ..13 Appendix..........14 Frequently asked questions ....14... -
Page 7: Getting Started
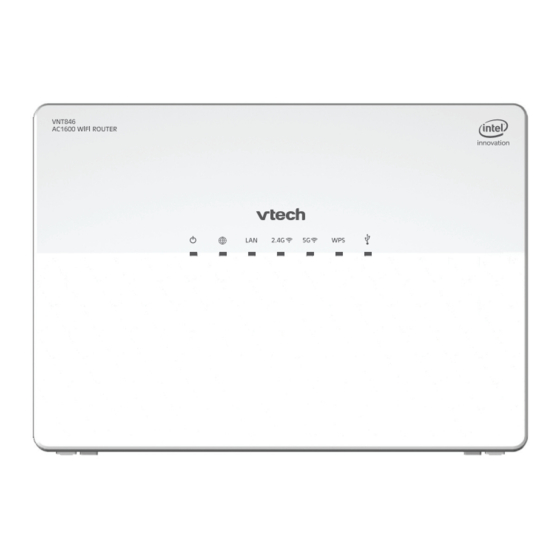
Getting started Router overview 1 – Wi-Fi button • Press to turn the 2.4G Wi-Fi on or off. • After turning on the Wi-Fi, press and hold for 10 seconds to start the Wireless Protected Setup (WPS). 2 – Wi-Fi button •... - Page 8 Getting started Router overview 4 – Status indicators (On/Off) light • Steady green when it is ready to use. • Steady orange when the router is just powered on and booting. • Off when the router is powered off. WAN light •...
- Page 9 Getting started Router overview 8 9 10 5 – ports • Connect to Ethernet devices such as computers and SIP phones. 6 – port • Connects to the wide area network via Cable/DSL Modem. 7 – button • Press and hold (using a narrow-pointed object) to reset the router to default settings.
-
Page 10: Connect Your System
Getting started Connect your system The VNT846 router has four LAN ports to connect with Ethernet devices such as computers and SIP phones. Before you start setting up your system, plan it carefully. Consider the number of Ethernet device(s) you need to connect with before you start planning your system. -
Page 11: Mount The Router On The Wall (Optional)
Getting started Mount the router on the wall (optional) Your router comes ready for tabletop or floor use. If you prefer to mount your router on the wall, you will need to purchase two screws separately. Use a pencil to mark two holes on the desired positions on the wall. The distance between the two holes is 17.8cm (7 inch). -
Page 12: Configure Your Computer Network
Getting started Configure your computer network In order to view or change the settings of the VNT846 router, you need to login to the web management page of the router. Before that, connect your computer to the LAN port of the router, and then set the computer to obtain IP address automatically according to the steps below. - Page 13 Getting started Configure your computer network 3. Right-click Local Area Connection, then select Properties. 4. Select Internet Protocal (TCP/IP), then click Properties.
- Page 14 Getting started Configure your computer network 5. Select Obtain IP address automatically and Obtain DNS server address automatically, then click OK.
-
Page 15: For Windows Vista/7/8
Getting started Configure your computer network For Windows Vista/7/8 Click Start, then open the Control Panel. 2. Click Network and Internet, then Network and Sharing Center. - Page 16 Getting started Configure your computer network 3. Click Change adapter settings. 4. Right-click Local Area Connection, then select Properties.
- Page 17 Getting started Configure your computer network 5. Select Internet Protocal Version 4 (TCP/IPv4), then click Properties. 6. Select Obtain an IP address automatically and Obtain DNS server address automatically, then click OK.
-
Page 18: Configure Your Router
Configure your router Login to the web management page With your computer connected to the LAN port of the router and set to obtain IP address automatically, power on the router and you can login to the web management page to browse the router settings and change them if necessary. •... -
Page 19: Web Management Page Overview
Configure your router Web management page overview After you logged in to the web management page, you can do the configurations of your router here. You will see the menus of SETUP, ADVANCED, WIRELESS, STATUS, TOOLS, and STORAGE. SETUP: The SETUP menu allows you to configure the basic functions of the •... -
Page 20: Appendix
Appendix Frequently asked questions Below are the questions most frequently asked about the router. If you cannot find the answer to your question, visit our website at businessphones.vtech.com or call 1 (888) 370-2006 for customer service. My router does not work. •... -
Page 21: Fcc Part 15
Appendix FCC part 15 This equipment has been tested and found to comply with the requirements for a Class B digital device under Part 15 of the Federal Communications Commission (FCC) rules. These requirements are intended to provide reasonable protection against harmful interference in a residential installation. -
Page 22: For Cetl Compliance Only
Appendix For cETL compliance only Mesures de sécurité importantes Lorsque vous utilisez votre appareil, vous devriez toujours suivre certaines mesures de précaution de base afin de réduire les risques d’incendie, d’électrocution et de blessures corporelles, dont ceux qui suivent : Information relative à... - Page 23 Appendix For cETL compliance only Champs électromagnétiques (EMF) Ce produit de VTech est conforme à toutes les normes se rapportant aux champs électromagnétiques (EMF) standard. Si vous le manipulez correctement en suivant les instructions de ce guide, son utilisation sera sécuritaire pendant de nombreuses années, selon les meilleures évidences scientifiques dont nous disposons aujourd’hui.
-
Page 24: Limited Warranty
Appendix Limited warranty 1. What does this limited warranty cover? The manufacturer of this VTech product warrants to the holder of a valid proof of purchase (“CONSUMER” or “you”) that the product and all accessories provided in the sales package (“PRODUCT”) are free from defects in material and workmanship, pursuant to the following terms and conditions, when installed and used normally and in accordance with the PRODUCT operating instructions. - Page 25 Appendix Limited warranty 5. How do you get warranty service? To obtain warranty service, visit businessphones.vtech.com or call 1 (888) 370-2006. NOTE: Before calling for service, please review the user’s manual; a check of the PRODUCT’s controls and features may save you a service call. Except as provided by applicable law, you assume the risk of loss or damage during transit and transportation and are responsible for delivery or handling charges incurred in the transport of the PRODUCT(s) to the service location.
-
Page 26: Technical Specifications
Appendix Technical specifications Operating temperature 34°F - 104°F 0°C - 40°C Power requirements Input: 100-240V AC 800mA 50/60Hz Output: 12V DC 2000mA Network Ethernet ports 10/100 Mbps RJ-45 Port... -
Page 27: Index
Index Appendix 14–20 Configure your computer network 6–11 Configure your router 12–13 Connect your system 4 Frequently asked questions 14 Getting started 1–10 Important safety information i–ii Limited warranty 18–19 Login to the web management page 12 Mount the router on the wall (optional) 5 Overview 1–2 Password 12 Power on 4... - Page 28 Intel and the Intel logo are trademarks of Intel Corporation in the U.S. and/or other countries. The Wi-Fi CERTIFIED™ Logo is a certification mark of Wi-Fi Alliance ® Designed to fit you home. And your life. VTech Communications, Inc. A member of THE VTECH GROUP OF COMPANIES.
Need help?
Do you have a question about the VTech VNT846 and is the answer not in the manual?
Questions and answers