
Related Manuals for NLI HR-2A


Summary of Contents for NLI HR-2A
- Page 1 NEWLONG INDUSTRIAL CO., LTD. NEWLONG INDUSTRIAL CO., LTD. NLIF-008 縁カガリ縫製袋用ミシン NLIF-017...
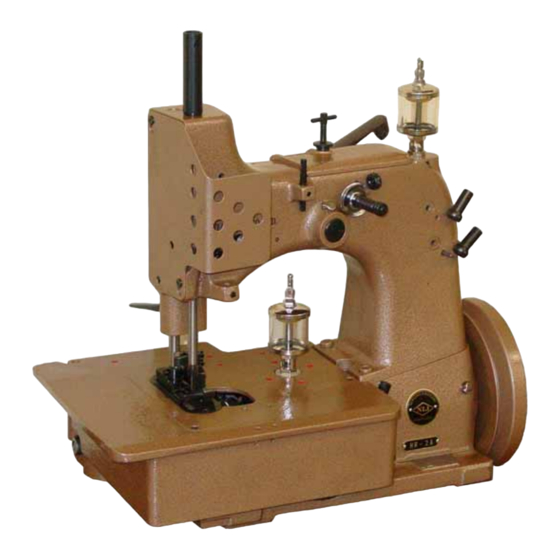
- Page 2 Thank you for purchasing the NLI Model HR-2A ニューロング工業(株) HR−2A型製袋用ミシンをお Bag Sewing Machine Head. 買い上げいただき有り難うございます。 This manual contains the instructions and precautions for この取扱説明書は HR-2A 型製袋用ミシンの取扱い方法と使 ○ ○ using the Model HR-2A Bag Sewing Machine Head. Be 用上の注意事項が記載されています。ご使用まえにこの取 sure to read and understand this manual before use and 扱説明書をかならずお読みください。内容を十分理解して正 use the machine correctly. しくご使用ください。 この取扱説明書はミシンのそばに、いつでもご利用いただけ Keep this manual near the sewing machine for easy ○ ○...
- Page 3 C L O SE D CO M P LI E S W I TH TH E M A C H IN E SPECIFICATIONS. 11 DO NOT USE SPARE PARTS OTHER THAN 11 “ニューロング工業㈱”純正部品以外は使用しない “NLI”GENUINE PARTS. で く だ さ い 。 ...
- Page 4 Identifying and Ordering Parts サービスに関するお問い合せ Where the construction permits, each part is 部品交換とご注文上の注意 stamped with its part number. On all orders, please include part number, part name and model ニューロング工業(株)全国営業所・連絡所には HR-2A ● name of machine. 型の純正部品を常備しております。 Safety Rules ご注文の際は、パーツリストのパーツ番号と名称でご指 ● 示ください。 To prevent personal injury: All power sources to the machine must be turned ...
-
Page 5: Table Of Contents
CONTENTS/目次 Specifications/ 2 仕様 Threading/ 2 糸通し図 Lubrication(Fig.1) (Fig.1) 3 給油 Adjustment/ 3 調整 4-1 Needle Setting (針の交換) 4 4-2 Adjusting of Looper (ルーパーの調整) ... -
Page 6: Specifications/ 仕様
1. Specifications/ 仕様 Seam specification and stitch type 502-SSa-1 縫い形式 Stitch Range 6.5mm-15mm 縫い目幅 Standard Setting of Range 10mm 標準縫い目幅 Width of Seam 15mm カガリ幅 Width of Seam special order 10mm カガリ幅特注 Maximum thickness of material 16mm 最大縫い厚 Feed Plain Feed 送り方式 普通送り Needle Type and size UO×1970 400 針 Thread (Cotton or jute) Cotton or Jute ... -
Page 7: Adjustment/ 調整
3. Lubrication/ 給 油 Lubrication is performed everyday to ensure a long HR−2A型製袋用ミシンを初めて運転をするとき、また相当 serving life of the machine. Each oiling part is marked 期間使用していないミシンを運転するときは、必ず手差し with a red cap. で、各部に充分注油してから運転してください。 Before starting operation, please make sure that an oil cup is sufficiently filled with oil, and please supplement oil if (例) シェルテラスオイル C10 it found not enough. 運 転 開 始 の前 にちょうつがい式 の正 面 カバー(81201A) P L EA SE ... -
Page 8: Adjusting Of Looper
4-2 Adjusting of Looper 4-2 ルーパーの調整 For convenient access, remove the presser foot, throa ルーパーの調整をする前に、押エ金、針板・送り金・針ガード plate and feed dog. を取りはずしてください。 ルーバーの調整が容易になります。 a) The distance between the needle center and the looper a) 針とルーパーの距離 <Fig. 1> Insert a looper (81208) into the looper rocker (81213). ル ー パ ー ( 8 1 2 0 8 ) を 、 ル ー パ ー 台 ( 8 1 2 1 3 ) に 取 り 付 ... -
Page 9: Adjusting Spreader
4-3 Adjusting Spreader 4-3 スプレッダーの調整 a) The distance between Needle and Spreader a) 針とスプレッダ―の距離 <Fig.2> Turn the pulley clockwise, and check the distance プーリーを廻して、スプレッダー(81207)がもっとも左に between the needle center and the concave part of the き た と き 、 針 芯 と ス プ レ ッ ダ ー の え ぐ り 部 の 距 離 は ... -
Page 10: Adjusting Thread Retainer
18) of the feed regulating stud (80696) which connects the feed rocker (80233) and the feed rod (80651) 4-6 縫 い目 巾 の調 整 <Fig.7> and move the feed regulating stud vertically, as shown in HR-2A型製袋用ミシンは縫い目巾10mmに調整して、出 (Figure 7). Bringing down the feed makes the stitch longer 荷しています。 and moving it up shorter. After the adjustment, never 縫い目巾は6.5〜1 5mmまで調整可能です。 ... -
Page 11: Adjusting Needle Guard
4-7 Adjusting Needle Guard 4-7 針 ガードの調 整 〈 F i g . 8,9 〉 Mount the needle guard (81225) in the groove on the 針 ガードは(81225と80225の)2種 類 です。縫 い目 巾 を変 throat plate (81244IW), as shown in (Figure 8), and adjust 更したときは、必ず針ガード(80225)を調整し直してくださ its position so that the clearance between the needle and い。針ガードの調整をしないと、針折れ・目飛びの原因にな the guard is 1mm. Hold the guard in position by means of ります。 the screw (90). Mount another needle guard (80225) on the feed bar a) 針 ガ ード( 8122 5)は、針 板 (81 244 IW)の 下 側 にネジ (80234B), as shown in (Figure 9), and adjust its position in (90)で取り付けています。 ... -
Page 12: Thread Tension
4-8 Mounting Presser Bar and Adjusting Pressure 4-8 押 エ金 の調 整 〈Fig.10〉 of Presser Foot 押エ棒(80660, 80661)が滑らかに上下することを確認し The presser bars must move freely. て、押 エ金 を取 り付 けます。 a) Remove the face cover (80887A) and determine the a) 高さ調整 position of the set collar (482C), as follows: 上 面 カ バ ー ( 8 0 8 8 7 A ) を は ず し て 、 カ ラ ー ( 4 8 2 C ) の ... -
Page 13: Trouble Shooting
5. TROUBLE SHOOTING When trouble occurs while operating the machine, refer to the following table for selecting suitable measures: Trouble Cause Cure Needle thread breaks 1. Damaged looper Replace looper. 2. Needle thread too tight Reduce tension. 3. Worn out feed dog causing fine Relace feed dog. stitches 4. Thread twisting or entangling Secure correct threading. between thread stand and needle 5. Improper needle setting; Set needle properly; Bent or damaged needle Replace needle. 6. Needle thread too loose Increase tension. ... - Page 14 5. ミシンのトラブルの原因と対処 ミシンを縫っていてトラブルが発生しましたら、次の表を参考にして対処してください。 トラブル内容 原 因 対 処 上糸が切れる 1. ルーバーに傷がある。 ルーパーを交換す。 2. 上糸調子のテンションが強すぎる。 テンションを弱くする。 3. 送リ金が摩滅して縫目がこまかくなる。 送リ金を交換する。 4. 糸立から針までの間で糸がもつれたり、 糸がもつれたり、からまないよう糸通しに ...
- Page 15 ORDERING PARTS 1. Description of each part and its stamp number is described in this parts list. Screws and nuts for parts are shownadjacent to the relevant parts. When ordering parts, describe clearly stamp number with its name of part. 2. The parts which have no Ref. Number can not be delivered independently; always oder it as an assembly. 3. A set of assembled parts is represented by the stamp number of its main parts. 4. The last figure on the parts stamp number advances on each improvement of the parts. 5. Parts No. described in [ ] of Remarks means old parts No. * The parts list is subject to change without prior notice. ご注文上の注意事項 1. ご注文の際は、部品番号、部品名称、個数を明記ください。 2. ...
-
Page 16: 1 Bushing, Oiler And Cover Parts
BUSHING, OILER AND COVER PARTS 0 1 ブッシュ、オイラー、カバー関係 ... - Page 17 BUSHING, OILER AND COVER PARTS 0 1 ブッシュ、オイラー、カバー関係 図 番 部 品 番 号 部 品 名 称 個 数 摘 要 Ref. No. Part No. Description Qʼty Remarks 1 76-81201 Cloth Plate Assʼy ベースカバー組 1 (2-6) Axle ベースカバービン 2 80437A 1 ...
-
Page 18: 2 . M I S C E L L A N E O U S T H R E A D G U I D E A N D T H R E A D T E N S I O N P A R T S
0 2 MISCELLANEOUS THREAD GUIDE AND THREAD TENSI0N PARTS 糸調子、糸ガイド関係 図 番 部 品 番 号 部 品 名 称 個 数 摘 要 Ref. No. Part No. Description Qʼty Remarks 1 81256A Thread Sleeve Assʼy 糸ガイド組 3 (2-4) 2 AS137 Support ... - Page 19 0 2 MISCELLANEOUS THREAD GUIDE AND THREAD TENSI0N PARTS 糸調子、糸ガイド関係 図 番 部 品 番 号 部 品 名 称 個 数 摘 要 Ref. No. Part No. Description Qʼty Remarks 7 22560B Screw for 81256A, AS137A ネジ 3 8 ...
-
Page 20: 3 Needle Lever, Pulley And Crank Shaft Parts
0 3 NEEDLE LEVER, PULLEY AND CRANK SHAFT PARTS クランクシャフト、針棒関係 ... - Page 21 0 3 NEEDLE LEVER, PULLEY AND CRANK SHAFT PARTS クランクシャフト、針棒関係 図 番 部 品 番 号 部 品 名 称 個 数 摘 要 Ref. No. Part No. Description Qʼty Remarks 1 80621H Pulley プーリー 1 Screw for 80621H ネジ 2 80 4 ...
-
Page 22: Presser Foot Lifter And Presser Foot Parts
PRESSER FOOT LIFTER AND PRESSER FOOT PARTS 0 4 押エ揚ゲ、押エ金関係 ... - Page 23 PRESSER FOOT LIFTER AND PRESSER FOOT PARTS 0 4 押エ揚ゲ、押エ金関係 図 番 部 品 番 号 部 品 名 称 個 数 摘 要 Ref. No. Part No. Description Qʼty Remarks 1 80663 Presser Foot Spring, upper 押エ板バネ (上) 2 Presser Foot Spring, lower 押エ板バネ (下) 2 ...
-
Page 24: 5 Looper Drive Parts
LOOPER DRIVE PARTS 0 5 ルーパー関係 ... - Page 25 LOOPER DRIVE PARTS 0 5 ルーパー関係 図 番 部 品 番 号 部 品 名 称 個 数 摘 要 Ref. No. Part No. Description Qʼty Remarks 1 29442N Eccentric Assʼy ルーバーロッド組 2 (2, 4-9) Connecting Bearing ルーバーロッド 2 80236 2 (3) ...
-
Page 26: 6 Feed Lift And Feed Driving Parts
FEED LIFT AND FEED DRIVING PARTS 0 6 送り関係 ... - Page 27 FEED LIFT AND FEED DRIVING PARTS 0 6 送り関係 図 番 部 品 番 号 部 品 名 称 個 数 摘 要 Ref. No. Part No. Description Qʼty Remarks 1 29099V Feed Drive Eccentric Assʼy 送リロッド組 1 (2, 4-6) 80651 Feed Rocker Eccentric Connection 送りロッド 2 ...
-
Page 28: Numerical Index Of Parts
NUMERICAL INDEX OF PARTS パーツ索引 PART NO. PAGE PART NO. PAGE PART NO. PAGE PART NO. PAGE 41046G 13-42 80667 15-15,19-3 81253 15-60 8A 23-12 HA10 23-21 51134V 17-32 80668 15-24 81255 13-41 11 23-16 80046 15-45 80669 15-41,15-53 81256 14-3 HS15A 23-4 80220C 19-20 80673C 13-25 81256A ... - Page 29 NUMERICAL INDEX OF PARTS パーツ索引 PART NO. PAGE PART NO. PAGE PART NO. PAGE PART NO. PAGE SCREW 22565C 17-34 NUT (ネジ) (ナット) 22570 19-16,19-25 22KH 21-45 22574 13-7 18 21-36,23-29 HS24C 13-51 22587 17-16,23-3 HA18A 23-9 ...
-
Page 30: Screw, Nut & Washer
HR-2A SCREW, NUT & WASHER (ネジ、ナット、ワッシャー) - Page 32 NEWLONG INDUSTRIAL CO., LTD. 〒125-0063 東 京 都 葛 飾 区 白 鳥 4− 8− 14 本社営業本部 TEL03(3603)2284㈹ FAX03(3603)2253 NL URL/E-mail 工業グル−プホ−ムペ−ジ URL http://nlwww.com/ E-mail info@nlwww.com ●本製品は改良のため予告なしに仕様・デザインを変更することがありますのでご了承ください。●記載されている内容の無断転用を禁じます。 13. Feb. 2008...
Need help?
Do you have a question about the HR-2A and is the answer not in the manual?
Questions and answers