Advertisement
Quick Links
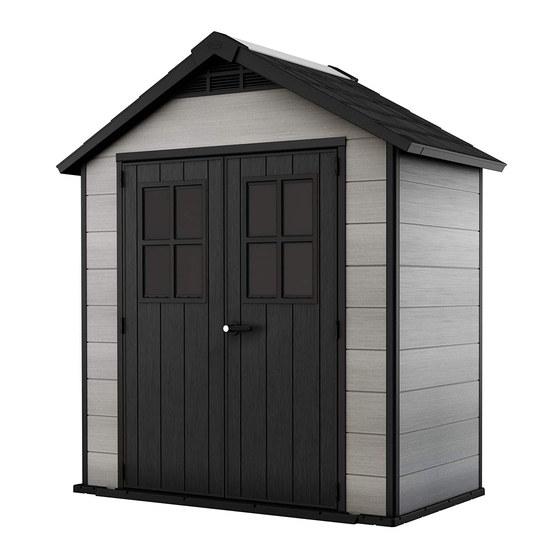
OAKLAND 754
USER MANUAL | MODE D'EMPLOI | MANUAL DEL USUARIO | GEBRAUCHSANLEITUNG |
GEBRUIKSHANDLEIDING | MANUALE PER L'UTENTE | MANUAL DO UTILIZADOR | 取扱説明書
WARRANTY ACTIVATION
US, Canada:
Tel: +1-877-638-7056
Fax: +1-704-263-9271
UK: Tel: +44-121-506-0008
Fax: +44-121-422-0808
Spain: Tlf: +34-976-46-00-06
Fax: +34-976-460-281
Other European Countries:
Tel: +31 (0) 161 22 8300
Japan: Tel : +81-36-426-0711
Email : info@keterjapan.com
Thank you for your purchase of the Keter shed. In order to activate your warranty,
please log onto our website and fill in the form under warranty activation.
この度は Keter 物置をご購入いただきまして有難うございます。
保証につきましてご不明点ございましたら上記までお問合せください。
SKU: 17197419
WWW.KETER.COM
Advertisement

Related Manuals for Keter DUOTECH OAKLAND 754


Summary of Contents for Keter DUOTECH OAKLAND 754
- Page 1 Tel: +31 (0) 161 22 8300 Japan: Tel : +81-36-426-0711 Email : info@keterjapan.com Thank you for your purchase of the Keter shed. In order to activate your warranty, please log onto our website and fill in the form under warranty activation. WARRANTY ACTIVATION この度は...
- Page 2 SITE PREPARATION | PRÉPARATION DU SITE | PREPARACIÓN DEL LUGAR | VORBEREITUNG DES AUFSTELLUNGSORTES | VOORBEREIDING VAN HET TERREIN | PREPARAZIONE DEL LUOGO DI MONTAGGIO | PREPARAÇÃO DO LOCAL | 組立場所について Level the ground surface | Égalisez la surface du sol | Nivele la superficie del suelo | Ebnen Sie die Bodenoberfläche | Maak de bodem vlak | Livella la superficie del terreno | Nivele a superfície do solo | 水平な地面の上で組み立ててください。...
- Page 3 BEFORE STARTING ASSEMBLY | AVANT DE COMMENCER LE MONTAGE | ANTES DE EMPEZAR EL ARMADO | VOR MONTAGEBEGINN | VOORDAT U BEGINT TE MONTEREN | PRIMA DI INIZIARE IL MONTAGGIO | ANTES DE INICIAR A MONTAGEM | 組立開始前に Read the care and safety guidelines at the end of this manual | Check to ensure that there are no missing or damaged parts BEFORE starting or arranging assembly | Review all assembly instructions | Assemble all the parts according to the directions in this manual.
- Page 4 SHED PARTS | PIÈCES DE L’ABRI | PARTES DEL COBERTIZO | TEILE DES SCHUPPENS | ONDERDELEN VAN HET SCHUURTJE | COMPONENTI DEL DEPOSITO ATTREZZI | PEÇAS DO ABRIGO | 物置部品について Remove all parts from the package(s) and spread them out on a clean work surface | Code letters are imprinted on each part for easy identication | Retirez toutes les pièces du/des paquet(s) et étalez-les sur une surface de travail propre | Des lettres sont imprimées sur chaque pièce pour une identification facile | Saque todas las piezas del paquete o paquetes y póngalas sobre una superficie de trabajo limpia | El código de letras está...
- Page 5 WINDOW PARTS | PIÈCES DE LA FENÊTRE | PARTES DE LA VENTANA | FENSTERELEMENTE | VENSTERONDERDELEN | PARTI DELLA FINESTRA | PEÇAS DA JANELA | 窓パーツ (x2) (x2) (x4) DOOR PARTS | PIÈCES DE LA PORTE | PARTES DE LA PUERTA | TÜRELEMENTE | DEURONDERDELEN | PARTI DELLA PORTA | PEÇAS DAS PORTAS | 扉パーツ...
- Page 6 SMALL PARTS | PETITES PIÈCES | PARTES PEQUEÑAS | KLEINTEILE | KLEINE ONDERDELEN | MINUTERIA | PEÇAS PEQUENAS | 小パーツ (x2) (x4) (x2) (x6) (x2) (x8) (x2) (x2) (x1) SCREWS | VIS | TORNILLOS | SCHRAUBEN | SCHROEVEN | VITI | PARAFUSOS | ネジ inch inch inch...
- Page 7 FLOOR ASSEMBLY | MONTAGE DU SOL | ARMADO DEL PISO | MONTAGE DER BODENPLATTE | VLOERMONTAGE | MONTAGGIO DEL PAVIMENTO | MONTAGEM DO PISO | 床パーツ組立方法 sc15 (x1) (x1) (x1) (x1) sc15 x 1 Front | Avant | Delante | Vorderseite | Voorkant | Anteriore | Frente | 前方向...
- Page 8 s26b (x2) (x1) No pre-drilled holes | Pas de trous pré-percés | Sin agujeros pretaladrados | Ohne vorgebohrte Löcher | Geen voorgeboorde gaten | Buchi preforati non presenti | Sem buracos perfurados previamente | ドリル穴は開いていません s26b x2 Front | Avant | Delante | Vorderseite | Voorkant | Anteriore | Frente | 前方向...
- Page 9 (x1) Front | Avant | Delante | Vorderseite | Voorkant | Anteriore | Frente | 前方向 BP (x1) Front | Avant | Delante | Vorderseite | Voorkant | Anteriore | Frente | 前方向...
- Page 10 BP (x1) BP (x1) Front | Avant | Delante | Vorderseite | Voorkant | Anteriore | Frente | 前方向 BP (x1) BP (x1) Front | Avant | Delante | Vorderseite | Voorkant | Anteriore | Frente | 前方向...
- Page 11 Front | Avant | Delante | Vorderseite | Voorkant | Anteriore | Frente | 前方向 (x1) Front | Avant | Delante | Vorderseite | Voorkant | Anteriore | Frente | 前方向...
- Page 12 s13b (x8) No pre-drilled holes | Pas de trous pré-percés | Sin agujeros pretaladrados | Ohne vorgebohrte Löcher | Geen voorgeboorde gaten | Buchi preforati non presenti | Sem buracos perfurados previamente | ドリル穴は開いていません s13b s13b BP (x3)
- Page 14 (x2) s13b (x8) No pre-drilled holes | Pas de trous pré-percés | Sin agujeros pretaladrados | Ohne vorgebohrte Löcher | Geen voorgeboorde gaten | Buchi preforati non presenti | Sem buracos perfurados previamente | ドリル穴は開いていません s13b s13b...
- Page 15 FP (x2) S45b (x2) s45b...
- Page 16 FP (x4) s13b (x16) No pre-drilled holes | Pas de trous pré-percés | Sin agujeros pretaladrados | Ohne vorgebohrte Löcher | Geen voorgeboorde gaten | Buchi preforati non presenti | Sem buracos perfurados previamente | ドリル穴は開いていません s13b s13b...
- Page 17 S45b (x2) (x1) s45b S45b (x2) s45b...
- Page 18 (x2) (x1) sc15 (x2) sc15...
- Page 19 sc15 (x4) (x2) sc15 x4 No pre-drilled holes | Pas de trous pré-percés | Sin agujeros pretaladrados | Ohne vorgebohrte Löcher | Geen voorgeboorde gaten | Buchi preforati non presenti | Sem buracos perfurados previamente | ドリル穴は開いていません NEUKをはめ込んだ後、NELR×2を内側にスライドさせて(外壁から押す)、NEUK、NELRをはめ込む。...
- Page 20 (x1) (x1) sc15 (x2) No pre-drilled holes | Pas de trous pré-percés | Sin agujeros pretaladrados | Ohne vorgebohrte Löcher | Geen voorgeboorde gaten | Buchi preforati non presenti | Sem buracos perfurados previamente | ドリル穴は開いていません sc15 sc15...
- Page 21 s13b (x2) s13b s13b sc15 (x1) (x1) (x3) sc15 s13b x1...
- Page 22 s13b (x2) s13b x1...
- Page 23 ROOF ASSEMBLY | MONTAGE DU TOIT | ARMADO DEL TECHO | DACHMONTAGE | DAKMONTAGE | MONTAGGIO DEL TETTO | MONTAGEM DO TELHADO | 屋根パーツの組立方法 (x2) (x2) (x2) sc15 (x14) sc15 x7...
- Page 24 (x2) (x2) sc15 (x10) sc15...
- Page 25 (x2)
- Page 26 sc15 (x6) (x2) sc15 x1 sc15 x2...
- Page 27 (x1) (x1) s26b (x1) (x6)
- Page 28 sc15 (x10) sc15 DOOR ASSEMBLY | MONTAGE DE LA PORTE | ARMADO DE LA PUERTA | MONTAGE DER TÜR | DEUR- MONTAGE | MONTAGGIO DELLA PORTA | MONTAGEM DA PORTA | 扉パーツの組立方法 (x4) (x8) sf13 (x16) sf13 x4 sf13...
- Page 29 (x1) (x1) (x2) (x1) (x1)
- Page 30 sc15 (x12) sc15 sc15 sc15 (x2) sc15 (x4) sc15 sc15...
- Page 31 s13b (x26) s13b (x6) sc15 (x12) sc15...
- Page 32 WINDOW ASSEMBLY | MONTAGE DE LA FENÊTRE | VENTANA DEL TECHO | FENSTERHMONTAGE | RAAMMONTAGE | MONTAGGIO DE LA FINESTRA | MONTAGEM DO JANELA | 窓パーツの組立方法 (x2) (x4)
- Page 33 sc15 (x18) (x2) sc15 x9 sc15 x9...
- Page 34 sc15 (x8) sc15 x2...
- Page 35 sc15 (x4) sc15 x2 (x1) (x1) (x1) sc15 (x1)
- Page 36 sc15 (x2) (x1) (x1) (x1) sc15 x2 (x1) (x1) (x1) (x1) sc8 x1...
- Page 37 (x2) sc15 (x2) sc15 x2...
- Page 39 OPTION | OPTION | OPCIÓN | OPTION | OPTIE | OPZIONE | OPÇÃO | オプション If you find that the shed is not level, use shims on either side of the shed or door | Si vous trouvez que votre abri n’est pas de niveau, mettez des cales sur chaque côté...
- Page 40 s13b (x7) Inside Intérieur Interior Innenseite Binnenkant Interno s13b x1 Interior 内側 s13b x1...
- Page 41 (x2) s13b sc15 (x6) (x10) No pre-drilled holes | Pas de trous pré-percés | Sin agujeros pretaladrados | Ohne vorgebohrte Löcher | Geen voorgeboorde gaten | Buchi preforati non presenti | Sem buracos perfurados previamente | ドリル穴は開いていません sc15 x3 s13b x5...
- Page 42 sc15 (x6) (x2) No pre-drilled holes | Pas de trous pré-percés | Sin agujeros pretaladrados | Ohne vorgebohrte Löcher | Geen voorgeboorde gaten | Buchi preforati non presenti | Sem buracos perfurados previamente | ドリル穴は開いていません sc15 x1 sc15 x2 sc15 (x2) s45b (x2) (x2) s45b x1...
- Page 43 s13b (x12) S45b (x18) S45b x18...
- Page 44 OPTION | OPCIÓN | OPTIE | OPZION | OPÇÃOE | オプション Shelves | Étagères | Regale | Estantes | Planken | Scaffali | Prateleria | 棚 * It is optional to purchase a wooden plank and use it as a shelf. L’achat facultatif d’une planche en bois vous permettra de créer une étagère.
- Page 45 OPTION | OPTION | OPCIÓN | OPTION | OPTIE | OPZIONE | OPÇÃO | オプション SECURING THE SHED TO A FOUNDATION Affix the shed to the foundation by drilling holes in the shed floor at the pre-marked locations and screwing it into the foundation using appropriate screws (screws not included). FIXER L’ABRI SUR UNE FONDATION Fixez l’abri à...
- Page 46 * For your safety - make sure you follow the paint’s care & safety guide prior to application. may be required. ABRIS KETER DUOTECH™ - PAROIS POUVANT ÊTRE PEINTES Ce placard n’a pas besoin d’aucun entretien et est fait d’un composé unique permettant de peindre les panneaux muraux brossés.
- Page 47 * Voor uw veiligheid moet u ervoor zorgen dat u de zorg- en veiligheidsinstructies van de verf opvolgt voordat u deze gaat gebruiken. PORTA ATTREZZI KETER IN DUOTECH ™ - PANNELI VERNICIABILI Questa capannone è senza manutenzione e è realizzata con un composto unico che consente che i pannelli spazzolati dei muri siano pitturati.
- Page 48 AND SAFETY GUIDELINES CARE AND SAFETY GUIDELINES shed is intended for storage purposes only. It is not designed for habitation. • The shed is intended for storage purposes only. It is not designed for habitation. • It is strongly recommended to secure the shed to an immovable object or anchor to the ground by drilling holes in the shed floor strongly recommended to secure the shed to an immovable object or anchor to the ground by drilling holes in the shed floor he pre-marked locations) and inserting proper screws into the ground (screws are not included).
- Page 49 • Tragen Sie eine Schutzbrille und befolgen Sie bei Verwendung von Elektrowerkzeugen immer die Anweisungen des Herstellers. • Tragen Sie eine Schutzbrille und befolgen Sie bei Verwendung von Elektrowerkzeugen immer die Anweisungen des Herstellers. • Reinigen Sie den Schuppen mit einem Gartenschlauch und einem milden Reinigungsmittel. Verwenden Sie auf keinen Fall eine harte Bürste und •...
- Page 50 お手入れおよび安全にご使用いただくためのガイドライン • 物置は、物品を収納する為の物で、居住用ではありません。 • 物置を動かないように物置の床に穴(あらかじめ印を付けた場所で)を開け、適切なネジを地面に差し込み (ネジは含まれていません)、土台に固定するか、地面に固定することを推奨します。 • 強風時や寒冷時には組み立てないでください。 • 物置は定期的にチェックをし、傾きがなく水平になっていることを確認ください。 • スチール製のエッジを持つ部品を取り扱うときは注意してください。 • 物置の組み立て、または取り扱う時は、ユーザーマニュアルに記載されている工具のみを使用してください。 • 物置組立時、メンテナンス時は必ず作業用手袋、安全ゴーグル、長袖を着用してください。 • 物置の近くで芝刈り機や機械式鎌等を使用しないでください。 • 電動工具を使用するときは、安全ゴーグルを着用し、常に製造元の指示に従い、取扱ください。 • 物置を洗浄は、庭のホースか中性洗剤で洗浄ください。脱脂剤や油性またはアセトンベースの洗浄剤など、 硬いブラシや研磨剤入りの洗剤は使用しないでください。 •最近使用されたグリルやブロートーチ、揮発性化学物質などの熱いものを物置に保管しないでください。 • 歪みが発生する可能性があるため、壁に重いものを置かないでください。 • 屋根に積もった雪や葉は綺麗にしてください。屋根に大量の雪が降ると物置が損傷する恐れがあります。 • 風の方向は、物置の場所を決定する際に考慮すべき重要な要素となります。特にドア側に対する風の露出を減らし、 風害を防ぐために、物置が使用されていないときはドアを閉じてロックしてください • 屋根の上に立たないでください。 • 地方自治体に相談して物置を建てるのに許可が必要かどうかを確認してください...
- Page 52 Made in Israel by | Fabriqué en Israël par | Fabricado en Israel por | Hergestellt in Israel von | Gemaakt in Israël door | Realizzato in Israele da | Fabricado em Israel por | イスラエル製 Keter Plastic Ltd., 2 Sapir St. Industrial Area, Herzliya 46852, Israel For assistance with assembly, or to request replacement parts, log onto our website or call Customer Service.
Need help?
Do you have a question about the DUOTECH OAKLAND 754 and is the answer not in the manual?
Questions and answers