Table of Contents
Advertisement
Quick Links
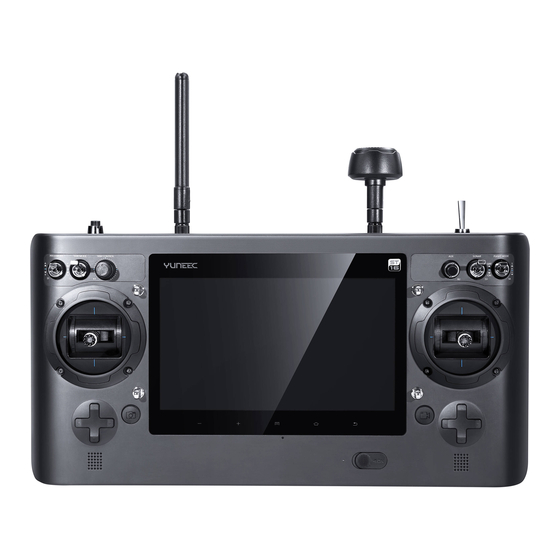
ST16 USER MANUAL
INTRODUCTION
The ST16 is equipped with a touchscreen display that allows for changing
various settings and viewing real-time telemetry data and streaming video during
flight. The ST16 seamlessly integrates control of the camera so you can easily
take still photos and start/stop video recording using the corresponding
buttons.
OPERATING INSTRUCTIONS:
ST16 AND RECEIVER BINDING
STEP 1): Power on the ST16 and tap "RC" on the main interface
STEP 2): Tap Model Select and if required press "OK" to bypass any pop up warning/alerts.
STEP 3): Tap to create a new model and if required press "OK" to bypass any pop up warn-
ings/alerts.
STEP 4): Tap Flight Settings and if required press "OK" to bypass any pop up warnings/alerts.
STEP 5): Lift the H920 back end upward approximately 45° , then back down to "level" twice till the
main LED indicator blinks yellow.
STEP 6): Tap the Refresh icon. Select the code of the H920 listed in the column under "Model" and
tap Bind ,then tap "OK" after the connection has been established
STEP 7): When tapping, you will hear two long beeps from the aircraft. That means the ST16 is
bound to the H920 successfully.
STEP 8): Tap [
] twice to return to the main screen and the model /receiver should automatically
connect to ST16
NOTICE: The H920 main LED indicator will blink red and white if the TORNADO loses GPS signal
/lock. The H920 main LED indicator will be solid color of the current mode if the GPS signal/lock is
acquired.
Advertisement
Table of Contents

Related Manuals for YUNEEC ST16


Summary of Contents for YUNEEC ST16
- Page 1 STEP 6): Tap the Refresh icon. Select the code of the H920 listed in the column under ”Model” and tap Bind ,then tap “OK” after the connection has been established STEP 7): When tapping, you will hear two long beeps from the aircraft. That means the ST16 is bound to the H920 successfully.
- Page 2 ST16 INSTRUCTIONS CHARGING THE LI-ION ST16 BATTERY You can charge the ST16 battery by using supplied USB cable and inserting it into the USB port on the charger. A green blinking LED indicates the charger is powered on and ready to charge, and a red blinking LED indicates the battery is charging.
- Page 3 Federal Communications Commission (FCC) Interference Statement This equipment has been tested and found to comply with the limits for a Class B digital device, pursuant to Part 15 of the FCC Rules. These limits are designed to provide reasonable protection against harmful interference in a residential installation.
- Page 4 IC Radiation Exposure Statement for Canada This device complies with Industry Canada licence-exempt RSS standard(s). Operation is subject to the following two conditions: (1) this device may not cause interference, and (2) this device must accept any interference, including interference that may cause undesired operation of the device. Le présent appareil est conforme aux CNR d'Industrie Canada applicables aux appareils radio exempts de licence.
Need help?
Do you have a question about the ST16 and is the answer not in the manual?
Questions and answers