RECARO Zero.1 Instructions For Assembly And Use
Hide thumbs
Also See for Zero.1:
- Instructions for installation and use manual (398 pages) ,
- Instructions for assembly and use (244 pages) ,
- Quick manual (3 pages)

Related Manuals for RECARO Zero.1


Summary of Contents for RECARO Zero.1
- Page 1 取扱説明書 兼 保証書 INSTRUCTIONS FOR ASSEMBLY AND USE Zero.1 UN R129.00 i-Size 身長 40cmから105cm以下 4才頃まで...
- Page 2 重要:この取扱説明書はいつでも読み返すことができるよう、シートベー ス背面にある取扱説明書収納スペースに大切に保管して下さい。 Thank you for choosing a RECARO child seat. With our unique experience we have been revolutionising car, aircraft and racing car seating for over 100 years. This unrivaled expertise is reflected in detail in every one of our child safety systems.
-
Page 4: Table Of Contents
目次 ページ CONTENT Page 1.はじめに 1. Description 2.安全に関する注意 2. Safety notice 3.お使いになる前に 3. Prior to first use 4.車両への取り付け 4. Installation of the child seat 5.お子さまの乗せ方(ベルトの肩位置高さ調整方法) 5. Strapping the child in (with height adjustment of belt) 6.後ろ向き/前向きの使用方法 6. Forward/rearward 7.リクライニング機能 7. Adjusting resting position 8.車両からの取り外し... -
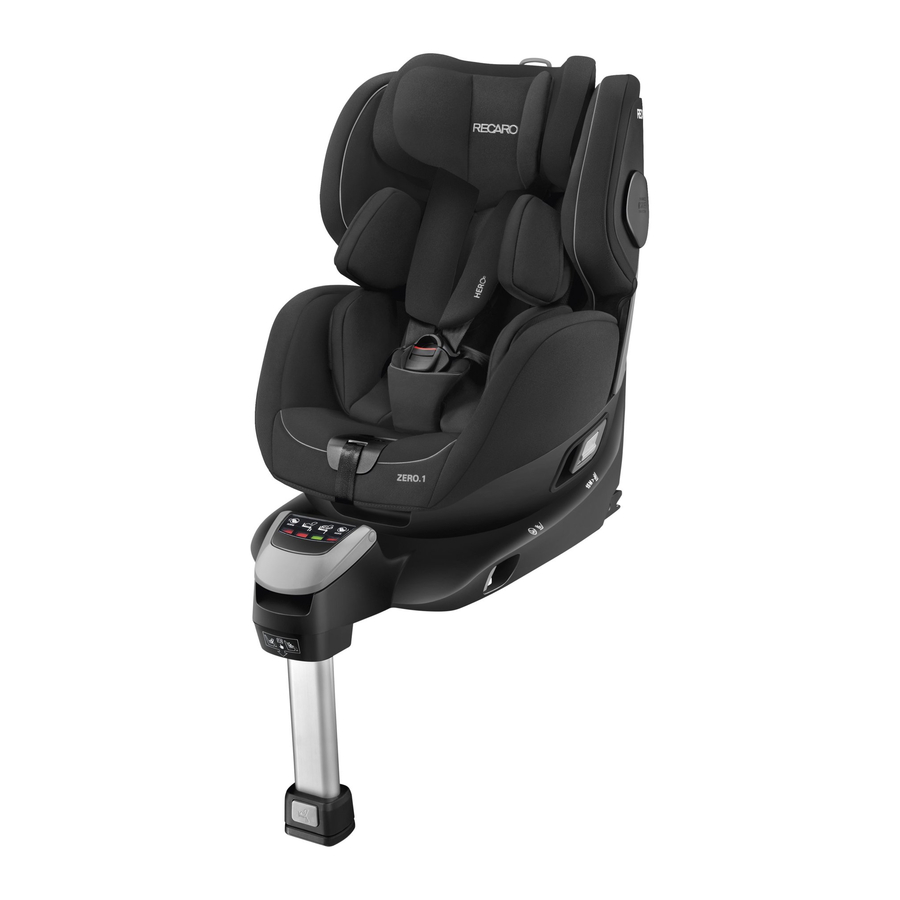
Page 5: Description
D or B1. Please check you vehicle handbook to ensure these positi ons are available, as well as checking the provided vehicle model list for compatability. The latest version of the vehicle model list can be found on our website (www.recaro-cs.com). 各部の名称... - Page 6 お子さまの適応条件 警告 ・ 下記条件を満たすお子さまにご使用ください。 ・ お子さまの月齢が15ヶ月かつ、身長76cmを超えるまでは前向きで使用しないでください。 お子さまの体重に合わせて下記のような使い方をします。 4才頃 新生児 身長105cm 体重18kg 身長40cm 身長76cm 月齢15ヶ月 進行方向に対して 進行方向に対して 後ろ向き 前向き ベビーサポートクッション使用期間 ・ サンキャノピーは前向 きの時は取り外してく ださい。 ・ 月齢15ヶ月までは ・ 身長76cm未満の場合は、 ・ 身長76cmまでは必ずベビーサポート 後ろ向きでお使い 月齢が15ヶ月を超えても、 クッションをお使いください。 ください。 前向きでお使いいただけま せん。 ・ サンキャノピーは使用できます。 ・ また月齢15ヶ月未満の場 (お子さまの頭部がサンキャノピーに接触する場合は取り外 合は、身長が76cmを超え...
-
Page 7: Safety Notice
安全に関する注意 2. SAFETY NOTICE 安全のために使用前には必ず本書をよく読んで、十分理解してから正しくご使用ください。また、こ のチャイルドシートを車両に取り付ける場合は、必ず車種適合リストを確認してください。本書は本 体シートベースの収納スペースに保管し、解らないことがあれば直ぐに確認してください。チャイル ドシートは交通事故などの際にお子さまの傷害の軽減を目的としており、必ずしも無傷で守るもので は有りません。 危険 取り扱いを誤ると、死亡または重大な傷害を負う危険が切迫して生じます。 ● お子さまを車内にひとりで放置しないでください、予期せぬ事故の原因となります。チャイルド シートを使用するときは保護者のかたが同乗して常に見守ってください。日差しの強い日は車内温度 が高くなり、お子さまが脱水症状になるおそれがあります。 ● お子さまを乗せたときには、ベルト、股パッド、肩パッドが正しく装着され、左右の差込タング がしっかりバックルに差し込まれて抜けないことを確認してください。 ● お子さまがバックルボタンを押してしまう可能性があります。差込タングがバックルからはずれ ていないことを常に確認してください。はずれていると本来の機能を果たさないばかりか、シートベ ルトが首に巻き付くおそれがあります。 ● アジャスタベルトがお子さまの体に触れないよう注意してください。首などに巻きつき窒息する おそれがあります。 ● お子さまがチャイルドシートの上に正座をしない、中腰にならない、立たないように注意してく ださい。 ● 車両に取り付ける場合は、取扱説明書および本体表示に従ってISOFIXコネクタを車両の取付け金 具に固定し、インジケータが緑色に変わっていることを確認してください。また、チャイルドシート 本体を前後左右に強くゆすり、確実に取り付けられていることを確認してください。 ● ISOFIXコネクタを車両の取付け金具に固定する場合は、周辺に障害物が無いか、車両シートベル トが挟まっていないかなどを確認してください。 ● 本製品を車両シートベルトやひも、ロープなどで固定しないでください。 ● チャイルドシートが本来の機能を発揮できず危険を招くおそれがありますので、次のような方法 では使用しないでください。 ・使用条件に適合しないお子さまや、取り付けできない座席では使用しない ・ベルトにねじれ、ゆるみ、たるみがある状態で使用しない。お子さまの首にベルトが巻き付 き窒息するおそれがあります ・サポートレッグを折りたたんだ状態で使用しない ・ヘッドレストが極端に出っ張っている座席で使用しない ・車両の内装や座席の形状により正しく取り付けができない、チャイルドシートの回転やリク ライニング操作、ヘッドサポートの高さ調節ができないなどの場合は使用しない ● 次の条件のいずれか1つでもあてはまる場合は、その座席ではお使いいただけません。 ・エアバッグが装備されている座席で使用しない(サイドエアバッグやカーテンエアバッグの み装備の座席を除く)... - Page 8 ・助手席で使用しない ・車両の工場出荷時と異なる座席で使用しない(市販の座席に交換した車両など) ・車両の座席や取付け金具に損傷がある場合は使用しない ・車両進行方向に対して横向き、または後向きの座席で使用しない ・座席の形状が極端に凹凸で、取り付けたときにチャイルドシートが不安定になる座席で使用し ない ・サポートレッグの先端が届く位置に、車両のスライドレールや床下収納スペース、エアコン吹 き出し口や凹凸部分、その他の障害がある座席では使用しない ・車両の床に対して座席の座面が低いまたは高い座席、または床の形状などにより、サポートレ ッグを正しく装着できない座席で使用しない ● チャイルドシートを、車両の進行方向に対して横向きにしたままで走行しないでください。 ● 事故など緊急時は保護者の方がバックルボタンを解除し、シートベルトをはずして速やかにお子 さまを車外の安全な場所に脱出させてください。万一バックルが外れないときは、ハサミなどでシー トベルトを切ってください。 警告 取り扱いを誤ると、死亡または重大な傷害を負うおそれがあります。 ● 本製品の回転、リクライニング、ASP(側面保護機能)、ヘッドサポート、サポートレッ グ、ISOFIXコネクタなどを操作するときは、お子さまや隣に座っている同乗者及び操作する人の、手 や足や体の一部を可動部に挟まないように注意してください。 ● リクライニング操作をするときは必ずお子さまをチャイルドシートから降ろし、お子さまをチャ イルドシートに近づけない状態にしてから行ってください。可動部に手や足や体の一部を挟むおそれ があります。 ● リクライニングによって開いた隙間に、手などを入れないように注意してください。 ● お子さまが厚着のままで使用しないでください。しっかり拘束できなかったり、抜け落ちたりす るおそれがあります。車内を適切な温度にしてから上着を脱ぎ、出来るだけ薄着で使用してくださ い。 ● お子さまの服や靴のひも・コードなどが、チャイルドシートに引っかかったり巻き込まれたりし ないよう注意してください。 ● 走行中はチャイルドシートの操作をしないでください。また同乗している他のお子さまなどがチ ャイルドシートに触らないように注意してください。可動部や隙間に手などを挟んだり、チャイルド シートが車両から外れたりするおそれがあります。 ● 本製品を車両に取り付けたり取り外したりする時や、お子さまの乗せ降ろしや各操作を行う時 は、車両を平らで安全な場所に駐車してから行ってください。 ● このチャイルドシートは、車種適合リストにて取り付け可能な車両座席以外では使用しないでく ださい(車種適合リストはレカロチャイルドセーフティのホームーページ等で公開しています)。 ● 緊急時の脱出の妨げになる座席に、チャイルドシートを取り付けないでください。...
- Page 9 ● シフトレバーやパーキングブレーキ、ミラーなど、運転操作に支障をきたす座席にチャイルドシ ートを取り付けないでください。 ● サイドアエバッグやカーテンエアバッグの近くで使用する場合は、お子さまの体がそれらにもた れかからないようにしてください。エアバッグが膨らんだ際に大変危険です。 ● 衝突事故にあったり落下させたりなど、一度でも強い衝撃を受けた履歴のあるチャイルドシート は使用しないでください。外観上問題が確認できなくても内部で破損していることがあります。 ● チャイルドシートの使用履歴がわからない場合(中古品やレンタルなど)は使用しないでくださ い。 ● チャイルドシートを使用しないときも必ず車両に固定し、チャイルドシートの差込タングをバッ クルに挿してください。急ブレーキの時などに車内に転がり危険です。 ● 車両の座席から取り外したヘッドレストや、チャイルドシートから取り外した部品は、車両から 降ろしてお子さまの手が届かない場所に保管してください。車内に置いたままにすると急ブレーキや 衝突時に人にあたったり、運転操作に支障をきたしたりするおそれがあります。 ● チャイルドシートを安全にお使いいただくために、走行前には必ず次のことを確認してくださ い。 ・チャイルドシートが車両に確実に固定されている(本体を前後左右にゆすり確認する) ・ベルトが正しい位置になるように、ヘッドサポートの高さが調節されている ・ベルトにゆるみ、たるみ、ねじれがない ・ベルトの腰側をお子さまの腰部に密着させ、腰骨のできるだけ低い位置にかかるようにする ・ベルトの肩側を常に肩の中央にかかるようにする。ベルトを首から離すと共に肩から落ちな いようにする。 ・差込タングが左右ともしっかりとバックルに差し込まれ、抜けない ・サポートレッグが車両の床から離れていない ・回転やリクライニングのレバーが元の位置に戻っていて、シートシェルがシートベースに確 実に固定されている ・ISOFIXコネクタが車両の取付け金具にしっかり固定されている ・全てのインジケータが緑色になっている ● お子さまの月齢が15ヶ月かつ、身長76cmを超えるまでは前向きで使用しないでください。 ● お子さまの体への負担を軽減するため、連続して1時間以上使用しないでください。 ● お子さまを座らせたときに、後頭部がヘッドサポートから上に出るときは使用しないでくださ い。 ● シートカバーや内蔵されているパッドやウレタンなどを取り外した状態で使用しないでくださ い。 ● 購入時に本製品が入っていたビニール袋はすぐに廃棄してください。 ● 挿入ガイドやサンキャノピーを使用しない場合は、お子さまの手の届かない場所に保管してくだ さい。 ● 本製品を取扱説明書に記載されていない方法で使用しないでください。...
- Page 10 ● 本製品がリコールなどのときに連絡できるよう、購入後すぐに使用者の登録をしてください(登 録方法は付属のお客様登録カードをご覧ください)。 注意 取り扱いを誤ると、重大な傷害や物的損害を負うおそれがあります。 ● 本製品にお子さまを乗せたままで持ち運びしないでください。持ち運びするときはシートベース の左右を持ち、ベルト、ISOFIXコネクタ、サポートレッグ、シートシェルは持たないでください。ま たサポートレッグの可動部などで手や体を挟まないよう注意してください。怪我をするおそれがあり ます。 ● 爪を伸ばしていたり、付け爪をしたりしていると、操作をするときに巻き込まれる可能性があり ますので、十分注意してください。 ● チャイルドシートに直射日光があたると本体やサポートレッグ、差込タングなどが熱くなり、お 子さまがやけどをするおそれがあります。屋内の涼しい場所に駐車するかカバーなどをかけて温度が 高くならないようにしてください。また、お子さまを乗せる前に各部を触り、熱くなっていないこと を確認してから使用してください。 ● お子さまだけで乗り降りさせないでください。必ず保護者の方が乗せおろしをして正しく使用し てください。 ● バックル及びリクライニング、回転部分の隙間に、ゴミや飲食物などが入らないよう注意してく ださい。故障の原因となります。 ● バックルにゴミや飲食物などが詰まって確実に差し込めないとき、または解除しにくいときは使 用しないでください。 ● ベルトに傷がついたときは使用しないでください。 ● お子さまがサンキャノピーに触れないように注意してください。チャイルドシート本体にサンキ ャノピーが正しく取り付けられ外れないことを確認してください。ジョイントが外れたり誤った取り 扱いをすると、お子さまに接触して怪我をするおそれがあります。 ● オープンカーや窓を開けて走行する場合はサンキャノピーを取り外してください。風にあおられ ると危険です。 ● サンキャノピーは、前向きで使うときや、お子さまの頭が接触する場合は取り外してください。 ● 後ろ向きで使うときは、シートベースカバーを取り付けてください。 ● 回転操作をする場合に、チャイルドシートの背もたれなどが車両の座席や内装・ドアなどにあた るときは、無理に回転させないでください。損傷や故障の原因となります。 ● 改造や分解をしないでください、予期せぬ事故につながるおそれがあります。また、取り付けら れているラベルやシールは外さないでください。 ● チャイルドシートが故障や劣化したときは使用しないでください。...
- Page 11 • The belts must not be twisted or trapped and must be completely tightened. • The child seat must not be used after an accident. Please contact Recaro to have the product tested in the factory. • Always ensure that luggage and other items are adequately secured, particularly those on the rear window shelf, as these could cause injury in the event of a collision.
-
Page 12: Prior To First Use
お使いになる前に 3. Prior to first use シートシェルを回転させて、図のようにシートベースカ バーを取り付けてください。 (回転操作方法は6章を参照してください) サンキャノピーの取り付け方法 1.左右末端のジョイントを、本体シェル側面にある差し 込み口(本体シェルとシートカバーの隙間)へ、図のよ うにしっかりと挿入します。 ※差し込む位置は、ラインを目印にしてください。 また進行方向前向き時は、サンキャノピーを取り外して お使いください。... - Page 13 2.図のように、サンキャノピーの末端を本体シェルの 隙間へ収めていきます。 3.スナップボタンを、本体シェルに留めます。 4.サンキャノピーを開閉してみて、ジョイントが本体 シェルから外れないことを確認してください。 (エクステンションがついていないモデルもあります) 警告 お子さまがサンキャノピーに触れないように注意してく ださい。ジョイントの先端などでお子さまが怪我をする 恐れがあります。 また進行方向前向き時は、サンキャノピーを取り外して お使いください。...
-
Page 14: Installation Of The Child Seat
車両への取り付け 4. Installation of the child seat 車両のISOFIX取付け金具が車両座席にかくれて見えにく い場合は、付属の挿入ガイドを図のようにISOFIX取付け 金具に使用することで取り付けしやすくなります。ただ し、車両座席の形状により挿入ガイドが取り付けできな いときは、挿入ガイドは使用しないでください。 注意:挿入ガイドを使用しないときは、お子さまの 手の届かない場所に保管してください。 重要:車両の座席にリクライニング機能がある場合 は、あらかじめ座席の背もたれを少し後方へ倒しておき ます。 Push the ISOFIX guides through the slit in the uphol- stery between the backrest and seat, and onto the ISO- FIX brackets. Ensure that the open side is located on the top. - Page 15 To extend the ISOFIX connectors, lift the lever ISOFIX adjustment handle the support leg, and pull out the con- nectors as far as the stop. 左右のISOFIXコネクタを、車両のISOFIX取付け金具へ カチッと音がするまでしっかり押し込みます。 Now position the RECARO Zero.1 on the ISOFIX brack- ets and push until you hear the connectors lock in place.
- Page 16 は、チャイルドシートのシートベースと座席が出来るだ け密着するよう、座席の背もたれを前方へ起こしてくだ さい。リクライニング機能がない場合はこの作業は不要 です。 重要 : さらにチャイルドシート本体を前後左右に強 くゆすり、確実に取り付けられていること(目安として ズレ3cm以内)を確認してください。 Lift the ISOFIX adjustment handle and push the RECARO Zero.1 towards the backrest until it fits snug- gly against it. サポートレッグを手前にいっぱいに開いたままボタンを 押し、サポートレッグが車両の床に接するよう長さを調 節してください。 注意:インジケーターのサポートレッグ表示(左から 2つめ)が緑色に変わるように操作してください。サポ ートレッグは車両の床に対して斜めになることもありま す。 To adjust the height of the support leg, first slide the sup- port leg up till it reaches the stop and then press the lock- ing mechanism on the front of the support leg.
- Page 17 重要 : インジケーターのサポートレッグ表示(左から 2つめ)が緑に変わっていることを確認してください。 表示が赤のままのときは、再度サポートレッグの長さを 調節してください。 If the length is adjusted correctly, the display for the support foot will change to green as soon as you lower the support leg onto the vehicle floor. If this is not the case, extend the support leg a little further as described above.
-
Page 18: お子さまの乗せ方(ベルトの肩位置高さ調整方法)
お子さまの乗せ方(ベルトの肩位置高さ調整方法) 5. Strapping the child in (with height adjustment of belt) 重要:身長が76cm未満のお子さまには、ベビーサポー トクッションを使用することができます。身長が76cm 以上のお子さまは、ベビーサポートクッションを取り外 してご使用ください。ベビーサポートクッションの着脱 方法は、本章の最後を参照ください。 お子さまをチャイルドシートに深く座らせ、ベルトの肩 位置がお子さまの肩の高さに最も近づくよう調整してく ださい。 The height of the shoulder belts and headrest, can be adjusted hero harness system to the height of the child. The shoulder belts should pass over the child’s shoul- ders at shoulder height or slightly higher. - Page 19 図のように、アジャスタレバーを押したまま、ベルトを 引き出します。 重要:ベルトを引き出す際は、ベルトのみを左右同 時に引っ張ってください。肩パッドの部分を引っ張って も、ベルトは引き出せません。 To loosen the belts, press the belt adjustment button and pull the shoulder belts forwards as shown. バックルの赤いボタンを押して、差込タングを外しま す。 重要:バックルのボタンはお子さまの力で外れにく いよう、固めに設計されています。 Undo the buckle by pressing the red button and pull out the tips in an upward direction. あ...
- Page 20 Tighten the belt by pulling the adjuster strap. The tighter the belt fits the child, the safer he or she is in the RECA- RO Zero.1. We recommend removing thick jackets or pullovers when in the seat. IMPORTANT: Ensure that the lap belts in particular are tight and fitted as low as possible across the child’s...
- Page 21 アジャスタベルトの先のループ部先端を、図のようにア ジャスタボタン裏のフックに取り付けることができま す。 You may also hook the loop of adjuster strap underneath the belt slot. ベビーサポートクッションの着脱方法 重要:身長76cmまでは必ずベビーサポートクッショ ンをお使いください。 Warning! Use the seat reducer until your child has reached ap- prox. 76 cm body height. To remove the insert, open the buckle and lay the belt straps to the outside.
-
Page 22: 後ろ向き/前向きの使用方法
後ろ向き/前向きの使用方法 6. Forward and rearward configuration of the seat 重要: お子さまの月齢が15ヶ月かつ、身長76cmを超えるまで は前向きで使用しないでください。 詳しくは「お子さまの適応条件」のページを参照くださ い。 To make buckling up easier, the seat shell can be turned to the side. シートシェルの回転は、左右どちらかの回転レバーで操 作します。 回転操作レバーの中央にあるボタンを押し下げなが ら、レバーを引きます。 シートシェル部分を手で持ち、ゆっくりと回転させ ます。 注意:回転操作をするときは、可動部にお子さまや 隣に座っている同乗者及び操作する人の手や体などを挟 まないようにしてください。 To unlock the rotating handle, first slide the button in the middle of the lever and then pull the lever outwards. -
Page 23: Adjusting Resting Position
シートシェルの回転機能が確実にロックされているかを 確認してください。 重要 : インジケーターの回転ロック表示(左から3 つめ)が緑に変わっていることを確認してください。ま た、シートシェルを前後左右にゆすり、確実にロックさ れていることを確認してください。 Ensure that the seat shell is locked securely in place. Important: The rotating image indicator must change to green. お子さまの月齢が15ヶ月かつ、身長76cmを超えた場合 は、前向きまたは後向きのどちらでもご使用いただけま す。 We recommend to transport your child in a rear-facing direction as long as possible. リクライニング機能... -
Page 24: Removing The Child Seat
ら取り外します。 注意:挿入ガイドを使用していた場合は取り外し、 お子さまの手の届かない場所に保管してください。 To remove the RECARO Zero.1, lift the ISOFIX adjuster handle on the front of the seat and pull it forward. Press down the light gray buttons and unlock the connectors by pulling on the silver levers as shown. The seat can be... -
Page 25: Removing The Cover And Cleaning The Child Seat
シートカバーの取り外しとお手入れ方法 9. Removing the cover and cleaning the child seat シートカバーなど縫製品を洗濯する際には以下の点にご 注意ください。 ・お洗濯の際、カバーに内蔵されているパッドやウレタ ン類はあらかじめ全て取り外してください。また、お洗 濯後はもとの位置に戻してください。 ・液温は30℃までとし、手洗いして下さい。 ・蛍光増白剤や塩素系漂白剤は使わないでください。 ・アイロンを掛ける場合は低温で行ってください。 ・ドライクリーニングはしないでください。 ・脱水機は使用しないでください。また強く絞るとしわ や破れの原因となります。 ・陰干ししてください。 ・色落ちする場合がありますので、他のものと一緒に洗 濯しないでください。 ・手を傷つけないよう、必要に応じて手袋などを着用し てください。 ベルトのお手入れの仕方 ・通常は固く絞った布で水拭きしてください。汚れがひ どい場合は、中性洗剤を水で薄めた液で汚れを落として から水拭きし、陰干ししてください シートカバーの取り外し方 図のように面テープおよびスナップボタンを取り外しま す。 The seat and belt can be cleaned with lukewarm water and soap. - Page 26 ヘッドサポートカバー全体を手前に抜き取ります。 注意 : 取り外す際に、内部の発泡素材を破損しない ようにしてください。 Remove the headrest cover in a forward direction. 背もたれカバーは、図のようにスナップボタンをすべて 外してから、下方に抜き取ります。 The back pad is attached to the headrest with press studs. After these are opened, the pad can be removed in a downward direction. 図のようにスナップボタンと面テープを外します。 To remove the lower part of the cover, first open the Velcro straps at the back.
- Page 27 バックルカバーからバックルを抜き取り、座面カバーを 本体から外します。 Pull the buckle through the crotch belt pad. サイドサポートのカバーは、図のように、ゴムループと スナップボタンを外します。 Unhook the cover on the outside and remove in a for- ward direction. To remove the cover in the shoulder area, first open the snap fastners/press studs on the outside.
- Page 28 次に、サイドサポートカバー左右内側のスナップボタン を外します。 Then open the press studs in the back area. サイドサポートカバー全体を上方に抜き取ります。 You can now remove the shoulder cover as shown. After washing, allow the cover to dry completely be- fore replacing it in the reverse order of the procedure described above.
- Page 31 見 本...
Need help?
Do you have a question about the Zero.1 and is the answer not in the manual?
Questions and answers