Advertisement
Table of Contents
- 1 Table of Contents
- 2 Safety Precautions
- 3 Installation
- 4 Wiring Connections
- 5 Basic Operation
- 6 Radio Operation
- 7 TV Operation (Optional)
- 8 Bluetooth Operation (Optional)
- 9 USB/SD Operation
- 10 Steering Wheel Control
- 11 Other Operations
- 12 Maintenance
- 13 Infra Red Remote Control (Optional)
- 14 Simple Troubleshooting Guide
- 15 Specifications
- Download this manual
1-DIN AM/FM RADIO WITH RDS
RMVB/DIVX/MP4/MP3/WMA PLAYBACK
USB & SD CONTROL
30 PRESET RADIO MEMORY
AUTOMATIC SAVE & PRESET SCAN
FRONT AUX-IN
HIGH POWER 4X50 WATTS
NO CD MECHANISM
DETACHABLE FRONT PANEL
WITH INDASH 7" TFT DISPLAY
TOUCH SCREEN FUNCTION
REMOTE CONTROL INCLUDED
BLUETOOTH FUNCTION
RCA output
gmVM750BT
media receiver WITH BLUETOOTH
Advertisement
Table of Contents

Related Manuals for GAS GMVM750BT


Summary of Contents for GAS GMVM750BT
- Page 1 1-DIN AM/FM RADIO WITH RDS NO CD MECHANISM RMVB/DIVX/MP4/MP3/WMA PLAYBACK DETACHABLE FRONT PANEL gmVM750BT USB & SD CONTROL WITH INDASH 7" TFT DISPLAY 30 PRESET RADIO MEMORY TOUCH SCREEN FUNCTION AUTOMATIC SAVE & PRESET SCAN REMOTE CONTROL INCLUDED FRONT AUX-IN...
-
Page 2: Table Of Contents
CONTENTS Safety Precautions......................2-3 Installation....................4-5 Wiring Connections......................6-7 Basic Operation......................8-9 Radio Operation......................10 TV Operation (optional)....................11 Bluetooth Operation (optional)..................12 USB/SD Operation....................13 Steering Wheel Control....................14 Other Operations......................15 Maintenance......................16 Infra Red Remote Control (optional)................17 Simple Troubleshooting Guide..................18 Specifications..................19... -
Page 3: Safety Precautions
SAFETY PRECAUTIONS Important Warnings to Take Note of BEFORE Commencing Installation Damage Caused By Incorrect Installation or Usage is NOT Covered By Warranty. PLEASE Take the Time to Read the Installation Notes Carefully. To Validate the Warranty Please Ensure That the Unit is Installed by a Professional, VAT registered Car Audio Installation Company. - Page 4 SAFETY PRECAUTIONS Secure the wiring with cable clamps or adhesive tape. To protect the wiring, wrap adhesive tape around them where they lie against metal parts. To avoid short-circuiting, cover all disconnected lead with insulating tape. There is a possibility of short-circuiting if the leads are not insulated.
-
Page 5: Installation
INSTALLATION Tools for Installation Use the 2 removal wrenches of the old unit to take out the old unit and place with this brand new car radio. The following tools and sup- plies may also be needed for the installation: Tools for Installation: Philips Screw-drivers /Machine Screws /Wire Stripper /Wire Cutter /Hammer /Pencil /Electrical Tape /Electric Drill Supplies for Installation: Machine Screws /Crimp Connectors /14 Gauge Wire for Power Connections /14-16 Gauge Speaker Wires The above are not supplied. - Page 6 INSTALLATION WARNING! Disconnect negative battery terminal from battery before starting installation. Consult the vehicle’s owner’s manual for proper instructions. NOTE: Mark the polarity of the existing speaker wires before disconnecting battery. NOTE: Remove the two transport screws from the top of the unit before installing. NOTE: Make sure there is enough space for the installation of this single-din in-dash.
-
Page 7: Wiring Connections
WIRING DIAGRAM Parking (green) Reverse(purple-white) STEERING 1(BROWN) STEERING 2A(WHITE) STEERING 2B(GREY) BACK CAM VIDEO OUT SUB OUT AUX VIDEO AUX IN Radio AUX IN Antenna RCA OUT RCA OUT RCA OUT RCA OUT Connector A Connector B 1. Rear right speaker(+)/Purple 1. - Page 8 WIRING DIAGRAM General Wiring Notes: Make sure You have a good chassis ground. Good ground connection will eliminate most electrical noise problems. A good chassis ground requires a tight connection to the .vehicle’s metal chassis. The area around the ground connection should be clean, bare metal without rust, paint, plastic, dust, or dirt for a good ground connection.
-
Page 9: Basic Operation
Basic Operation 1. Turning the unit on/off Press the POWER button to turn the unit on. Press and hold the POWER button again to turn off. 2. Sliding out the monitor Press the TILT button so that the monitor will slide out automatically and the main GUI display will show up. Press the TILT button again so that the screen will go back in the chassis. - Page 10 Basic Operation Press SEL Button until the display shows “FAD”, then use the VOL +/- Button to adjust the balance between the front & rear speakers. F. Other Audio Settings You can adjust other audio settings like preset equalizer, loudness or subwoofer ON/OFF by tapping the “EQ” icon on the main menu, or on the control menu of other audio/video play modes.
-
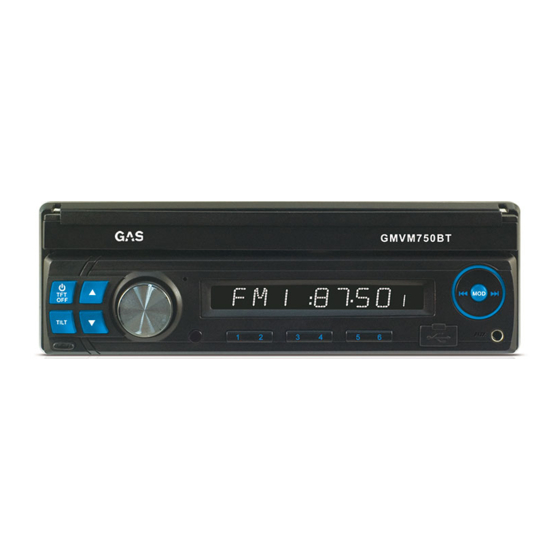
Page 11: Radio Operation
Radio Operation 1. Choose Radio Band Touch the BAND button onscreen to choose among the five radio bands - three FM Bands (FM1, FM2, and FM3) and two AM Bands (AM1, and AM2). Each of the five bands can store up to six preset stations, for a total of 30 preset memory stations. 2. -
Page 12: Tv Operation (Optional)
TV Operation (Optional) SCAN Tap SCAN to seek all strong and clear frequency stations available and store them. Press << or >> to seek one station. SAVED STATIONS When you reach the desired TV stations, the stations will be automatically saved for you to recall later. SELECT SAVED STATIONS Tap the <... -
Page 13: Bluetooth Operation (Optional)
Bluetooth Operation (Optional) PAIRING At BT mode, search bluetooth device by the phone and “BT CAR STEREO” will appear in your phone. Input “0000” as password to establish connection. DIAL PAD Touch the dial pad to dial the number you would like to call. Touch the CALL (green) button to send the number. CALL RECORD Press the HISTORY button to enter the phone book page to view received, missed and dialed calls. -
Page 14: Usb/Sd Operation
USB/SD Operation Plug the USB/SD card into the USB/SD port. The unit will play the contents automatically. 1. Advance/Go Back Advance to the next track or go back to the previous track by pressing the forward or rewind buttons on the front panel or touch screen. -
Page 15: Steering Wheel Control
Steering Wheel Control Refer to the wiring diagram for connection. The brown wire (Steering 1) must be connected, then the white or grey (Steering 2A and 2B) will be connected depending on the total number of the wire from the steering wheel remote control of your vehicle. TAB STEERING WHEEL LOGO in the OSD. -
Page 16: Other Operations
Other Operations 1. GPS Navigation (Optional) If GPS navigation is available with the system, Tap the GPS logo on the OSD to enter GPS navigation. Follow the on screen instruction to input destination and start navigation. The operation varies from software to software. 2. -
Page 17: Maintenance
Maintenance Cleaning the Unit Do not use any liquids to clean this unit. Do not use petroleum distillates to clean this unit. Use a clean, dry cloth to clean this unit. Replacing the Fuse Make sure the amperage matches the specified value when replacing the fuse(s). If the fuse is bad, check the power connection and replace the fuse with a new one. -
Page 18: Infra Red Remote Control (Optional)
Infra Red Remote Control (Optional) 1. Power On/off 13. Time Clock Display/Statistical Disc 2. Mode Switch Button Information Display Button 3. Stop Playback 14. VOL + 4. Navigation Up 15. Play/Pause Function 5. Navigation Left 16. Sound Select Button 6. Enter Button 17. -
Page 19: Simple Troubleshooting Guide
Simple Troubleshooting Guide PROBLEM CAUSE / SOLUTION No Power Check whether the fuse is blown, replace with fuse of proper value if necessary. Unit stops responding or shows error Press the RESET button. in display Unable to receive radio stations Check whether the antenna is inserted or the antenna is properly connected;... -
Page 20: Specifications
Specifications GENERAL Operating Power............................12 Volts DC, Negative Ground Output Wiring..........................Designed for using four speakers only RCA line out..............................low-level outputs - 1000MV Output Impedance..........................Compatible 4 to 8 Ohm Speakers Fuses.........................................10 amp Dimensions............................178mm(W) x 170mm(D) x 58mm (H) Weight........................................2.0 Kg TFT/SYSTEM Resolution..................................800RGB(H) X 480(V) Brightness/Contrast.................................300cd/m /600 Viewing angle......................................70...
Need help?
Do you have a question about the GMVM750BT and is the answer not in the manual?
Questions and answers