Advertisement
Available languages
Available languages
Quick Links
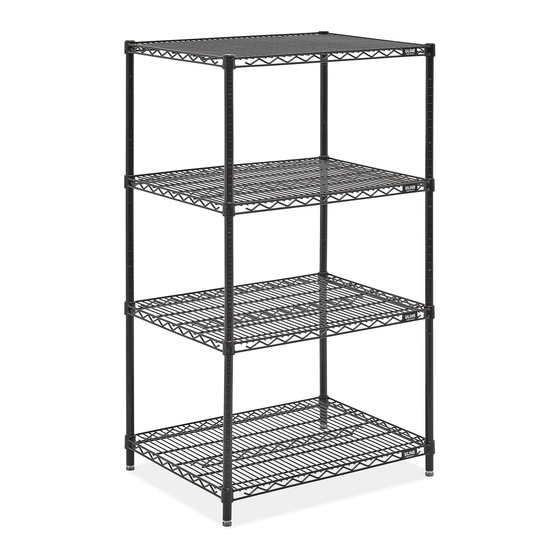
BLACK WIRE
SHELVING
Post x 4
NOTE: For Two-Shelf Black Wire Shelving Units, there will be 2 shelves and 8 sets of shelf supports.
INSTALLATION OF SELF-LEVELERS AND OPTIONAL CASTERS
Figure 1
Figure 2
Figure 3
PAGE 1 OF 6
1-800-295-5510
uline.com
Shelf x 4
TO INSTALL SELF-LEVELERS
NOTE: If installing casters, do not install self-levelers.
1.
Make sure post is positioned as shown. (See Figure 1)
2. Insert self-leveler into open end of post.
3. Use a rubber mallet/hammer or tap on ground until self-leveler slides
into post.
4. Repeat steps 2 and 3 for other posts.
TO INSTALL OPTIONAL CASTERS
1.
Make sure post is positioned as shown. (See Figure 2)
2. Engage the wheel brakes to keep casters from rolling during assembly.
Use a rubber mallet to tap caster stems into posts. (See Figure 2)
INSTRUCTIONS FOR UNIT ASSEMBLY
1.
Start with the lowest shelf. Snap the interlocking pieces of a
Shelf
shelf support (wide end down) around the post at the lowest
Support
groove where shelf is to be located. Slide the support up or
down until it snaps onto the groove. Add a shelf support to
the same place on the remaining posts. (See Figure 3)
NOTE: NSF requires food service applications to keep the
lowest shelf at least 6" above the floor.
PARTS
Shelf Support x 16 Sets
Para en Español, vea páginas 3-4.
Pour le français, consulter les pages 5-6.
Self-Leveler x 4
0221 IH-1748
Advertisement

Related Manuals for U-Line BLACK WIRE SHELVING


Summary of Contents for U-Line BLACK WIRE SHELVING
- Page 1 Post x 4 Shelf x 4 Self-Leveler x 4 NOTE: For Two-Shelf Black Wire Shelving Units, there will be 2 shelves and 8 sets of shelf supports. INSTALLATION OF SELF-LEVELERS AND OPTIONAL CASTERS TO INSTALL SELF-LEVELERS NOTE: If installing casters, do not install self-levelers.
- Page 2 INSTRUCTIONS FOR UNIT ASSEMBLY (CONTINUED) 2. Slide post through underside of shelf until shelf slides firmly over supports. (See Figure 4) Figure 4 3. Stand unit upright. Gently tap shelf down to secure it. (See Figure 5) Figure 5 4. Determine the height of the next shelf, snap on supports then add and secure shelf.
- Page 3 800-295-5510 uline.mx ESTANTERÍA DE ALAMBRE NEGRO PARTES Soporte de Repisa x Set de 16 Poste x 4 Repisa x 4 Autonivelador x 4 NOTA: Para unidades de Estantería de Alambre de dos repisas habrá 2 repisas y 8 sets de soportes de repisa. INSTALACIÓN DE AUTONIVELADORES Y RUEDAS OPCIONALES PARA INSTALAR AUTONIVELADORES NOTA: Si se instalarán ruedas, no instale autoniveladores.
- Page 4 INSTRUCCIONES PARA ENSAMBLE DE UNIDAD (CONTINUACIÓN) 2. Deslice el poste a través de la parte inferior de la repisa hasta que la repisa se deslice firmemente por encima de los soportes. (Vea Diagrama 4) Diagrama 4 3. Pare la unidad. Presione ligeramente la repisa hacia abajo para asegurarla.
- Page 5 1-800-295-5510 uline.ca RAYONNAGE MÉTALLIQUE NOIR PIÈCES Ensemble de support de Montant x 4 Tablette x 4 Dispositif tablette x 16 d'autonivellement x 4 REMARQUE : 2 tablettes et 8 ensembles de supports de tablette seront disponibles pour les rayonnages métalliques noirs de deux tablettes. INSTALLATION DES DISPOSITIFS D' A UTONIVELLEMENT ET DES ROULETTES EN OPTION POUR INSTALLER LES DISPOSITIFS D'AUTONIVELLEMENT REMARQUE : Si vous installez des roulettes, n'installez pas de...
- Page 6 INSTRUCTION DE MONTAGE DE L'UNITÉ (SUITE) 2. Insérez le montant par le dessous de la tablette jusqu'à ce que la tablette glisse fermement sur les supports. (Voir Figure 4) Figure 4 3. Placez l'unité à la verticale. Tapotez délicatement la tablette vers le bas pour le fixer.